Devo is a cloud-based multi-tenant centralized log management solution designed for today’s massive scale and performance requirements. It is just one of the many analytics solutions that Cribl Stream can easily route data to. This blog will cover integrating Devo as a Destination for Stream data using Palo Alto Networks Firewall events as an example.
Configuring Devo to Receive Data via HTTP
To send data to Devo via HTTP, we will need to generate a token.
To create a token in Devo, go to Administration → Credentials and select the Authentication Tokens tab.
Click on Create New Token, and give the token a name that describes the unique source. Next, enter the destination Target table(s) for the events. This is the tag or tags that will be used by Devo to classify the events. You can use wildcards to send the data to multiple tables.
In my example, I will be sending Palo Alto Networks firewall events to Devo. So I will set the table to
firewall.paloalto.traffic.

Configure Stream Webhook Destination
Using the token created in the previous step, we will configure a Stream Webhook Destination.
In Stream, click on Destinations and select the Webhook Destination.
Give your Destination a name.
Set the URL.
The URL to send the HTTP request uses the following format:<endpoint>/<mode>/<domain>/token!<token>/<host>/<tag>?<message>
Here are the URL’s components:
<endpoint> – We will be using the URL for the U.S. region endpoint. The URL should look something like this:

<mode> – We are going to be sending multiple events, so we will use stream.<domain>–- This is the Devo domain we are sending events to.<token> – The token we created in the previous step.<tag> – The Devo tag to apply to the events. In this case, I am sending Palo Alto Traffic data, so I will be setting the tag to firewall.paloalto.traffic. (About Devo tags)
Then set the Method to POST and click Save.
Set Up a Route with the Webhook as a Destination
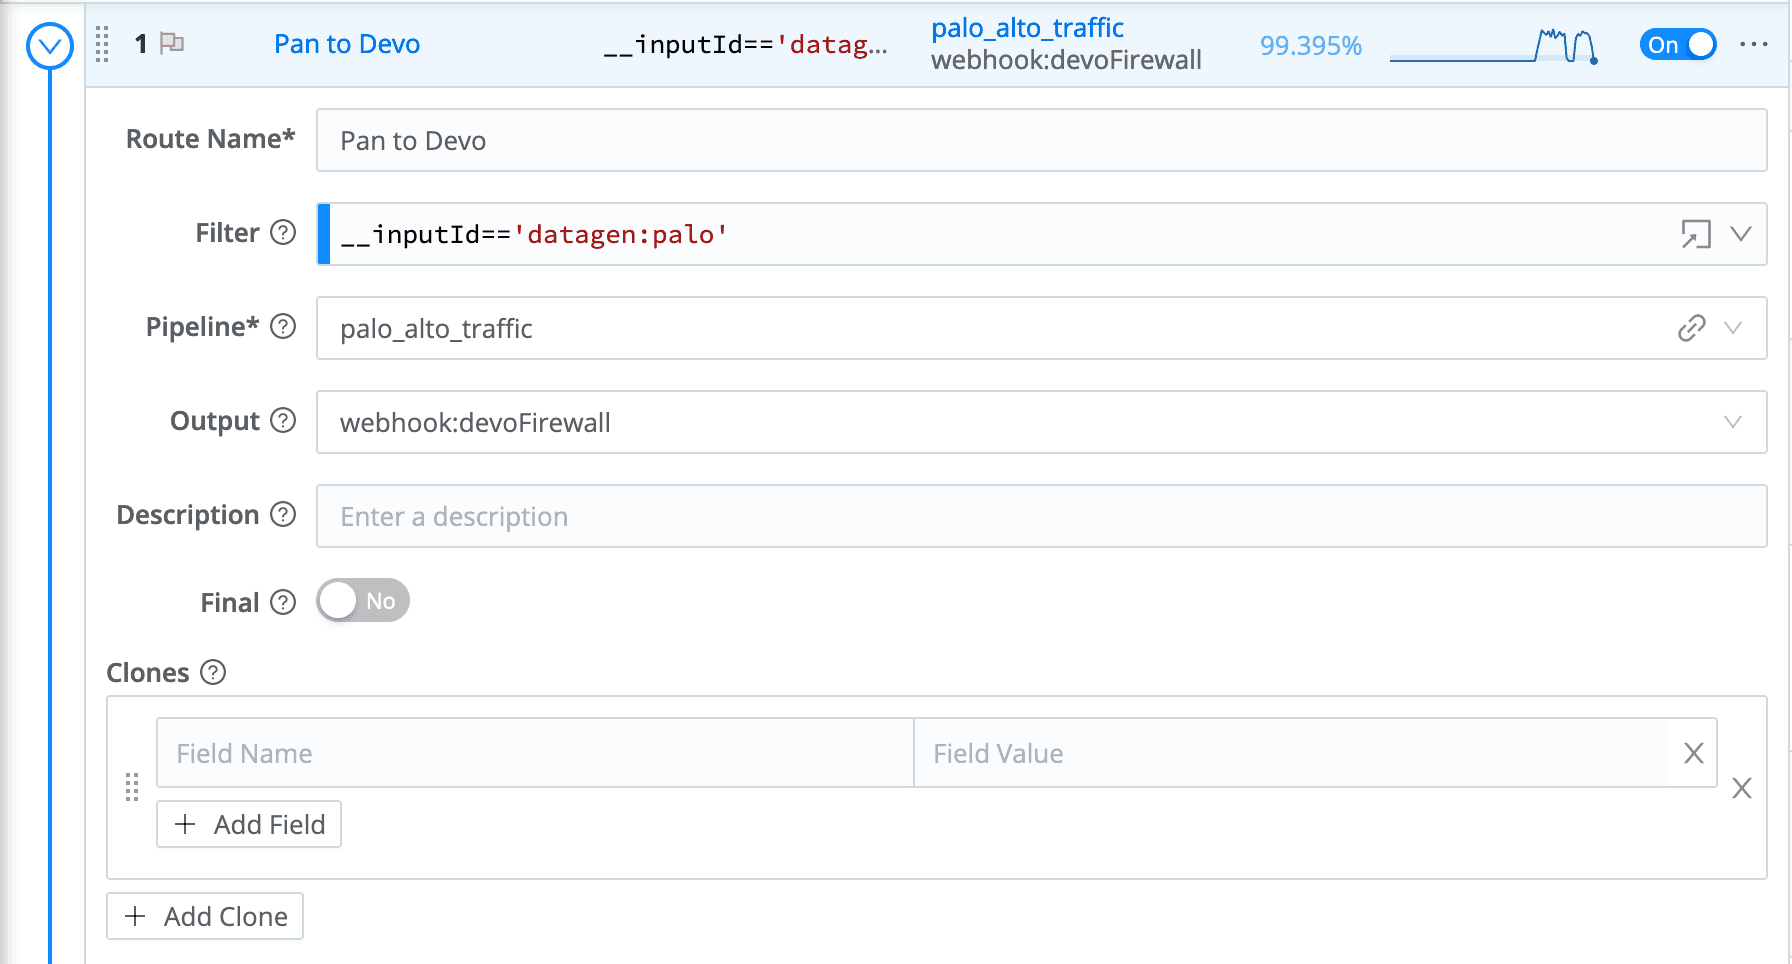
Now that we have configured the Webhook Destination for Devo, let’s set up a Route within Stream to send some data to that Destination.
In this example, I will be sending some firewall logs that I have previously configured as a source in Stream. I am also going to use the Palo_Alto_traffic Pipeline that comes out of the box with Stream.
Go to Routes and click + Add a route.
Set the Pipeline to
palo_alto_traffic.Set Output to the Webhook Destination we just created for Devo.

Once saved, you should start to see events flow.
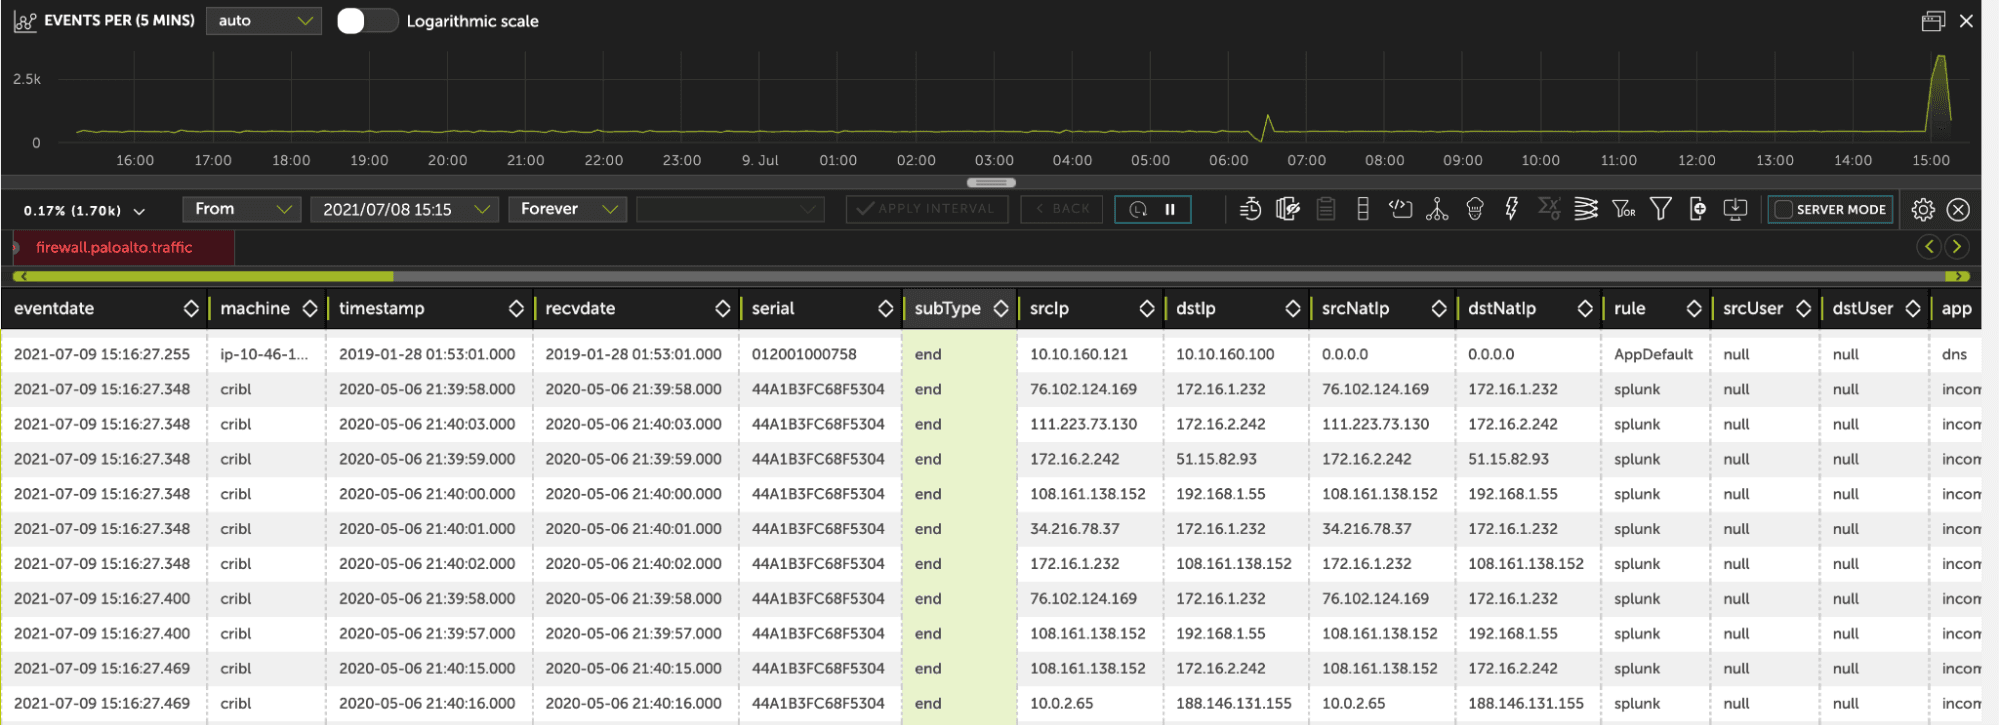
View Events in Devo
Now that we have configured Stream to send events to Devo, we can search for them using the same tag we used when sending the data firewall: paloalto.traffic.
Go to Data Search and use the Finder to select firewall → paloalto → traffic.

The fastest way to get started with Cribl Stream is to sign-up at Cribl.Cloud. You can process up to 1 TB of throughput per day at no cost. Sign-up and start using Stream within a few minutes.


