
Microsoft Defender offers everyone comprehensive threat prevention, detection, and response capabilities—from individuals looking to protect their families to the world’s largest enterprises. Microsoft Defender allows IT and Security teams to prevent, detect, and respond to attacks across devices, identities, apps, email, data, workloads, and clouds.
Have you ever wondered if you can use Cribl Stream to help manage your Microsoft Defender for Endpoint logs? The answer is Yes (plus benefits)!
Here are the key benefits of using Cribl Stream with your Defender logs:
Cribl Stream can unroll grouped records into individual events and reformat Defender data as required for destinations.
Cribl Stream provides the ability to reduce Defender data in an easy-to-manage UI.
Cribl Stream workers can be placed in your Azure environment to help reduce egress costs and bandwidth.
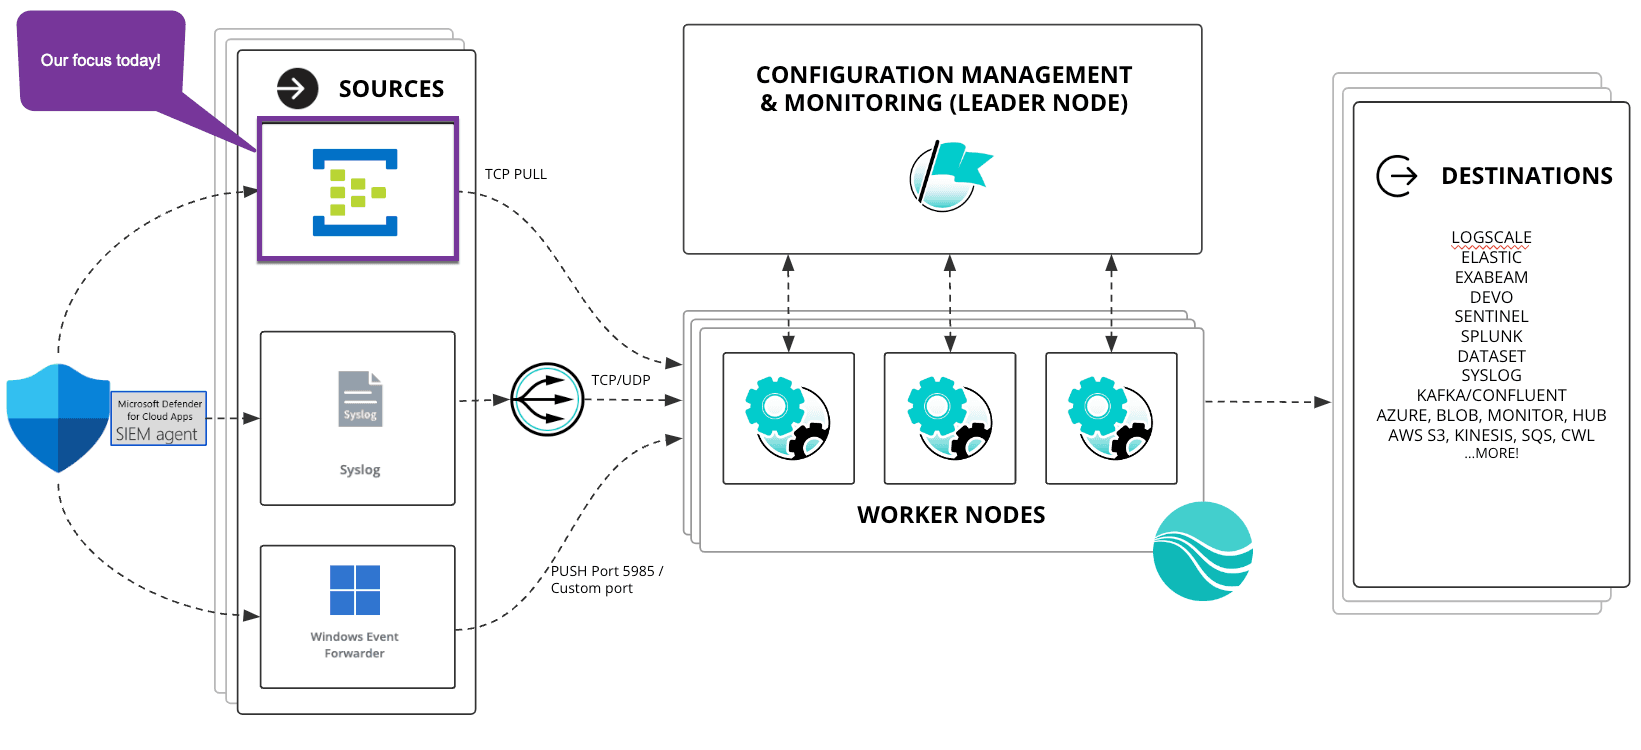
Cribl customers are using three main methods to ingest Defender logs into Cribl Stream:
Event Hubs (most common)
Windows Event Forwarding
Syslog via the Microsoft SIEM Agent.
This article focuses on the most common use case of forwarding Defender events to an Event Hub and using Cribl to get the events into a format that can be used by a downstream SIEM for alerting and reporting.
The Problem
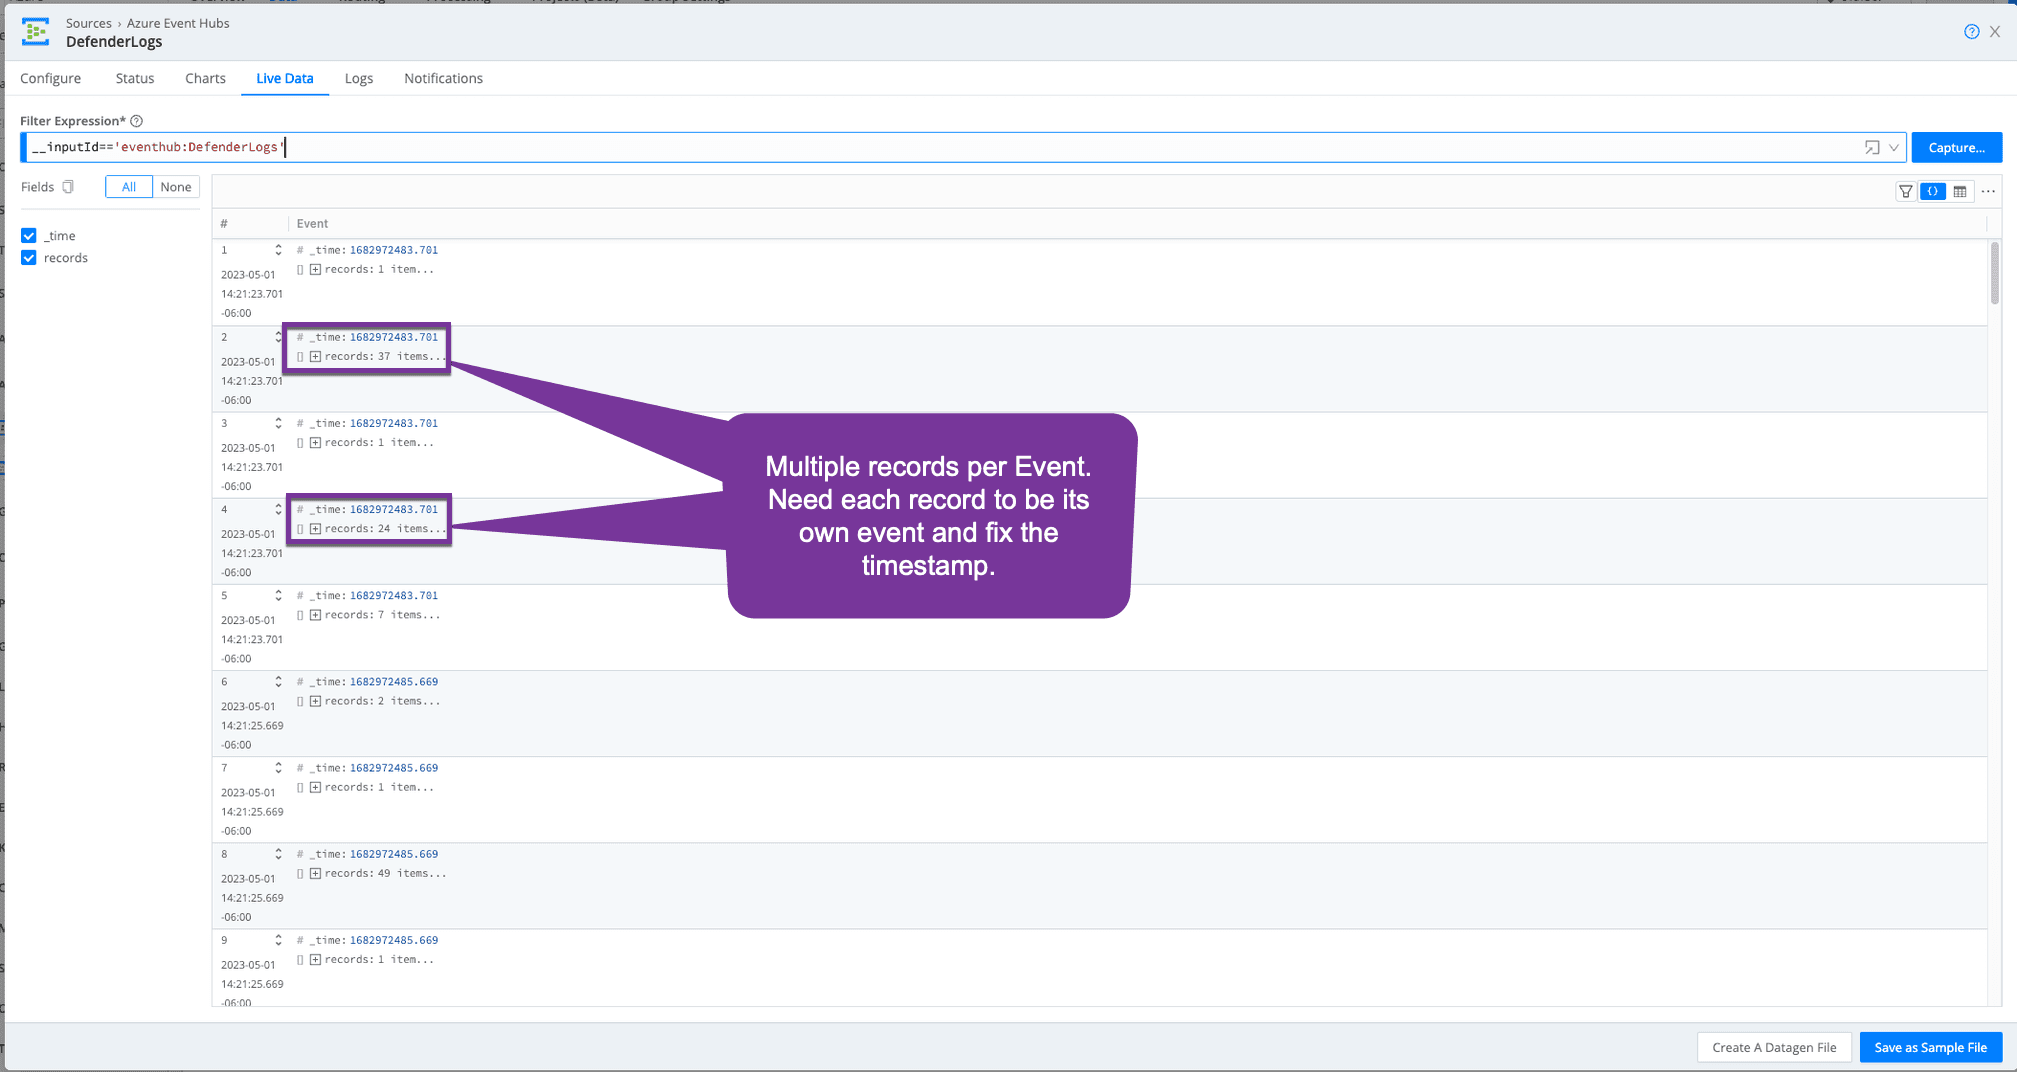
Defender logs are massive! There is also no easy button for getting Defender logs out of Microsoft and forwarded to your SIEM. Most connectors will utilize Event Hub. For details on setting up forwarding to Event Hubs, see this article. When streaming Defender events to Event Hub, multiple events will be grouped into records and sent as a single event with an inaccurate timestamp for the group of records.
The Solution
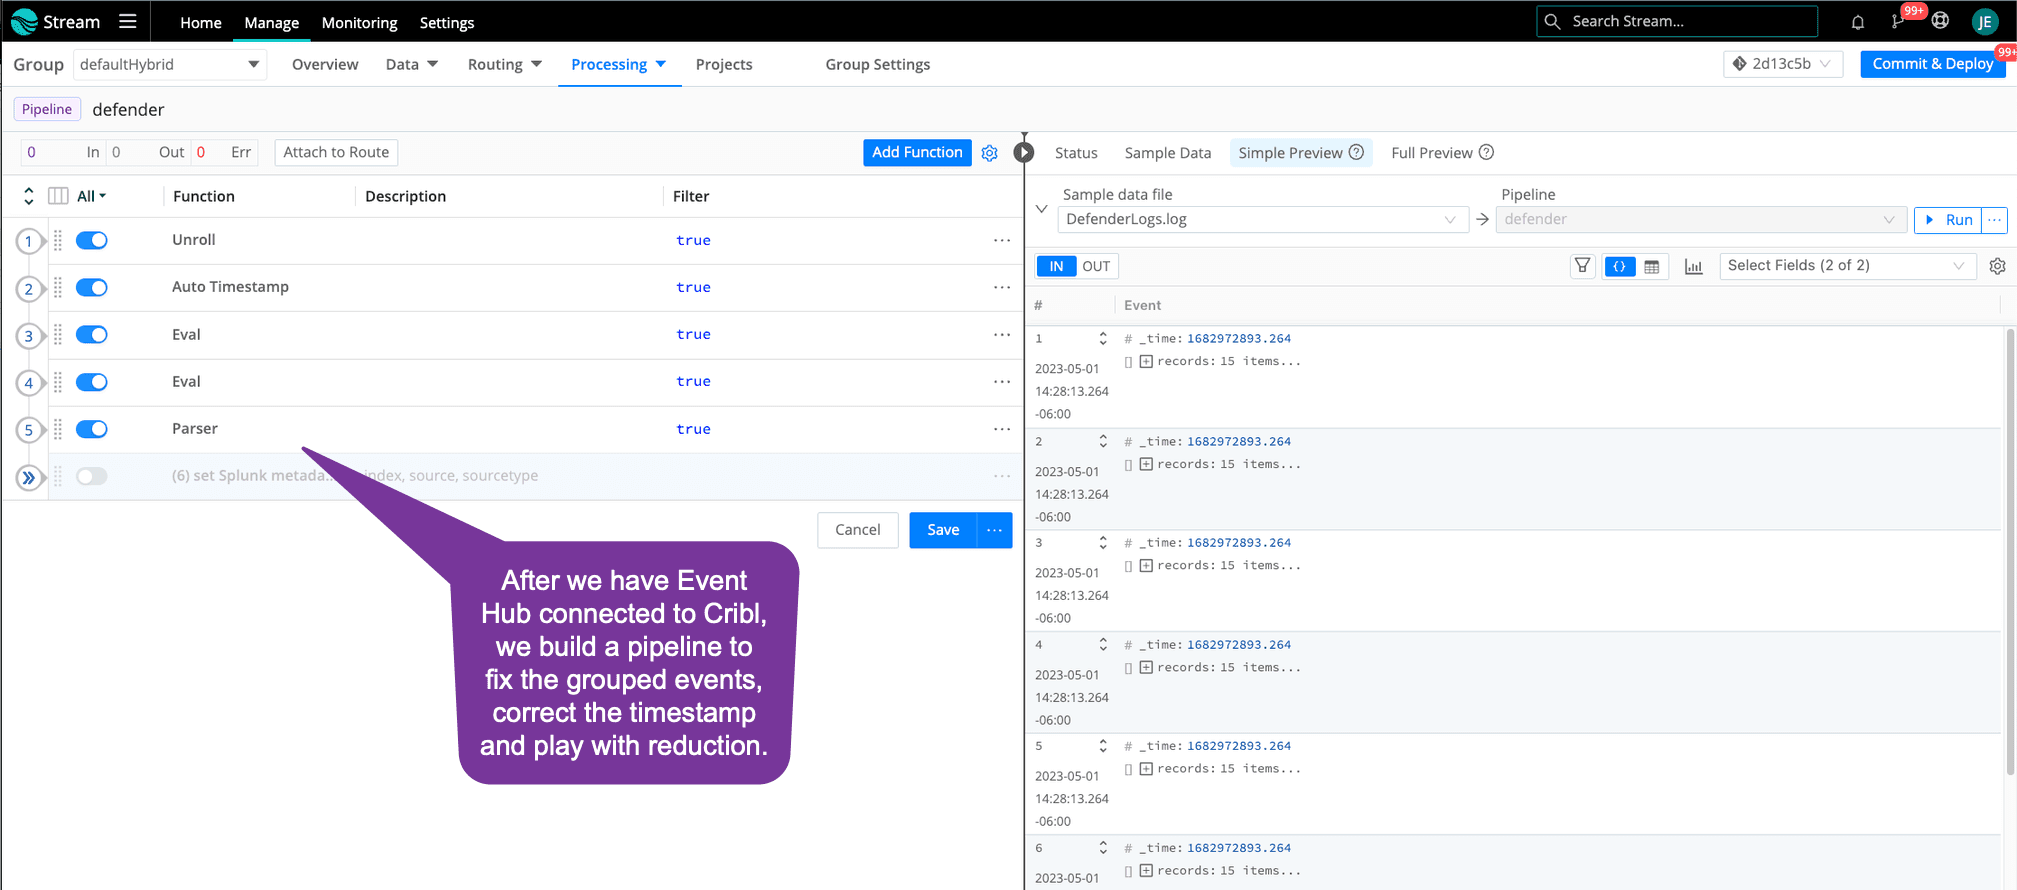
Use Cribl Stream to pull records from Event Hub, unroll the records into individual events, and add the correct timestamp for each event. After Defender events are in this open format, you can continue to remove null values and reformat them into what is needed for your downstream security analytics tool. Let’s take a look at the pipeline for this.
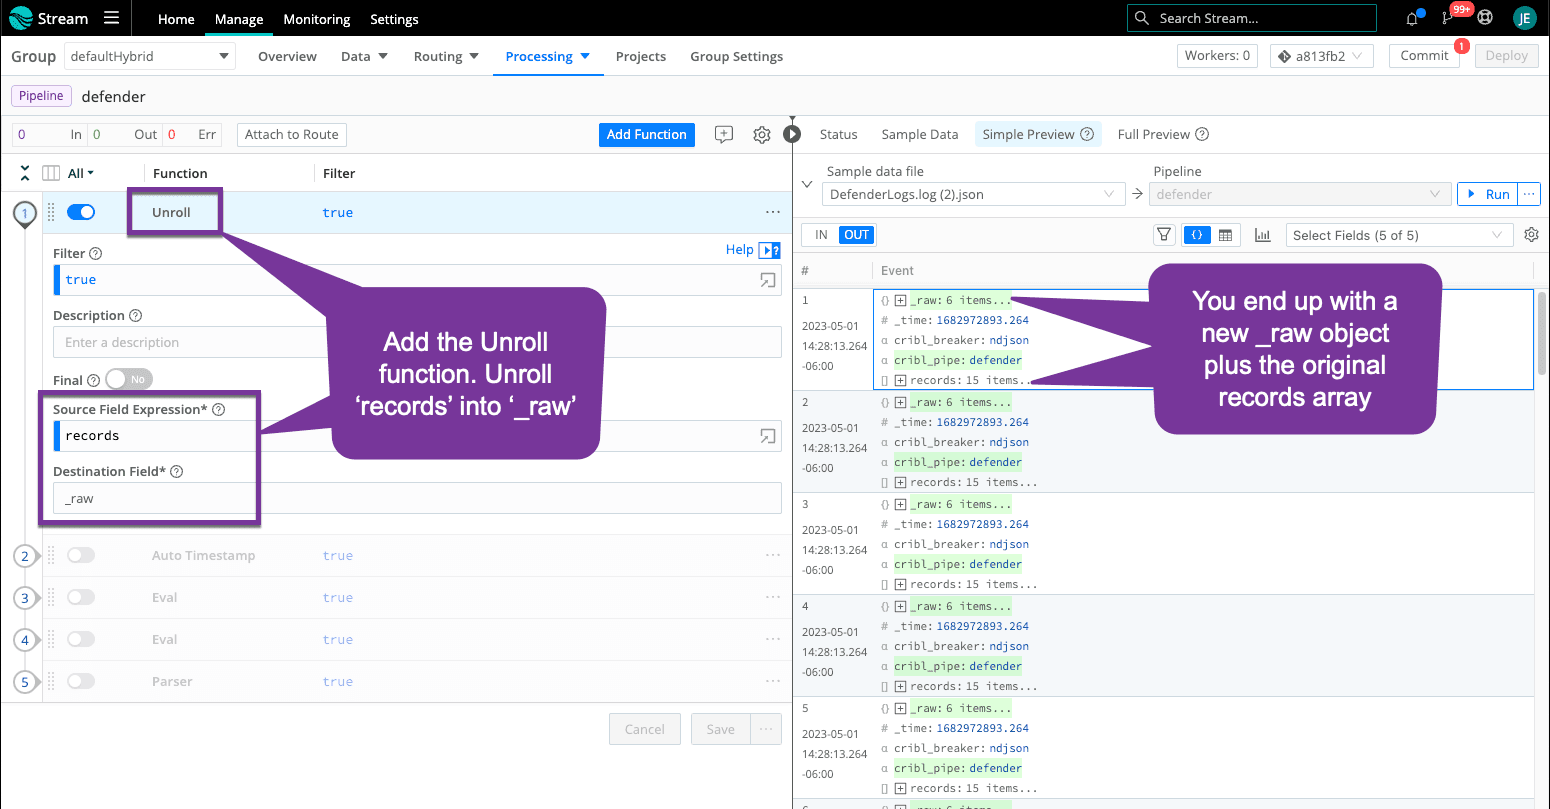
Step 1: Unroll into Individual Events
The first thing we must do is Unroll each record into its own event. Note that your number of events increases because each record has its own event. The records array is still in each event, and we will clean that up later.
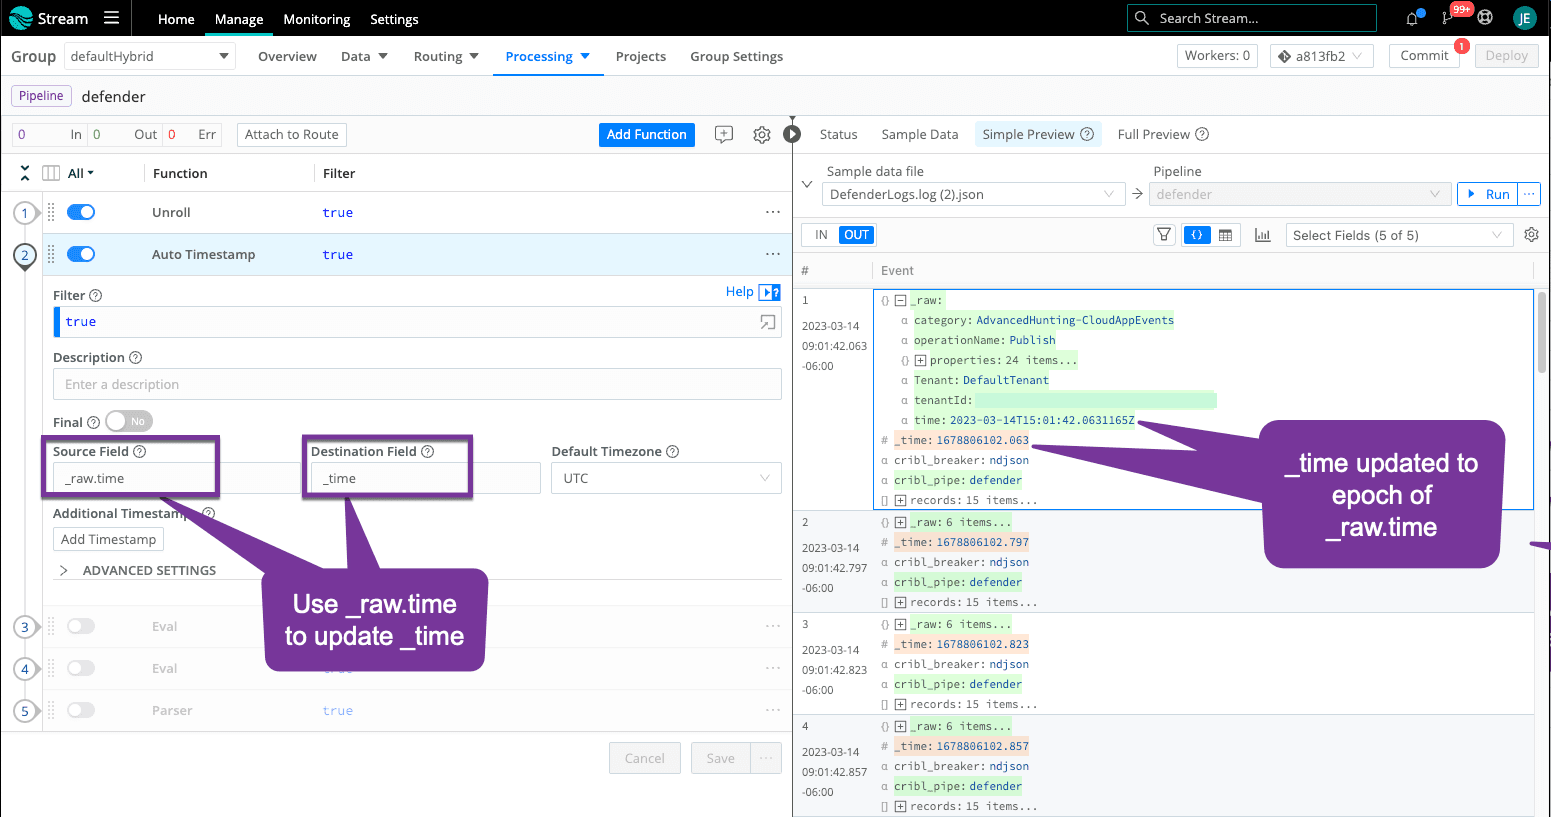
Step 2: Fix Timestamp
Each record has its own ‘time’ field. Now that we have each record as its own event, we must update ‘_time’ to match ‘time’.
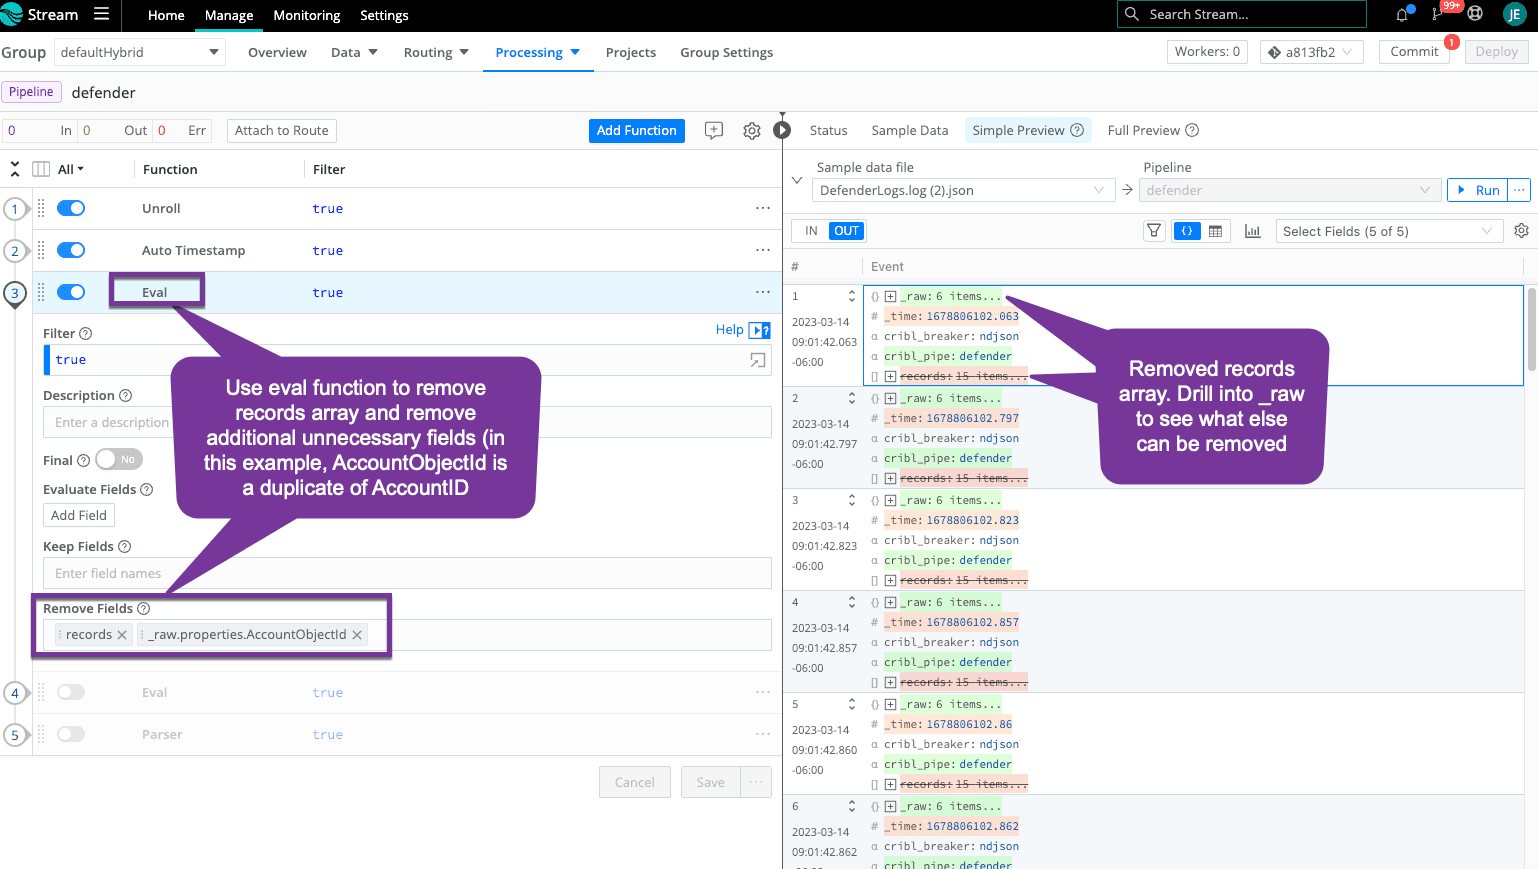
Step 3: Remove Records and Test Reduction
It’s time to start cleaning up the event and remove unnecessary fields, like that original records array. Continue to remove fields that are not needed by your destinations for alerting and reporting.
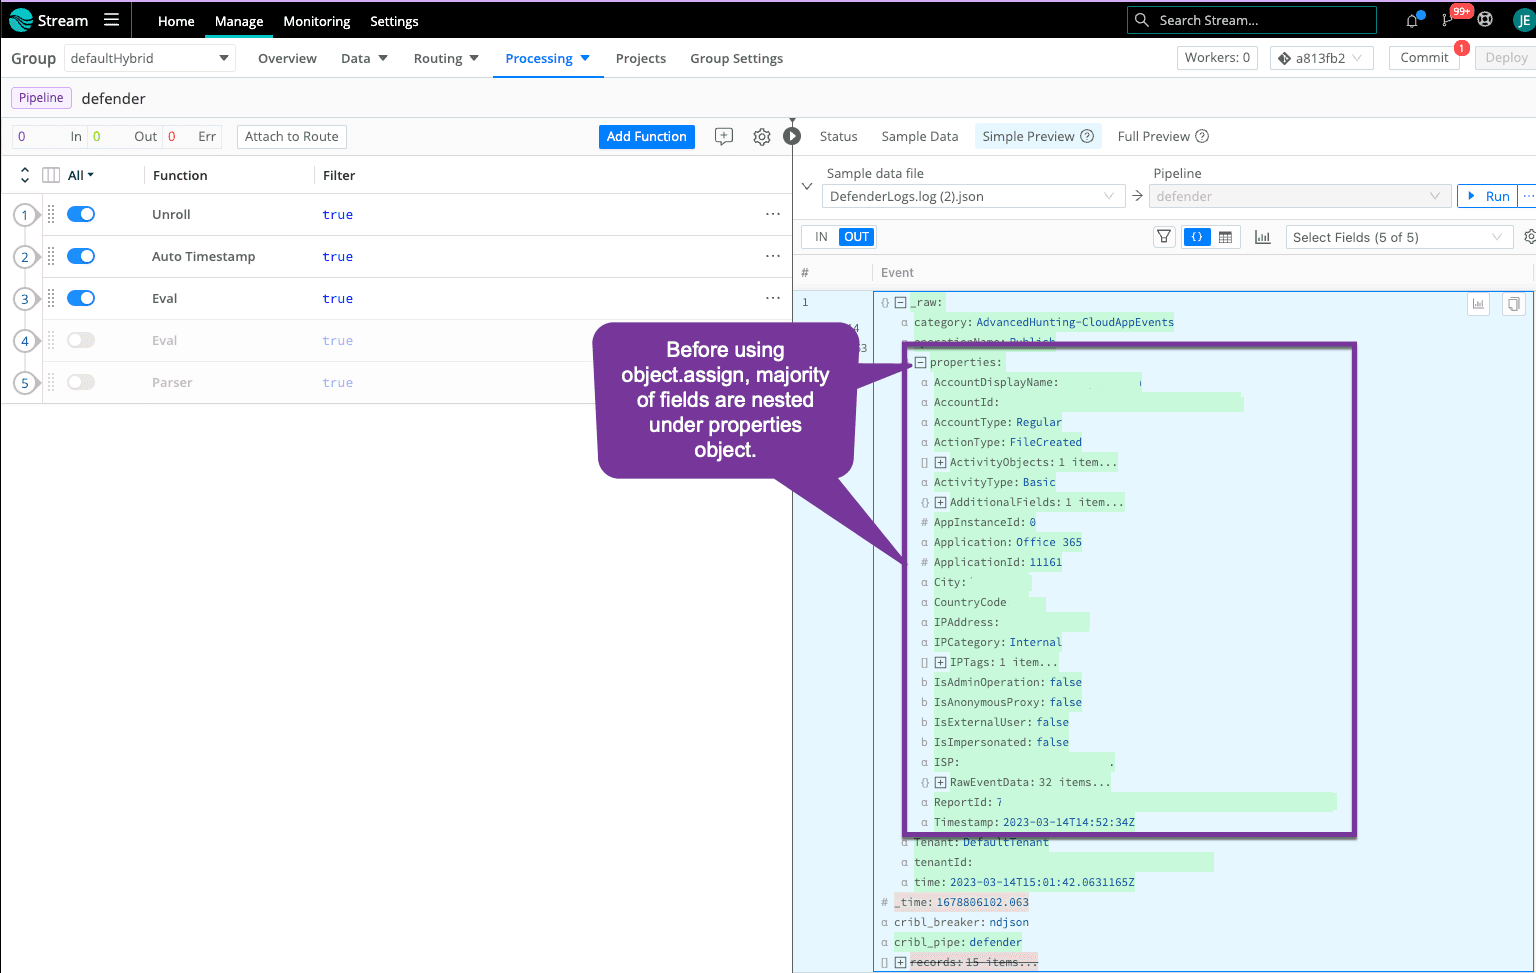
Step 4: Move Fields Up an Object (Optional)
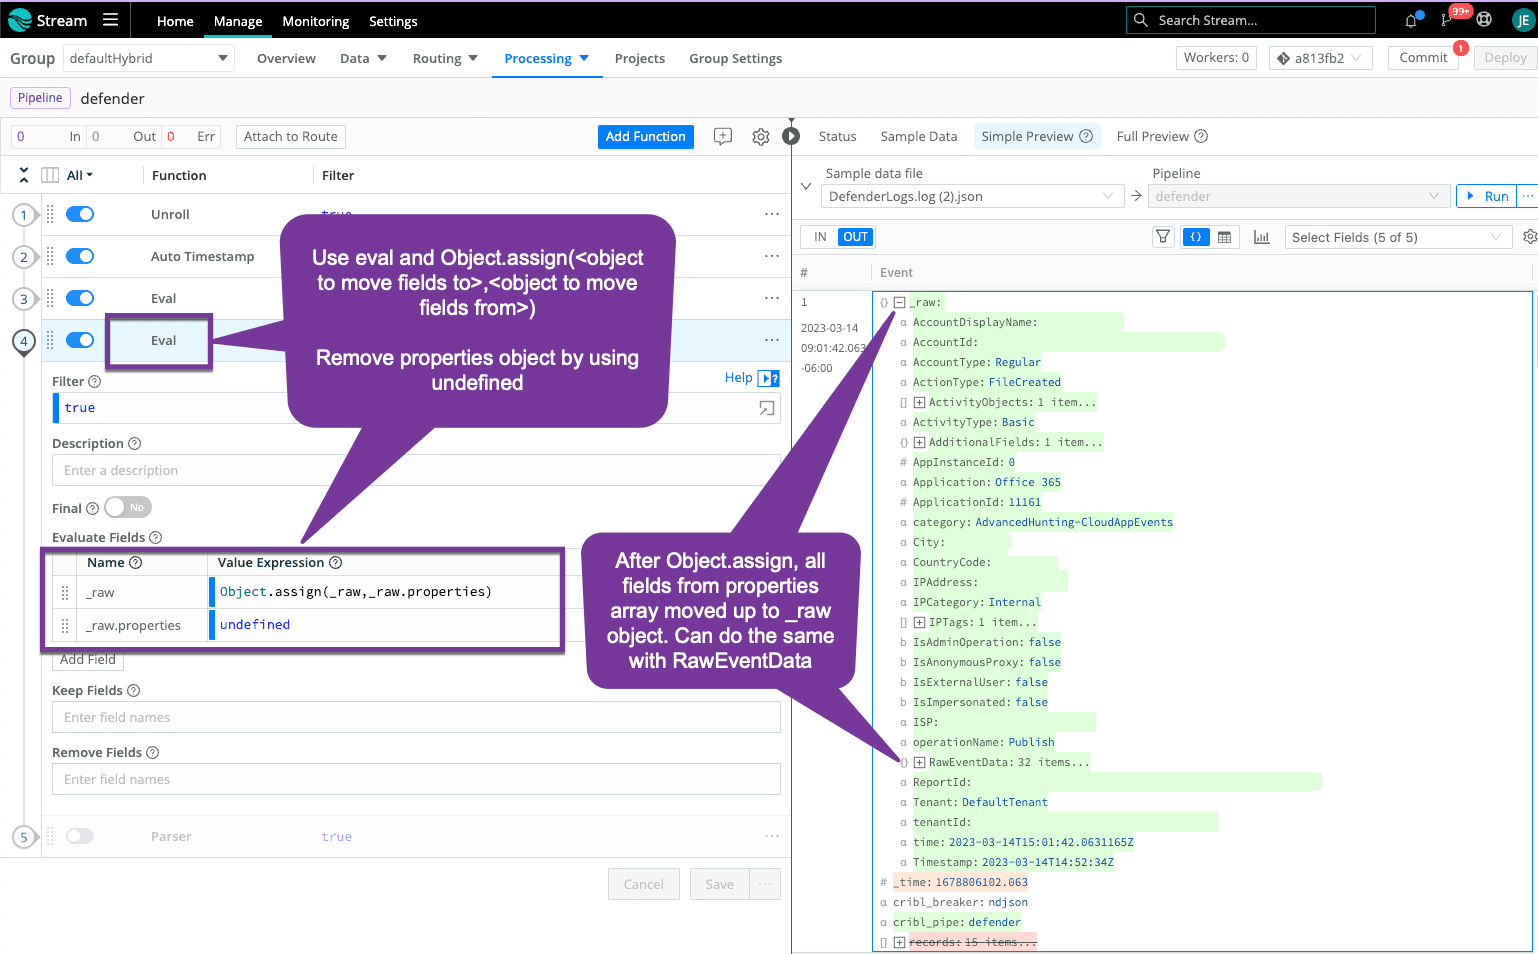
This is an optional step. All the good stuff is under the properties object, and, in some destinations, this shows up as 'properties.field' when you may not want your searches to include the additional object level. You can use Object.assign() in an eval function to move all the fields in the properties object up one level under _raw. You could do the same for RawEventData.
Before Object.assign():
After Object.assign():
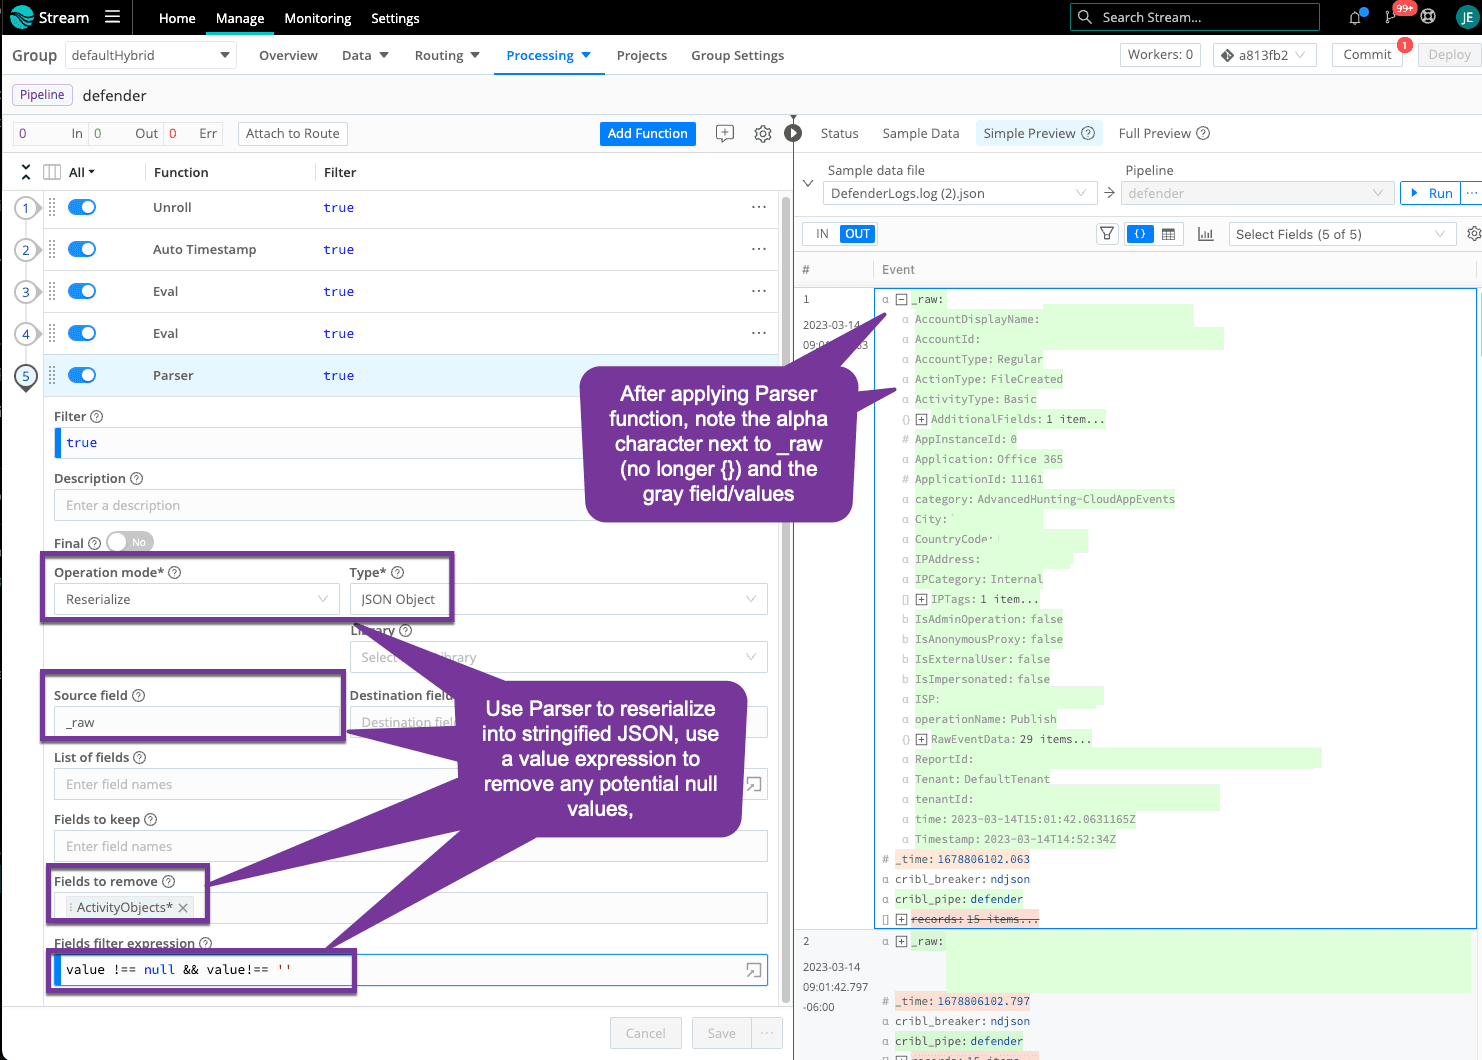
Step 5: Serialize to Stringified Raw (Optional)
Your sample dataset is all under _raw object, you can use the Parser function to send to your destination as stringified _raw or keep as a true JSON object. I included the typical filter expression for null values, just in case, but this sample did not have any null values. The Parser function allows another option for you to remove duplicates or additional fields (similar to what we did in Step 3). In this case, I noticed fields in the ActivityObjects object are all duplicates of top-level fields so I removed the full object using a wildcard.
That’s a wrap!
Your Microsoft Defender Endpoint logs are now in a format you can work with to remove unnecessary fields and drop low-value events.