For today’s IT and security professionals, threats come in many forms – from external actors attempting to breach your network defenses, to internal threats like rogue employees or insecure configurations. These threats, if left undetected, can lead to serious consequences such as data loss, system downtime, and reputational damage. However, detecting these threats can be challenging, due to the sheer volume and complexity of data generated by today’s IT systems.
This blog post will guide you through using Cribl Search to analyze failed SSH login attempts, a common sign of intrusion attempts. Let’s see how Search can help us distinguish malicious threats from milder vulnerabilities. If you missed part 1, be sure to check it out.
Imagine a situation where an organization has recently noticed an increase in the volume of failed login attempts across multiple Edge Nodes. This is suspicious, but it’s not clear whether it’s an organized attack or a random spike in activity. In this scenario, a SecOps engineer could use Cribl Search to sift through the vast amounts of log data generated by the organization’s systems, searching for patterns that could indicate a coordinated attempt to gain unauthorized access.
The Journey Begins
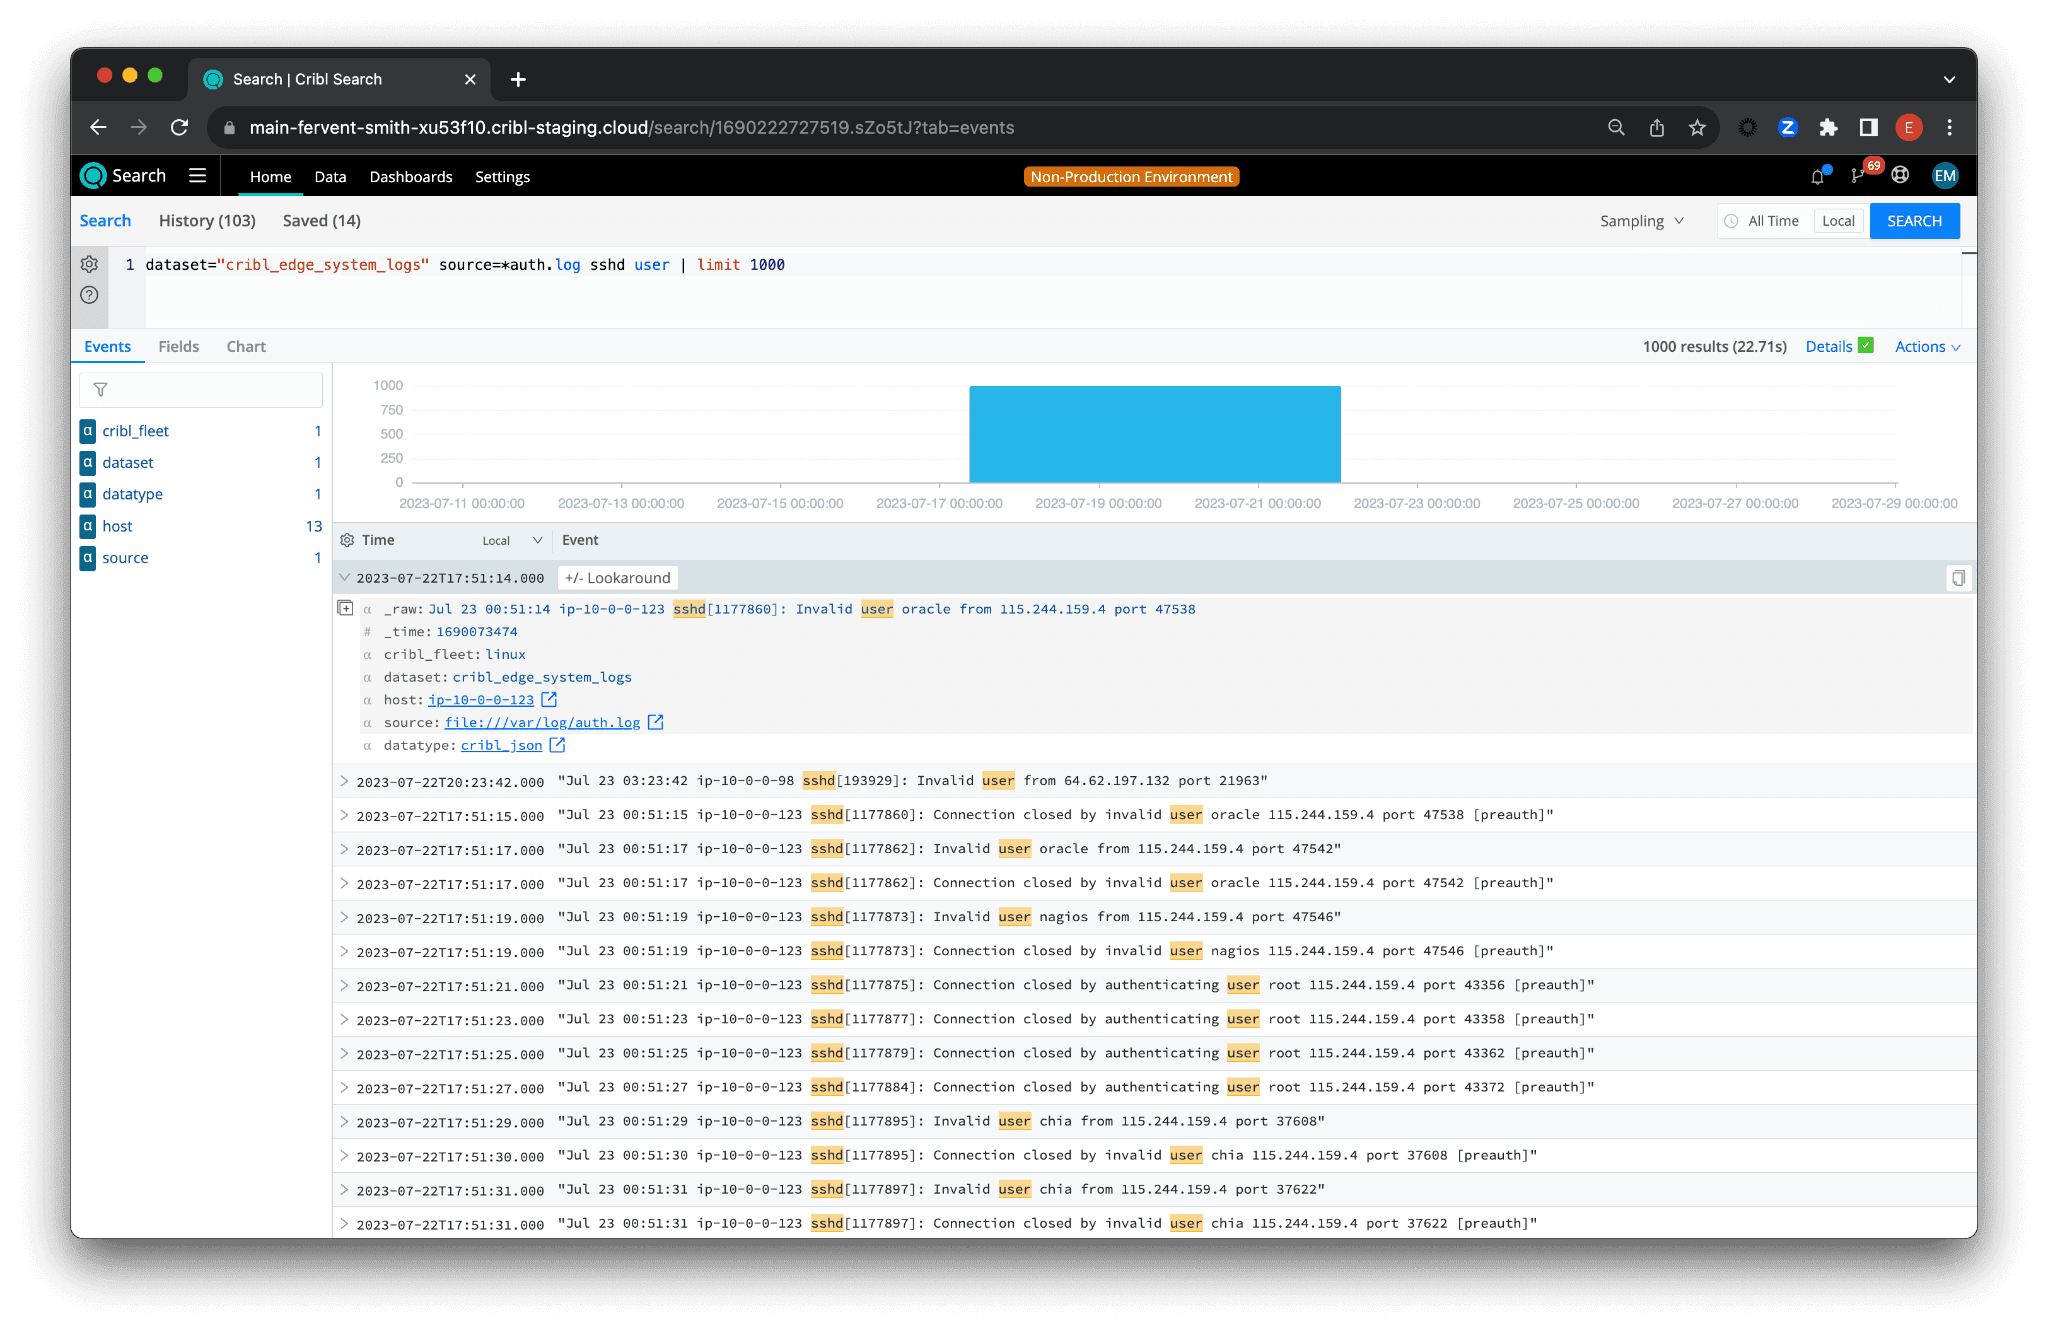
This first query provides us with an overview of our data:
dataset="cribl_edge_system_logs" source=*auth.log sshd user | limit 1000

In this initial step, we are fetching the first 100 logs from the cribl_edge_system_logs dataset where the source is any file matching auth.log. We are filtering these logs further to those that contain both sshd and user, which are keywords we expect to find in logs related to SSH login attempts.
Delving Deeper
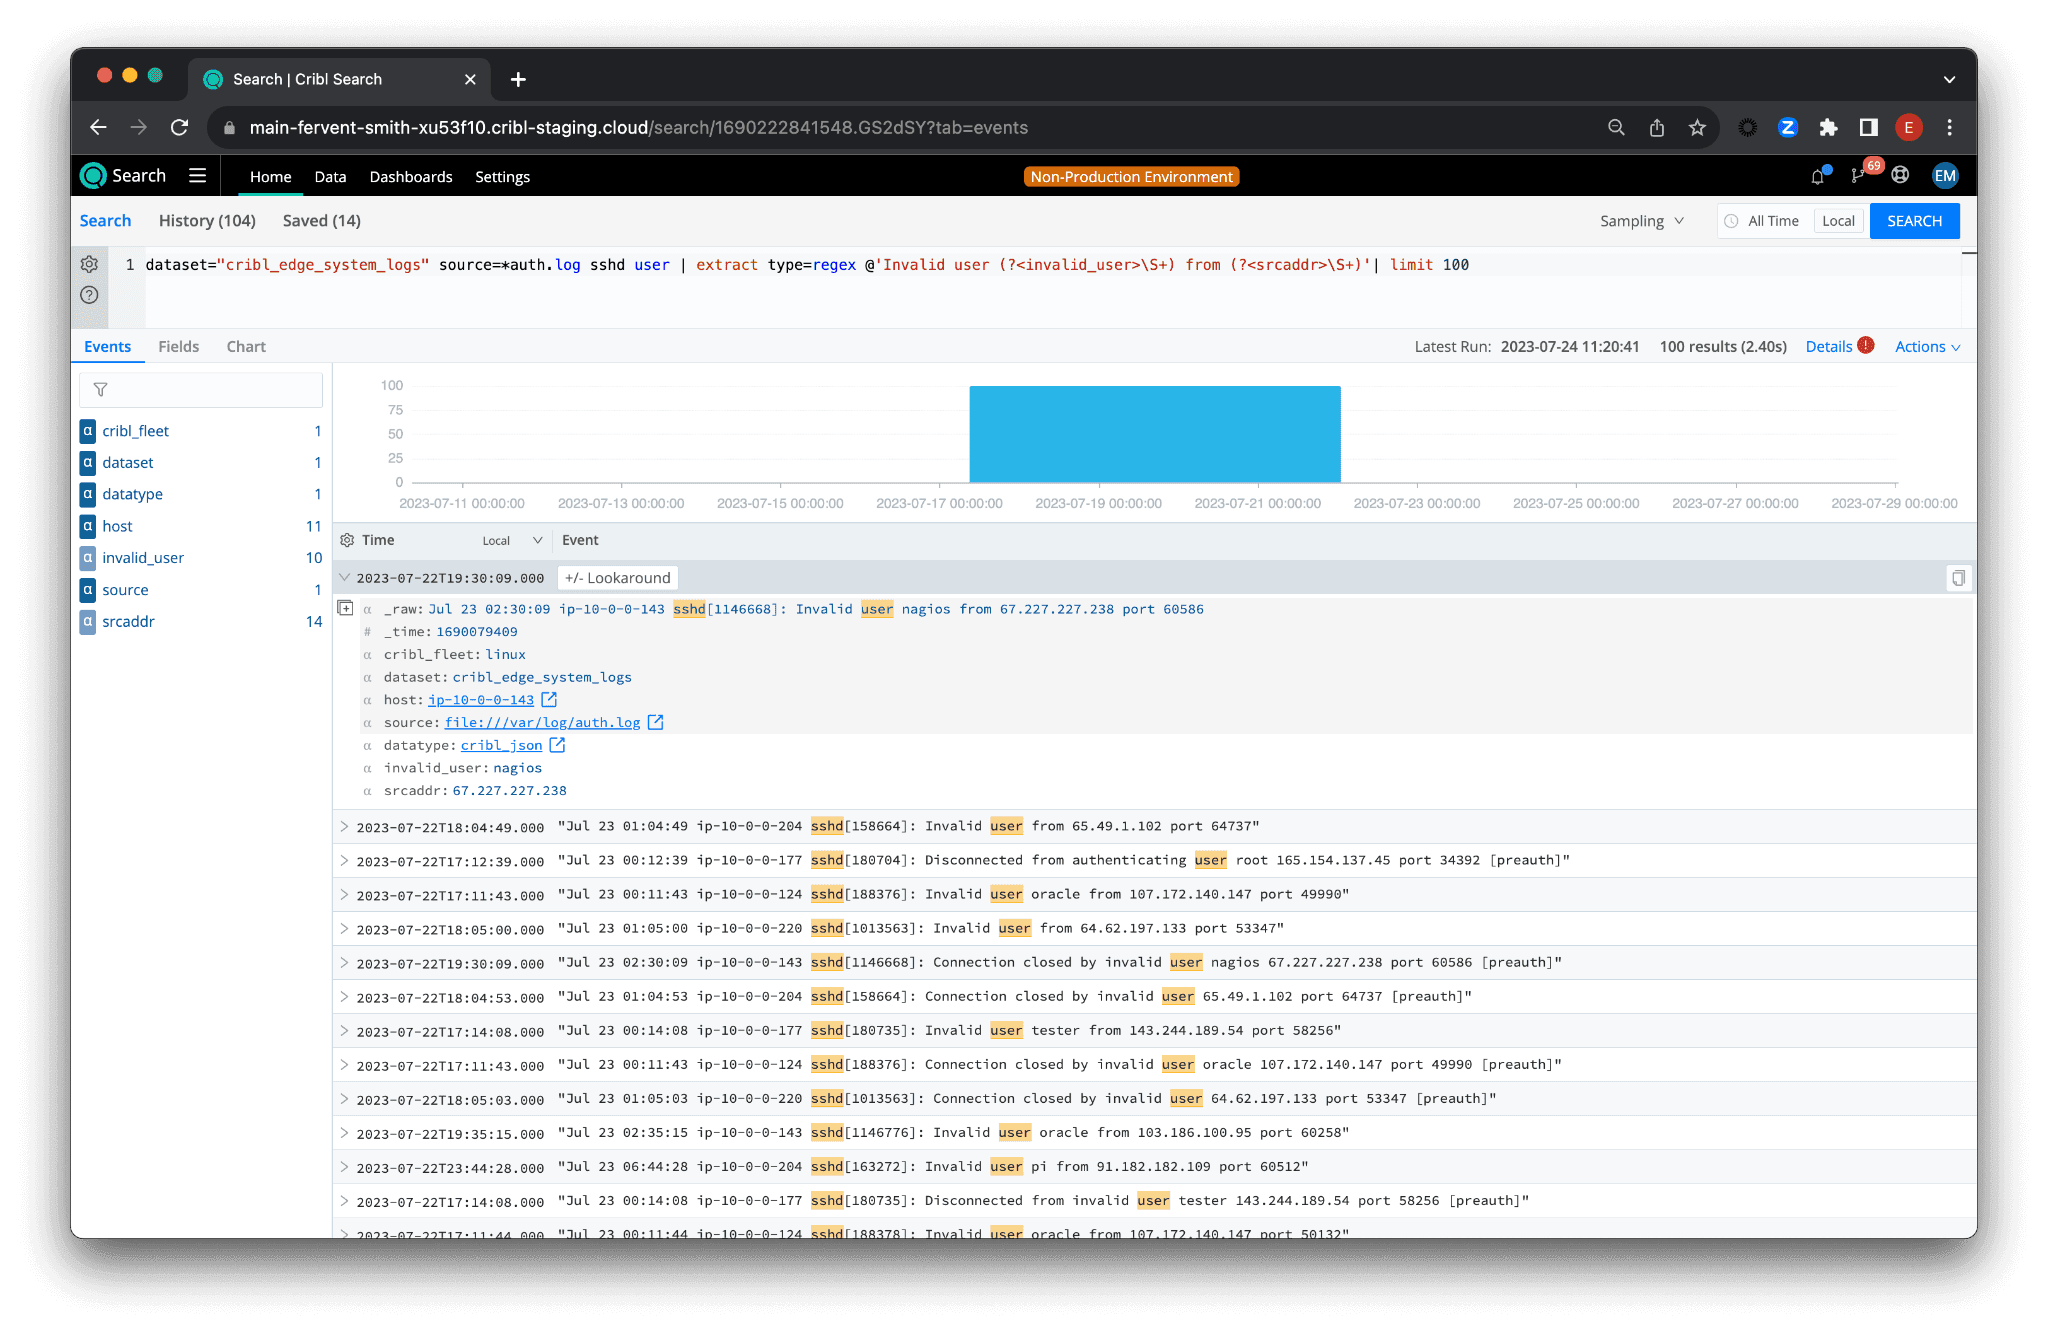
Next, we want to extract more specific information from the logs. We modify our query to:
dataset="cribl_edge_system_logs" source=*auth.log sshd user | extract type=regex @'Invalid user (?\S+) from (?\S+)'| limit 100
This query still fetches logs from the same dataset and source but reduces the initial limit. However, we add a regular expression to extract details about failed login attempts. Our regular expression looks for the pattern “Invalid user [user] from [source address]” in the log entries. It then captures the username and source IP into fields named invalid_user and srcaddr respectively. These fields are then available for further operations.
Refining and Summarizing
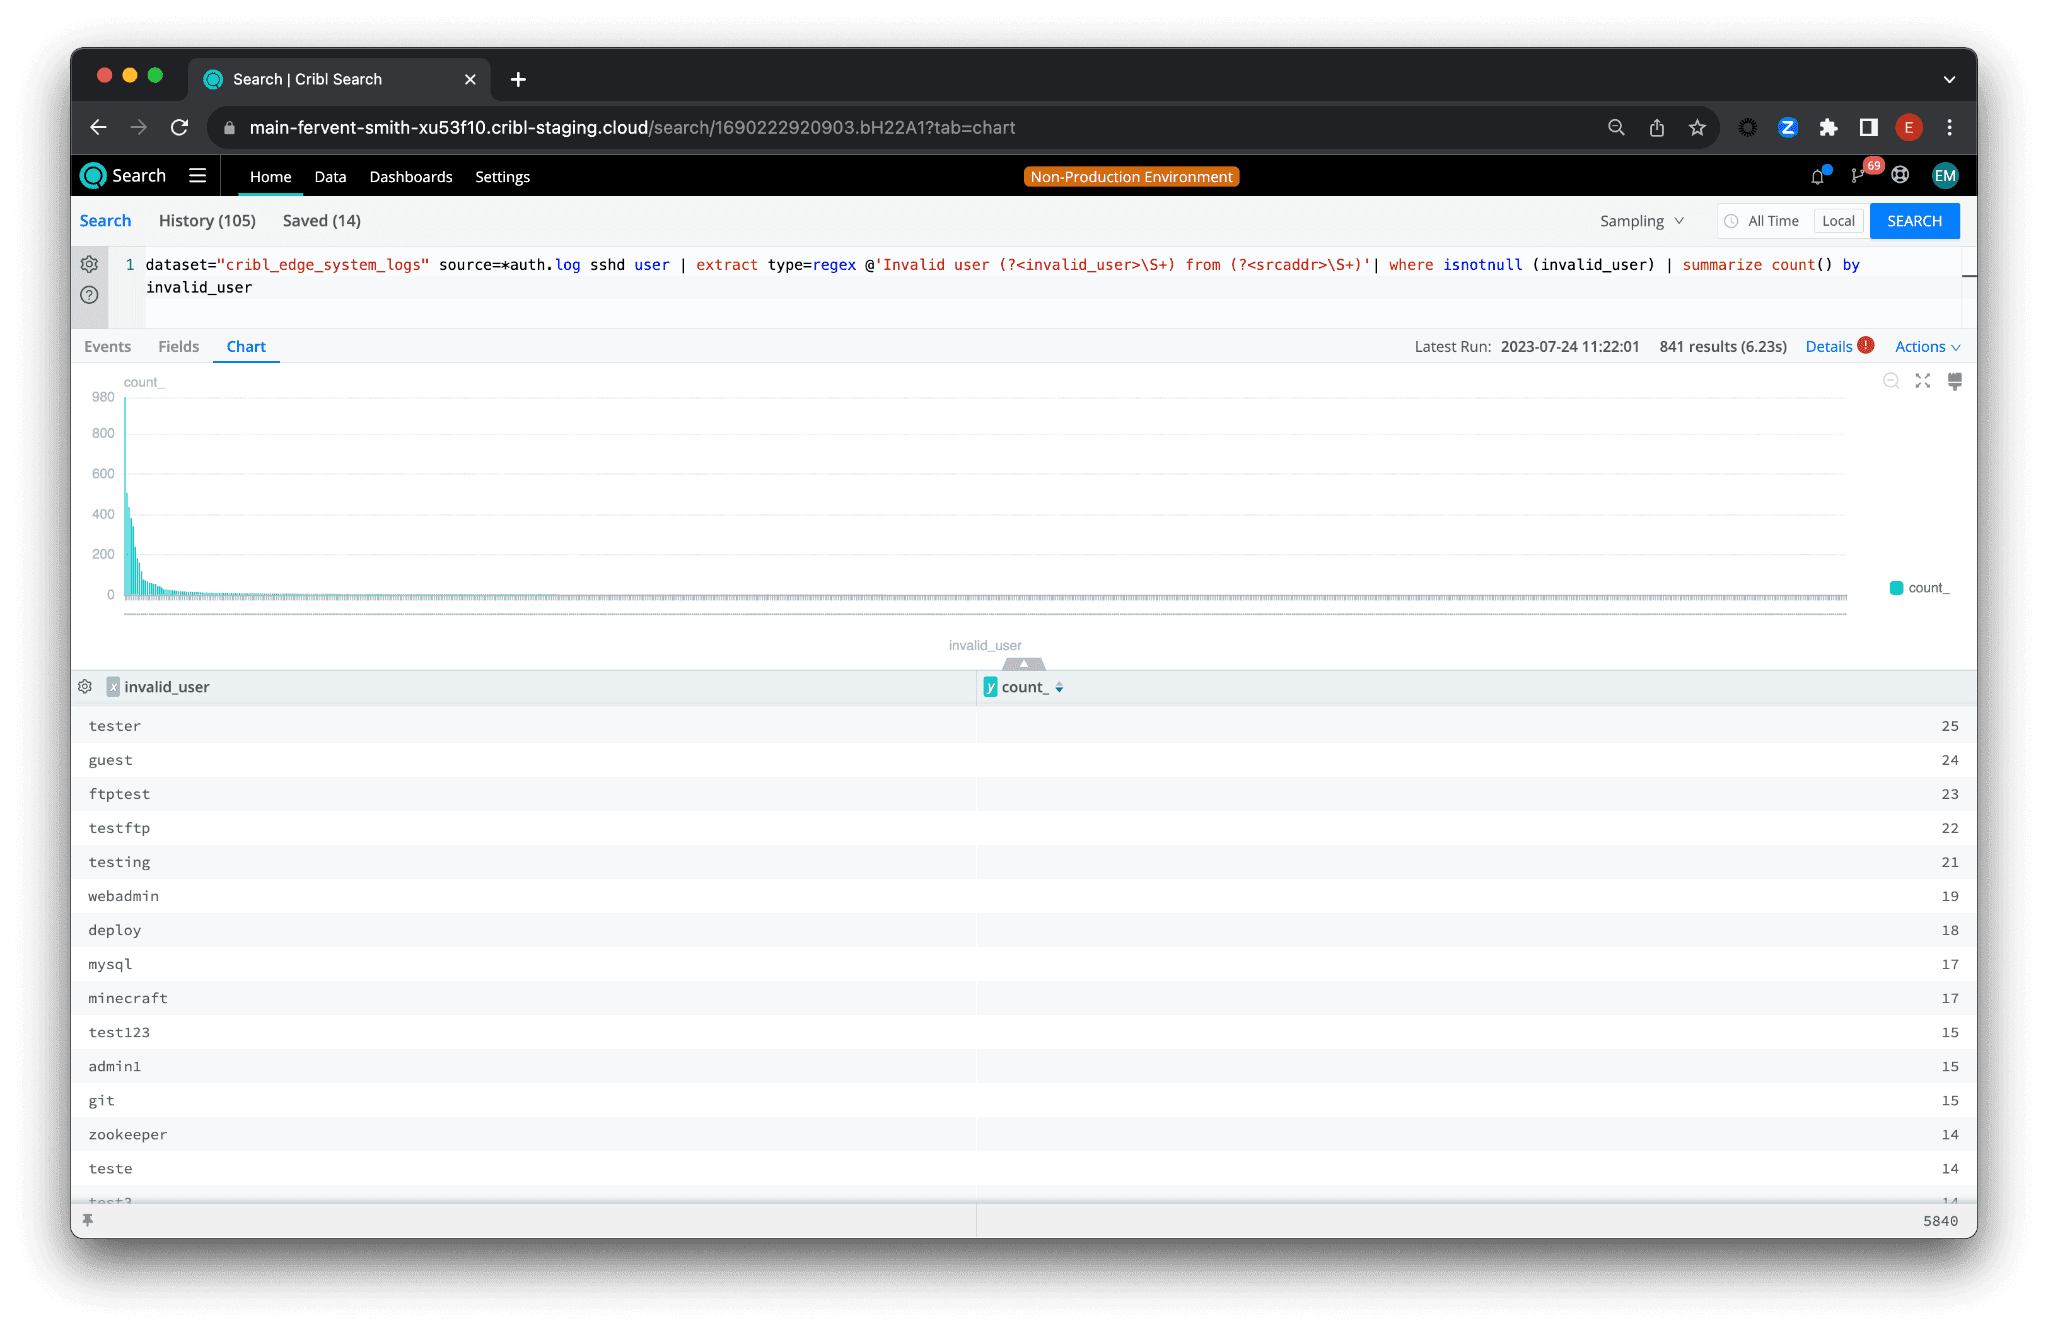
Finally, we remove the limit and null values, and summarize the data:
dataset="cribl_edge_system_logs" source=*auth.log sshd user | extract type=regex @'Invalid user (?\S+) from (?\S+)'| where isnotnull (invalid_user) | summarize count() by invalid_user

This final version of the query refines the data by removing any logs where invalid_user is null. In other words, we only want to consider logs where an actual invalid username was attempted, as opposed to an empty field. This helps remove potential noise from our results.
The last part of the query, summarize count() by invalid_user, counts the number of logs for each invalid user. This gives us a summary view of who our most active intruders are.
Scrolling down through the list, there are some gems like fastfart, dadmin, or simply satisfactory. Attackers never fail to entertain with their creativity.
Seeing the Forest for the Trees
With our comprehensive view of unauthorized login attempts and the IP addresses associated with these attempts (srcaddr), we now have powerful insights into possible threats facing our systems.
Creating a Proactive Defense with Lookup Tables
So, what next? Now that we have a list of suspicious IP addresses and usernames, we can put them into a lookup table. This simple, yet effective, technique allows us to compile a database of potential threats.
We can then create a scheduled search to periodically run and search against these IP addresses and usernames. If these nefarious actors dare to return, they’ll find themselves identified and their actions blocked. In our next blog post, we will dive deeper into this topic, guiding you on constructing this proactive defense system using Cribl Search’s lookup tables, scheduled searches, and notifications.
Honeypotting: Luring the Bad Guys
Here’s a quick hint for an additional layer of security: you can use a tactic called honeypotting. The principle is straightforward – set up traps for potential attackers in the form of vulnerable systems. This might sound counterintuitive, but it’s an incredibly effective way to preemptively identify potential threats.
How do you do this? Simply set up a few inexpensive EC2 instances with open ports and minimal information. The vulnerable appearance of these instances will attract attackers to scan your environment for weak points. While they are busy probing these dummy systems, their IP addresses will be logged, providing valuable information for your defense strategy.
Once these addresses are identified, you can add them to your lookup table and subsequently block them, leaving your would-be attackers hitting a brick wall. This continuous process of logging and blocking will substantially strengthen your cybersecurity defenses.
We hope this blog post has provided you with valuable insights on how to leverage Cribl Search for intrusion detection, and we look forward to diving deeper into these tactics in future posts.


