
Picture this! The coffee is hot, the keyboard is ready to rock, the bandwidth is unused, and the software is deployed (or the cloud is waiting patiently)…. but the data is missing! That’s right, most of us have been there. In our industry, it is very common for data to be the lowest common denominator for many projects. Whether you’re testing something new in your home lab, or you’re troubleshooting a new Cribl Pack in your dev environment before pushing to production, having data is pretty important.
Now, we have been in that situation more times than we can count, and since you probably already know one of our most important value is Customers First, Always, we build products to help customers first AND then everything else. So let’s talk about a very powerful feature that comes right out-of-the-box with Cribl Stream. That feature is a built-in data generator (Datagen) that can be useful for testing and/or troubleshooting.
Cribl Stream ships with several built-in datagen templates, but you’re also able to use your own data samples to create datagens. We’ll walk through both below or you can watch the included video.
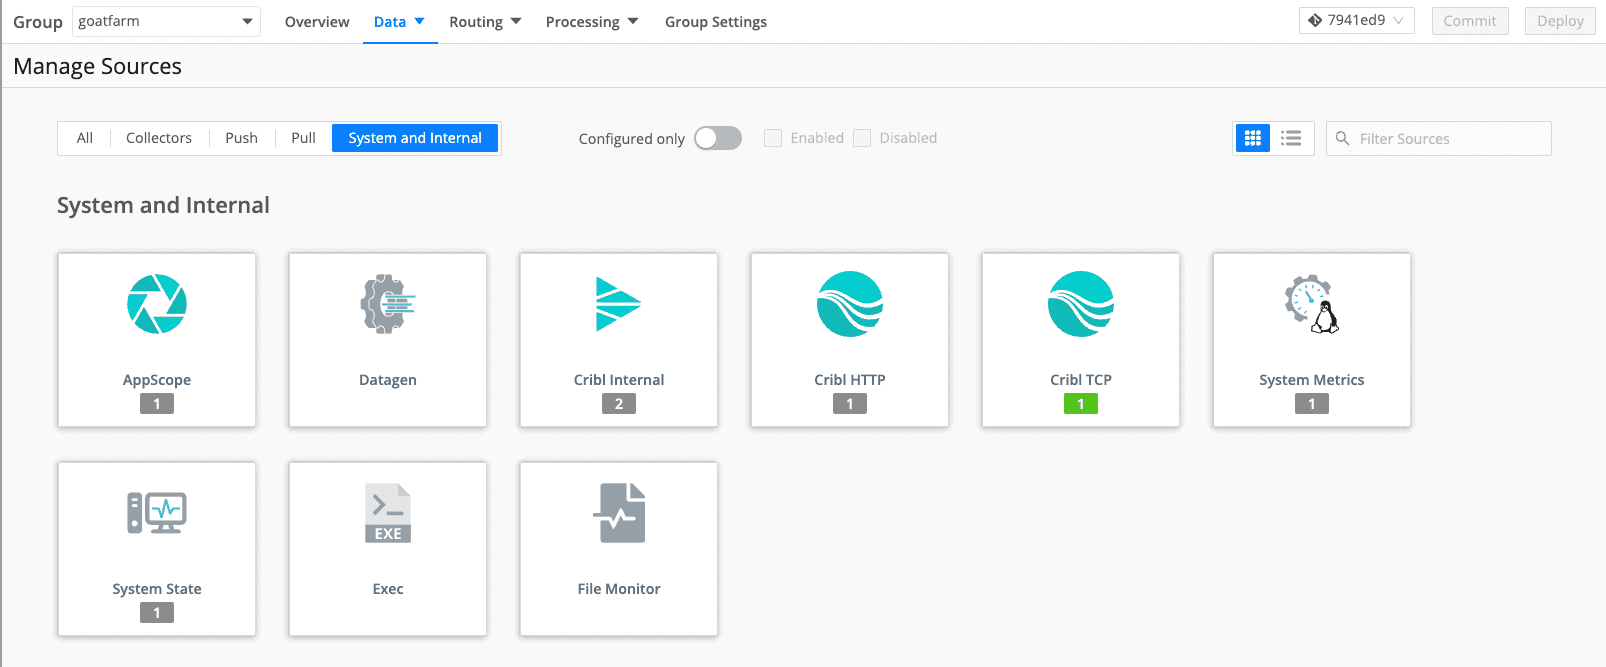
First, navigate to Data/Sources, and filter on “System and Internal”.
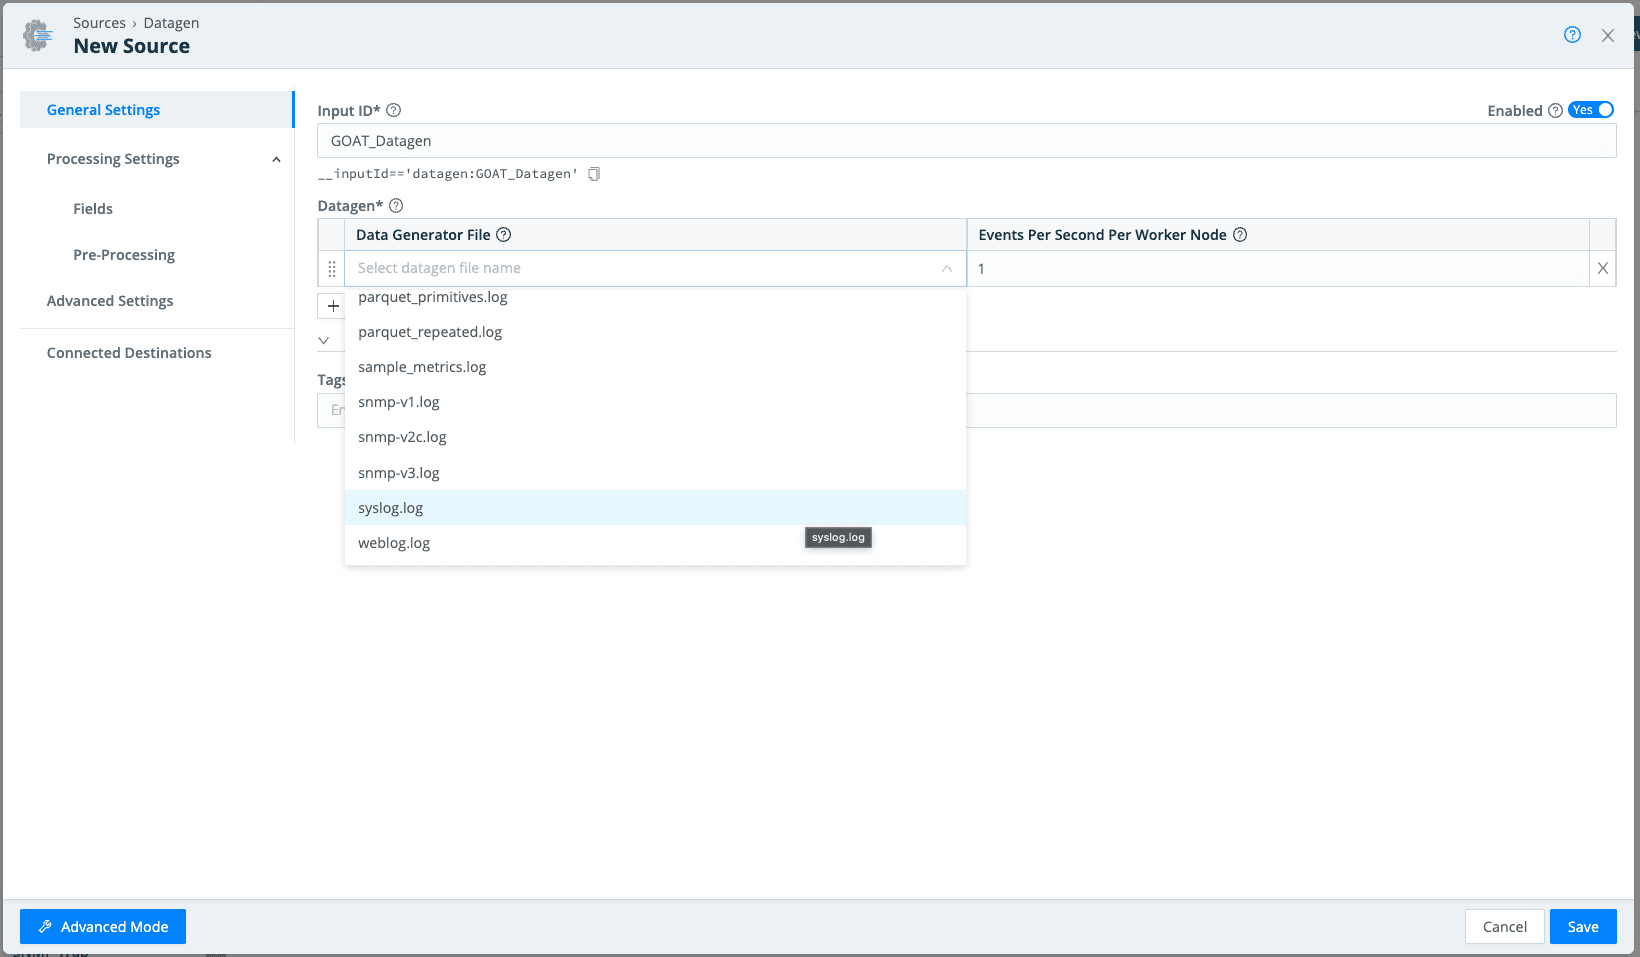
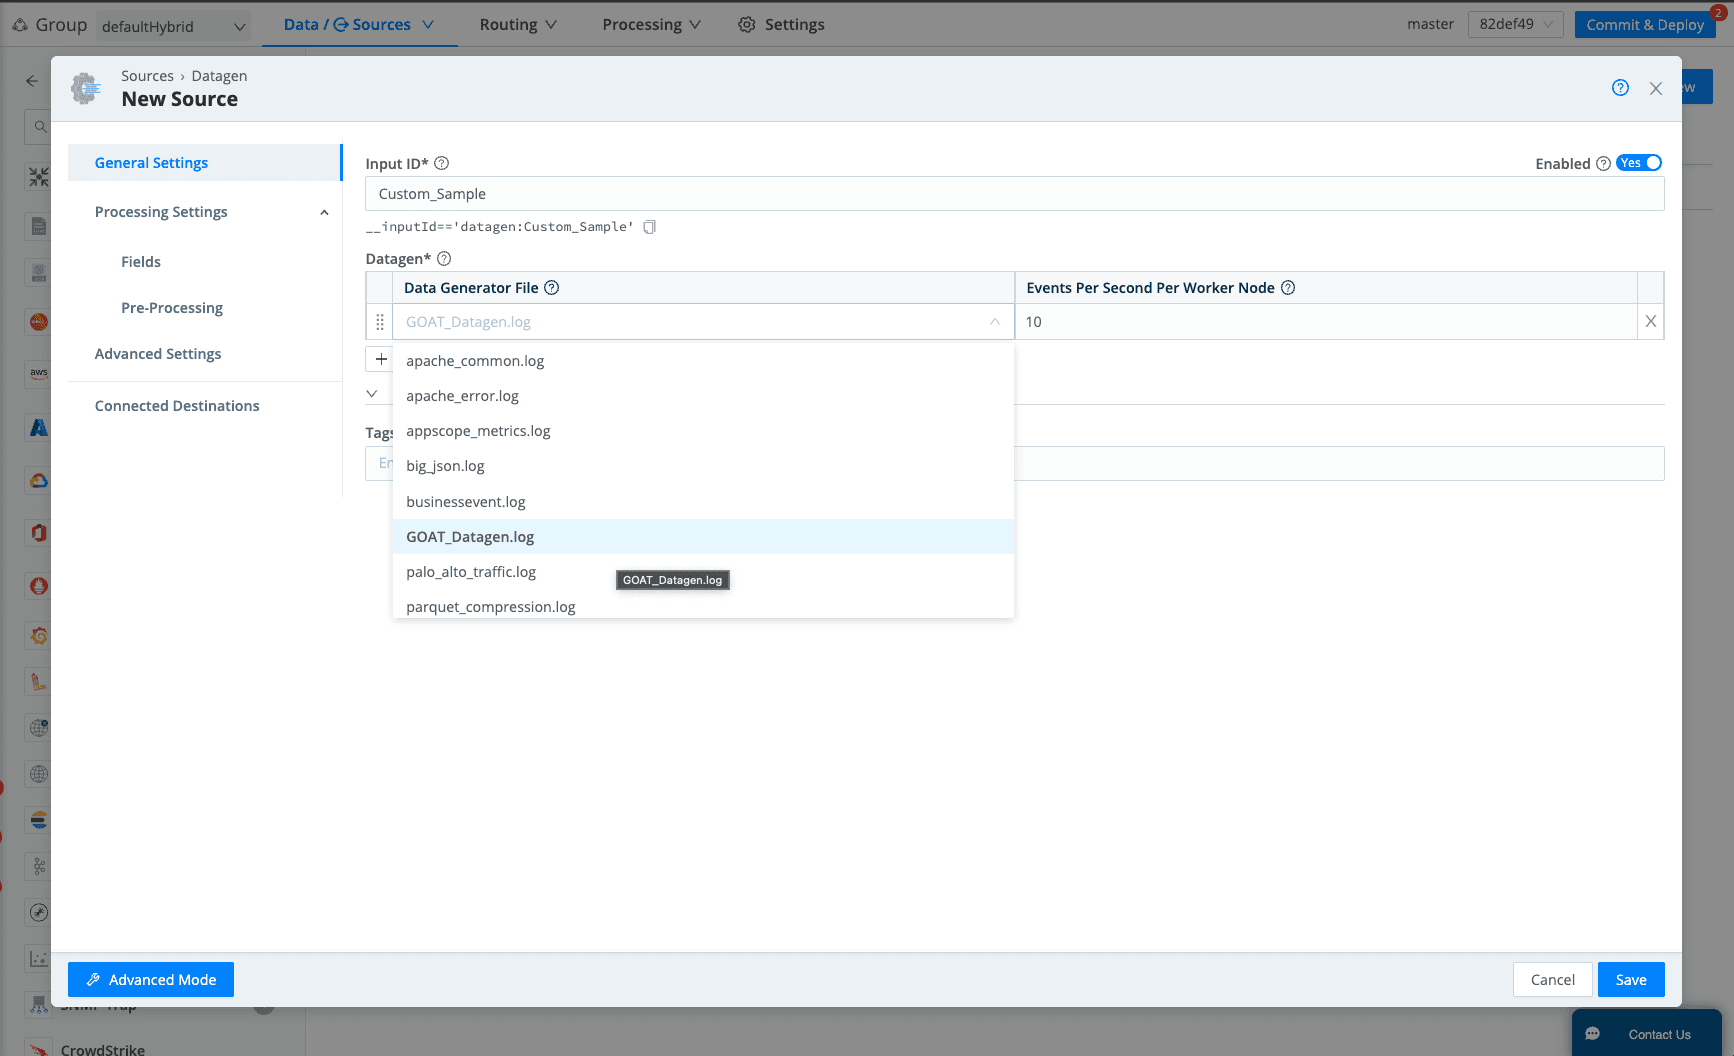
Next, choose Datagen, then Add New. Below, you can see some built-in datagen templates. Give it a name, choose a datagen file, and event rate.
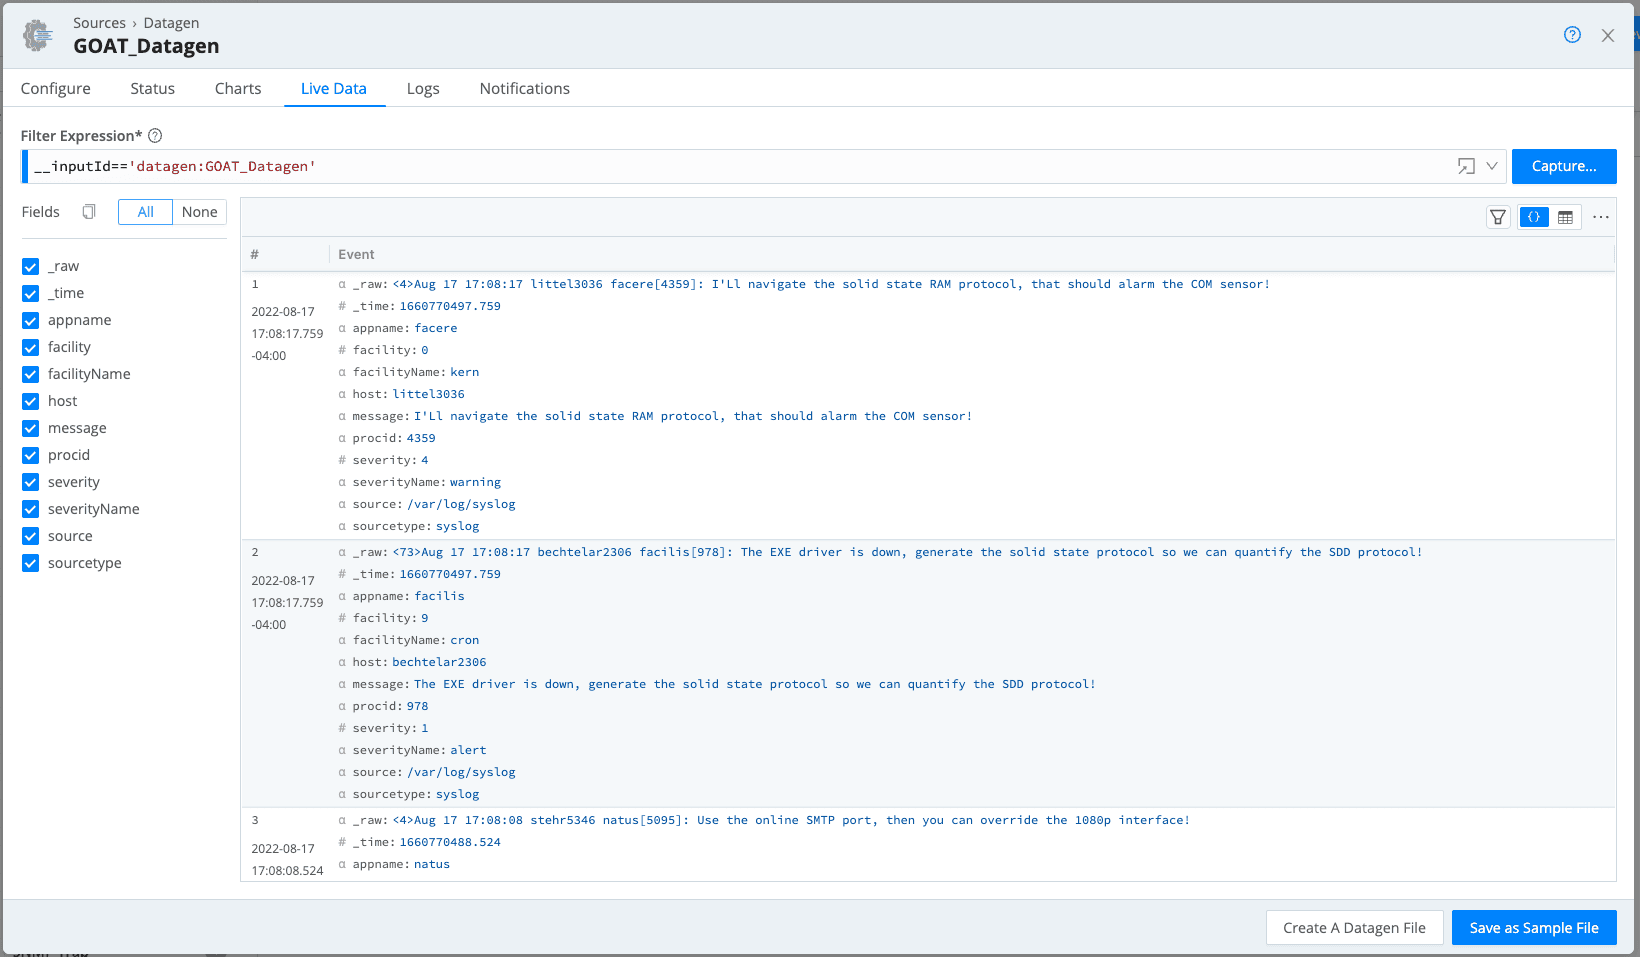
After performing a Commit & Deploy, click Live to see the datagen events.
Congratulations, you’ve configured a datagen! Now you can treat this as any other source, send the data through a custom pipeline, or a pack, then send it off to a destination.
Now using Cribl’s built-in datagens is all well and good, but what about using your own data sample to create a datagen that is more relevant to your needs? Well, let’s walk through how we do that.
First, navigate to Processing/Pipelines. On the right hand side of the page, you should see the Sample Data pane. Assuming you have a set of sample data in a file, you can either upload the file directly, or copy/paste:

If you decide to go the upload route, you can upload events in any format you’d like as long as you can correctly identify where the timestamp and event breaks are located.
Below, I’ve pasted my sample in. This is where you would configure event breaker rules, as well as timestamp settings. You can validate these are working by comparing the “IN” view and the “OUT” view. In my sample below, you can see the timestamps properly detected and highlighted in purple, and the event break in red:

Once we’re happy with the timestamp and event breaker settings, choose “Create A Datagen File” in the bottom right corner. In this step, we can instruct Stream to replace the sample timestamp with a new timestamp and the desired timestamp format. In this case, we’ll leave it as is (3-letter month, two digit day, two digit hour, minute, second). Don’t forget to check the “File Name,” before moving to the next step. Finally, choose “Create A Datagen File.”

Finally, same as before, we’ll navigate to Data/Sources, and choose Datagen. Create a new Datagen, and our newly added datagen file should be listed in the dropdown:
Save this, and be sure to Commit & Deploy. Once the worker picks up the new config, we should be able to see the events flowing under live data:

This should get you started with your own custom datagens. These are perfect for testing a new config, troubleshooting a Pack, and probably many more scenarios we haven’t thought of yet. If you have any questions, be sure to hit up our docs and or Cribl Curious.