
When Cribl Stream becomes the center of your data universe, your individual settings, routes, pipelines, and packs become a critical aspect of your work. What happens if you lose access to the UI? If you are on a licensed version of Cribl Stream backing up the work that you are in Sources, Destinations, Routes, Pipelines, and Packs would be done easily using the GitOps remote repo. That would allow you to back up all configurations to your remote repository and then bring it back into a new server/system. Of course, Cribl.Cloud users don’t have to worry about this either.
But if you do not have a licensed version and have been using the free version of self-managed Cribl Stream, how do you get a backup of this work? So long as you can still access Cribl Stream’s GUI/UI, you can export your work for the routes and pipelines. This is actually a great time to mention the Pack capabilities – aside from being able to install the Packs that Cribl offers in the Packs Dispensary, you can also create these yourself to produce a self-contained package of your work. When you need to share or migrate backup that works, you just export the Pack and it takes all of the routes and pipelines you created with it. You can read more about the Packs here.
But, if you do not have your routes and pipelines in a Pack on your setup and you want to backup other portions of the configuration of your Cribl Stream server, here’s what you do:
For Routes That Are Not in a Pack Configuration Do
Navigate to your routes (not the Quick Connect routes – unfortunately, that will have to be rebuilt by hand but should not be difficult given your sources and destinations being set)
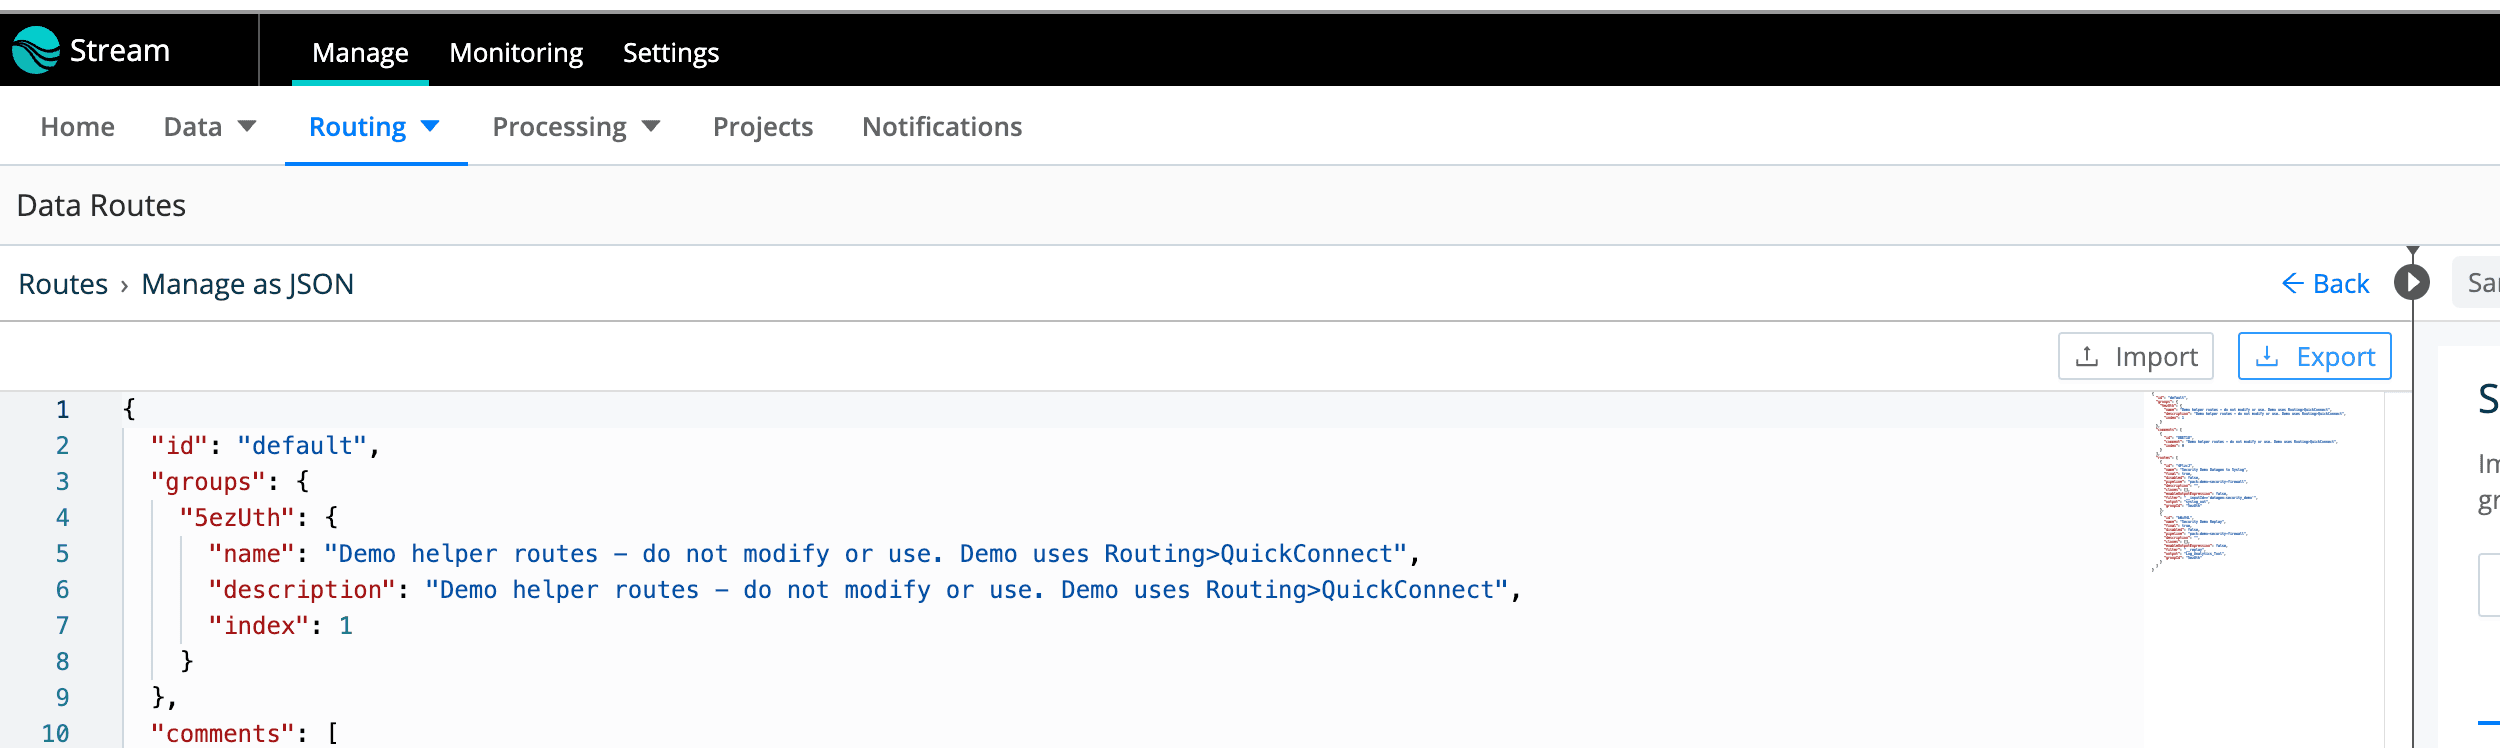
In the Data Routes window there is an icon in the top, right-hand corner of the side of the route (not the Sample Data side) that if you place your mouse pointer over it shows “Manage as JSON” – click it

In the Routes > Manage as JSON window, you will see a button at the top of this area labeled “Export” – click it:

That will download the route.json file to your browser’s download folder on your desktop.
Once you set up your new environment, you will follow almost the same steps except you will click the “Import” button in the Routes > Manage as JSON window and then click the “Save” button at the bottom.
For pipelines that are not in a Pack configuration do:
Navigate to Processing and Pipelines and then select the Pipeline you will Export
In this Pipeline window, find the icon that looks like a gear or a cog in the top right-hand corner of the pipeline window (not the data sample side) – if you place your mouse on that icon a text should pop up that reads “Pipeline Settings”. Click on it:

This will open the Pipeline name/config page. In the same area as the previous icon’s location, there will be an icon for the “Manage as JSON.” Find it and click on it:
This will finally open the Pipeline name/advanced page. At the top right-hand corner will be the “Export” button. Click it and the pipeline_name.json file will download to your browser’s download folder on your desktop.
Just like with the routes file, once you have rebuilt/restored your Cribl Server, do the exact same steps above, except click the “Import” button on the Pipeline name/advanced page and then click the “Save” button at the bottom.
For Any of the Data Sources and Destinations
Navigate to the Data > Sources or Data > Destinations page with the Source/Destinations tiles and pick the data source/destination tile you wish to grab the configuration.
Once you are on the Manage Source/Destination / source_name/destination_name page, click on the source ID/destination ID line that you want to export.

With the Source/Destination > source_name/destination_name > source_id/destination_id window open, click on the button at the bottom of the window that is labeled “Manage as JSON”
This opens the Manage as JSON window for this source ID/destination ID. At the top right-hand corner you will find the “Export” button – click it to begin the download of the source_id.json/destination_id.json file to your browser’s download folder

Once you have rebuilt your Cribl server instance, you will go through almost the exact same steps except you will click the “Import” button to load the source_id.json/destination_id.json file for this source/destination.
For a Pack That You Wish to Export
Navigate to the Processing > Packs window to display the list of Packs you have loaded in your Cribl Server
In the Packs window, find the Pack you want to export and then find the “…” at the end of the row for that Pack and click it to expose the menu drop-down

Choose/click the “Export” menu option from the drop-down menu. This opens the Export Pack window. In the bottom right-hand corner click the “Export” button to start the exporting and downloading of the Pack file

The Exported Pack
filename.crblfile will download to your browser’s download folder on your desktop.Once your new Cribl server has been created and you are ready to put this pack file back, navigate back to the Packs window as instructed above and this time click the “Add Pack” button in the top right-hand corner of the window.
Choose the “Import from file” menu option

This will open a file browser window – browse to the location of the .crbl file that you downloaded from above, pick it, and then click on the “Open” button in this window

This opens the Import Pack window where you will click the “Import” button in the bottom right-hand corner of the window to begin importing the pack. Once it is done you should see the Pack listed in the Packs window that you are returned to.

Capturing Global Settings
If you have made any changes to the Global Settings in the Settings menu at the top of the Cribl Stream UI:

These items you may need to capture these manually or with screenshots and replicate these in your new setup. These are the configurations that would have been included with your GitOps/GitHub external repo setup with Enterprise licensing.
What To Do When There Is No GUI/UI Access to Cribl Stream
If Cribl Stream’s server has encountered some sort of catastrophic failure and you cannot access the GUI/UI any longer to conduct the above and you wish to recover as much of your configuration as possible, you may have to go to the filesystem level to grab backups of your Cribl Stream server. To do this, follow these steps:
On the Cribl Stream server command line, go to the
$CRIBL_HOME/bindirectory, where the package was extracted (e.g.: /opt/cribl/bin).Execute the “
./cribl stop” command.Once the Cribl Stream server is stopped, create a copy of everything in the
$CRIBL_HOME\localdirectory at a minimum. Preferably everything under $CRIBL_HOME.Rebuild or create your new Cribl Stream server following these instructions.
Before starting the Cribl Stream server (or run through the above and stop the new server), paste the copy of your files from the
$CRIBL_HOME\localdirectory at a minimum (or everything under$CRIBL_HOMEdirectory).Start Cribl Stream by executing the “
./cribl start” command.Then set up a CRIBL_VOLUME_DIR so you can backup everything in that directory with your new server.
Wrap up
This guide is a perfect way to back up your locally installed Cribl Stream instance that you’re using in your home lab or in a testing environment. As I mentioned at the beginning, Cribl Stream over Cribl.Cloud eliminates the need to manually back up any configurations. Licensed versions of Stream running in your own environment can also use GitOps.