
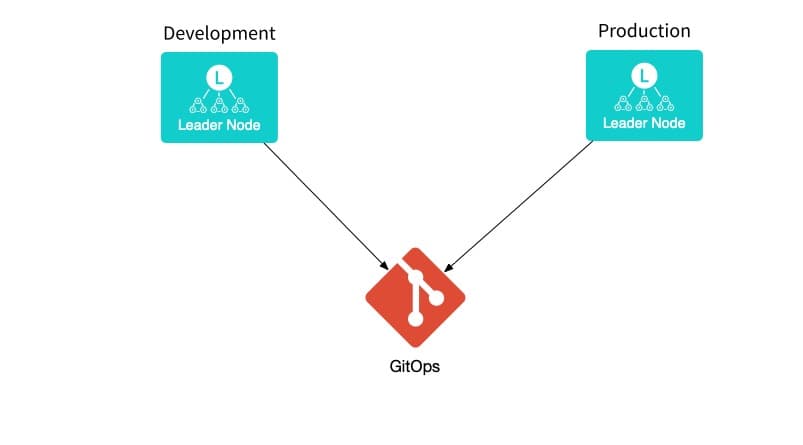
Git integration has always been at the foundation of Stream. In the fall 2021 release of Cribl Stream (both on-prem software and Cloud), our Enterprise users have a received set of APIs to separate the development and deployment of Stream. Stream GitOps connects with your favorite git based versioning platforms and leverages their PR, approve/reject, and CI/CD workflows to push production-ready changes from a development branch into a main branch or release. We know how important it is to ensure your production Steam environment only receives updates and changes that have met your internal processes and reviews.
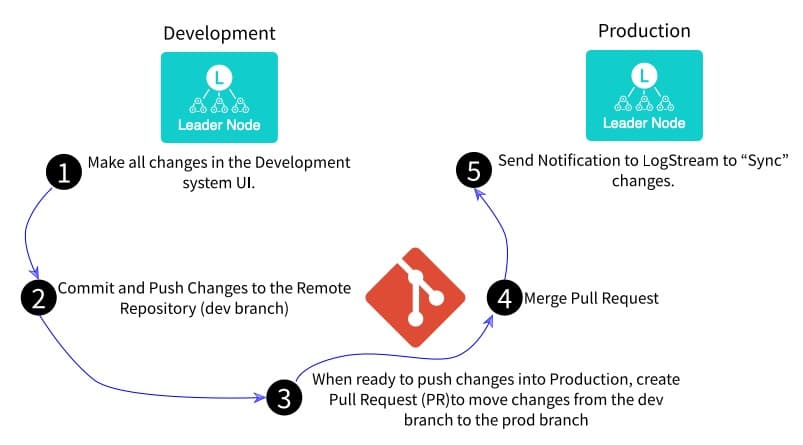
In this blog post, we’ll walk through the steps to configure Cribl Stream integration with a GitHub repository. These steps enable a continuous integration/continuous delivery between a Cribl development environment and a Cribl production environment. A great background to the subject is described in a previous blog post
Step 1: Initialization – Connect Cribl to GitHub
Note – Before we start: Make sure you have Cribl Enterprise License in both the production and development instances of Cribl
Create a Github account: For example, https://github.com/rdagan-cribl
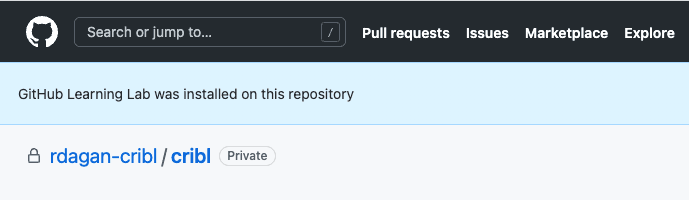
Create a new empty and private repository. For example, https://github.com/rdagan-cribl/cribl
Note: In the beginning only ‘master ‘ branch is created
Generate SSH Public and Private keys:
ssh-keygen -t ed25519 -C "your_email@example.com"Validate:
/root/.ssh/id_ed25519(private – will go to Cribl Stream) and id_ed25519.pub (public – will go to GitHub)Copy the SSH public key to your clipboard (vi /root/.ssh/id_ed25519.pub)
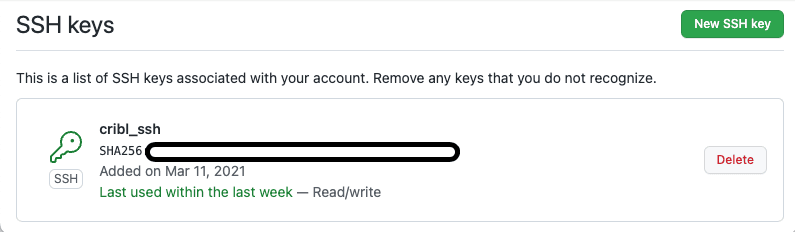
Enter Public Key into your GitHub account -> Settings -> SSH -> New SSH Key
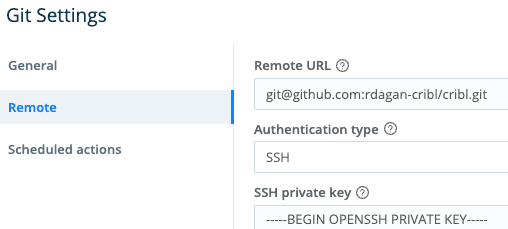
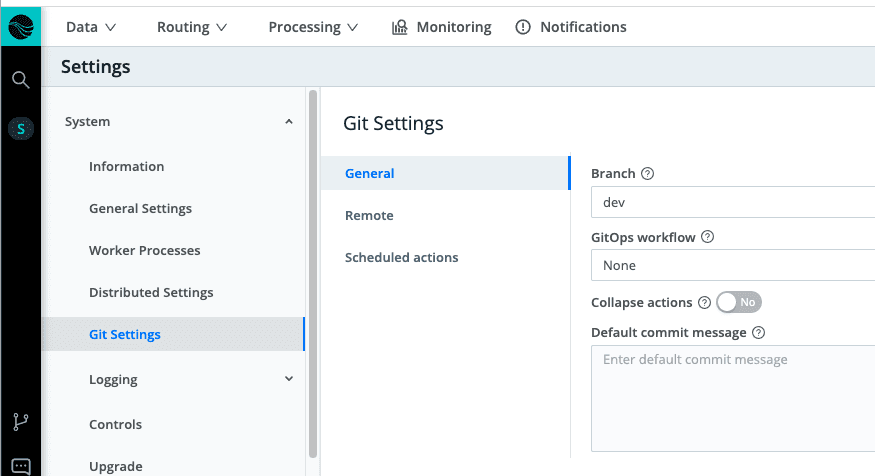
In your Cribl Stream production instance, go to Settings > Git Settings.
Remote Url: The link to your GitHub repository. For example,
git@github.com:rdagan-cribl/cribl.gitAuth: SSH
Private Key (Copy from
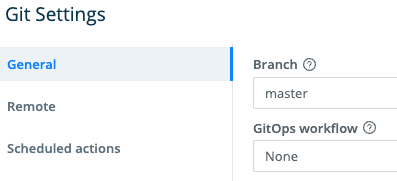
/root/.ssh/id_ed25519)GitOps workflow: None\
Branch: master
Note: GitOps workflow = None, means Cribl Can write to GitHub
Add the GitHub keys to known_hosts:
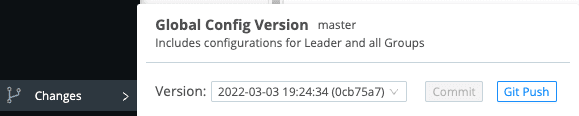
ssh-keyscan -H github.com >> ~/.ssh/known_hostsIn the Cribl Stream production instance, click on ‘Git Push’.
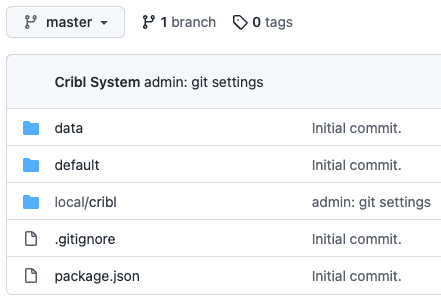
On the GitHub UI -> Cribl repository, you will see the Cribl Stream configurations in your ‘ master ‘ branch
An alternative to SSH authentication is to use Username / Password (Token) authentication.
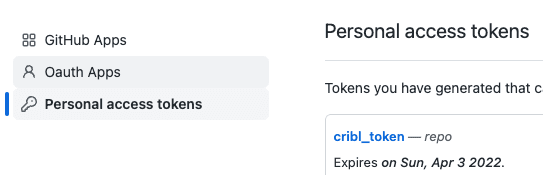
First, generate GitHub Token. In your GitHub Account -> Settings -> Developer Settings -> Personal Access Token -> Generate a new Token
Second, In your Cribl Stream production environment, go to Settings > Git Settings
URL: HTTPS address to the repository
Auth: basic
User: GitHub Account (for example,
rdagan-cribl)Password: Copy Token from GitHub
GitOps workflow: None
Branch: master
Step 2: In GitHub – Create 2 Branches (Production and Dev)
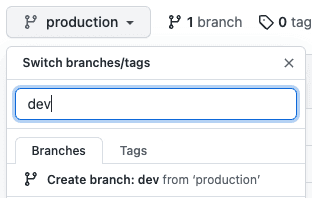
In GitHub click on the ‘1 branch’ option
Rename ‘master‘ branch to ‘production‘ branch
Click on the production branch, and create new ‘dev‘ branch
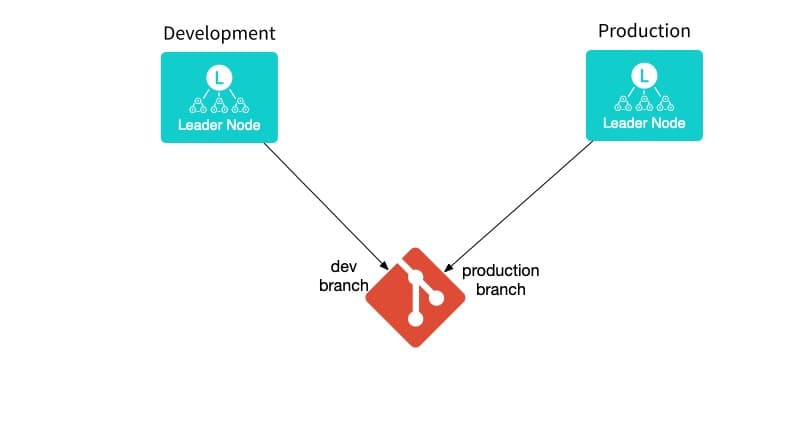
Step 3: Point Cribl Stream Production Instance to the Production GitHub Branch
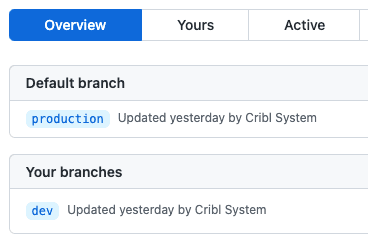
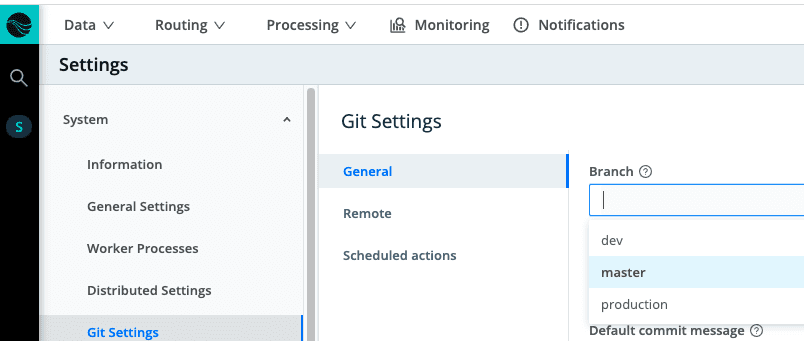
In your Cribl Stream Production instance, reload your Leader node UI. On the Git Setting -> General -> Branch, you should be able to see 3 options (dev, master, production) branches.
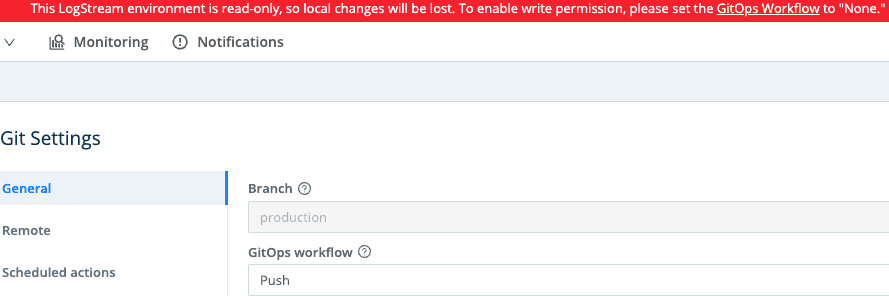
Select ‘production‘ as the branchSelect ‘Push‘ for the GitOps workflow. After you save your changes, your Cribl production environment becomes a Read Only mode
Step 4: Point Cribl Stream Development Instance to the Dev GitHub Branch
In Cribl Stream Development instance, go to Settings -> Git Settings -> Remote
Remote Url: The link to your GitHub repository. For example,
git@github.com:rdagan-cribl/cribl.gitAuth: SSH
Private Key (Copy from
/root/.ssh/id_ed25519)
In the Cribl Stream Development instance, Reload the UI. Go to Settings > Git Settings > General
GitOps workflow: None
Branch: dev
Note: GitOps workflow = None, means Cribl can write to GitHub
Step 5: Send New Configurations from Cribl Dev to the Dev GitHub Branch
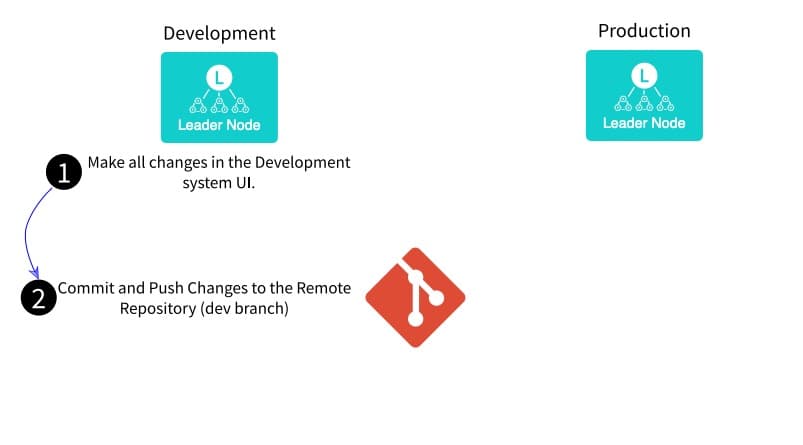
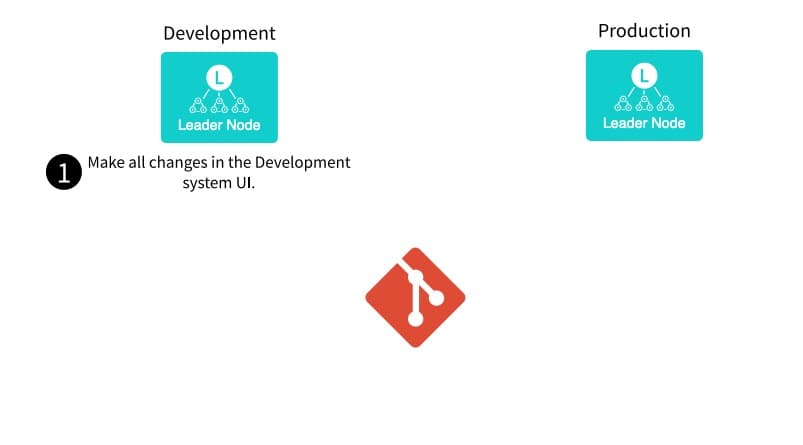
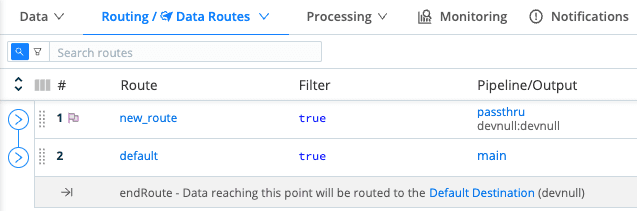
In the Cribl Stream Development environment, add a new Route to test our end to end:
Route name: new_route
Pipeline: passthru
Output: devnull:devnull
In the Cribl Stream Development environment, Select ‘ Commit ‘ and ‘ Git Push ‘. This will send the configurations to GitHub dev branch

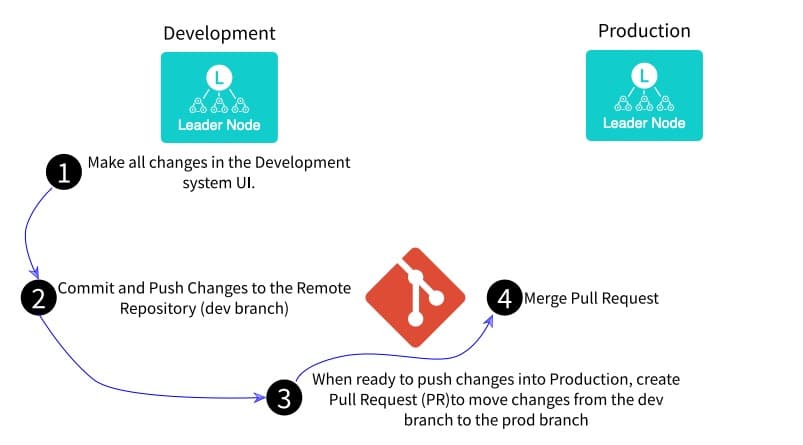
Step 6: Github Merge Configurations From Dev to Production Branch
In GitHub under the dev branch you will see the new route.yml (local -> pipeline -> route.yml)
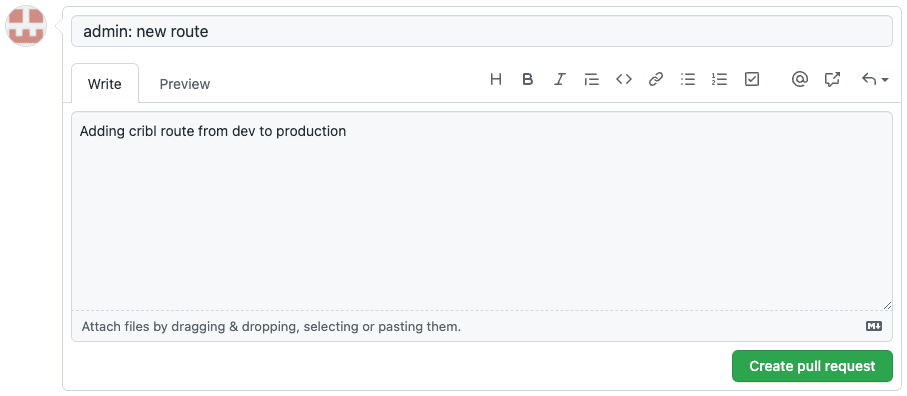
In the Dev branch, Click on the ‘Compare & Pull request‘

Add some comments and click on ‘Create pull request‘
Optional, Add Reviewers and Assignees to approve the request
If GitHub did not detect any conflicts, click on ‘Merge pull request‘ -> and ‘Confirm merge‘
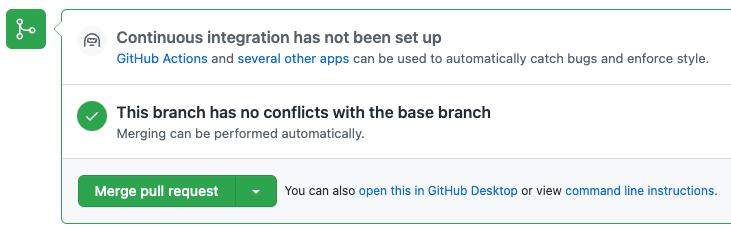
If the merge was successful, you will see a GitHub confirmation that the changes from dev branch made it to the production branch

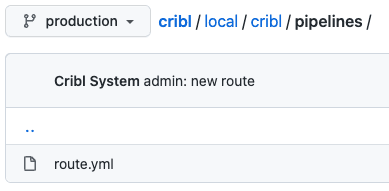
In GitHub under the Production branch, you will see the new route.yml (
local -> pipeline -> route.yml)
Step 7: Send a Request From the Cribl Stream Production Environment to Pick Up the Changes to Your Github Production Branch
In your Cribl Stream production run the below command to pick up the latest information from GitHub Production branch
The command requires a Cribl Bearer Token. There are multiple ways to get the Bearer Token and it can be found in the Cribl documentation
For example, from Cribl Stream production instance UI:
From the left nav, select API Reference.
Near the top, expand the GET /auth/groups endpoint.
Click Try it out.
Click Execute.
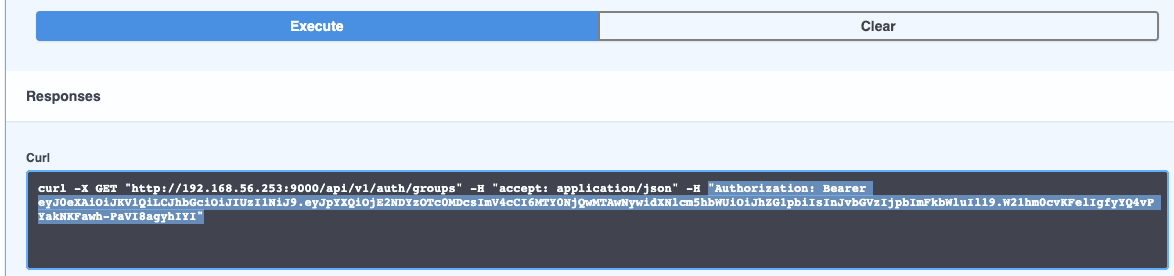
In your Cribl Stream production CLI run the below command
curl -X POST "http://<leader URL or IP>:9000/api/v1/version/sync" -H "accept: application/json" -H "Authorization: Bearer <bearer token>" -d "ref=<production branch>&deploy=true"For example:
[root@localhost prod]# curl -X POST "http://192.168.56.253:9000/api/v1/version/sync" -H "accept: application/json" -H "Authorization: Bearer eyJ0eXAiOiJKV1QiLCJhbGciOiJIUzI1NiJ9.eyJpYXQiOjE2NDYzOTc0MDcsImV4cCI6MTY0NjQwMTAwNywidXNlcm5hbWUiOiJhZG1pbiIsInJvbGVzIjpbImFkbWluIl19.W21hm0cvKFelIgfyYQ4vPYakNKFawh-PaVI8agyhIYI" -d "ref=production&deploy=true"
In the Cribl Stream Production environment, we can see the Route from the Cribl Stream development environment
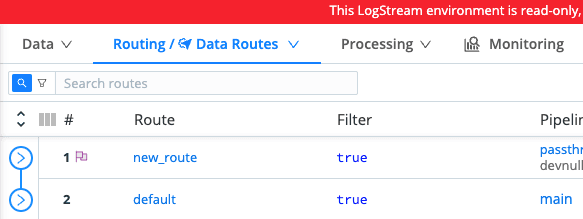
In this post, we showed how Cribl Stream integration with GitHub can help you move your Routes, Pipelines, and Pack from the development environment to the production environment. For a more in-depth look at GitOps in Cribl, check out the recent Cribl Office Hours below.
The fastest way to get started with Cribl Stream and Cribl Edge is to try the Free Cloud Sandboxes.