
Cribl’s integration catalog is ever-expanding. At Cribl, we constantly collect feedback on where to integrate next and channel it to deliver more high-impact integrations into our catalog. Whether it is Sources, Collectors, or Destinations, we constantly add new integrations to expand our reach in the IT security and observability ecosystem.
A big investment this year has been in the Azure security space. Customers and partners have requested a native integration for sending data to Microsoft Sentinel. Sentinel is Microsoft’s cloud SIEM & SOAR platform that provides users with security threat detection, incident analysis, and automated threat response tools. In the 4.2 release, we released our native integration for Sentinel, allowing customers the ability to write to four built-in tables in Sentinel. These include:
CommonSecurityLog
SecurityEvents
Syslog
WindowsEvents
Let’s tour how Cribl can be used to send security data to Sentinel’s built-in tables.
Creating Credentials
Log into the Azure portal at portal.azure.com. In the search bar, search for “App registrations.” Open the App registrations section. Click “+ New registration”.
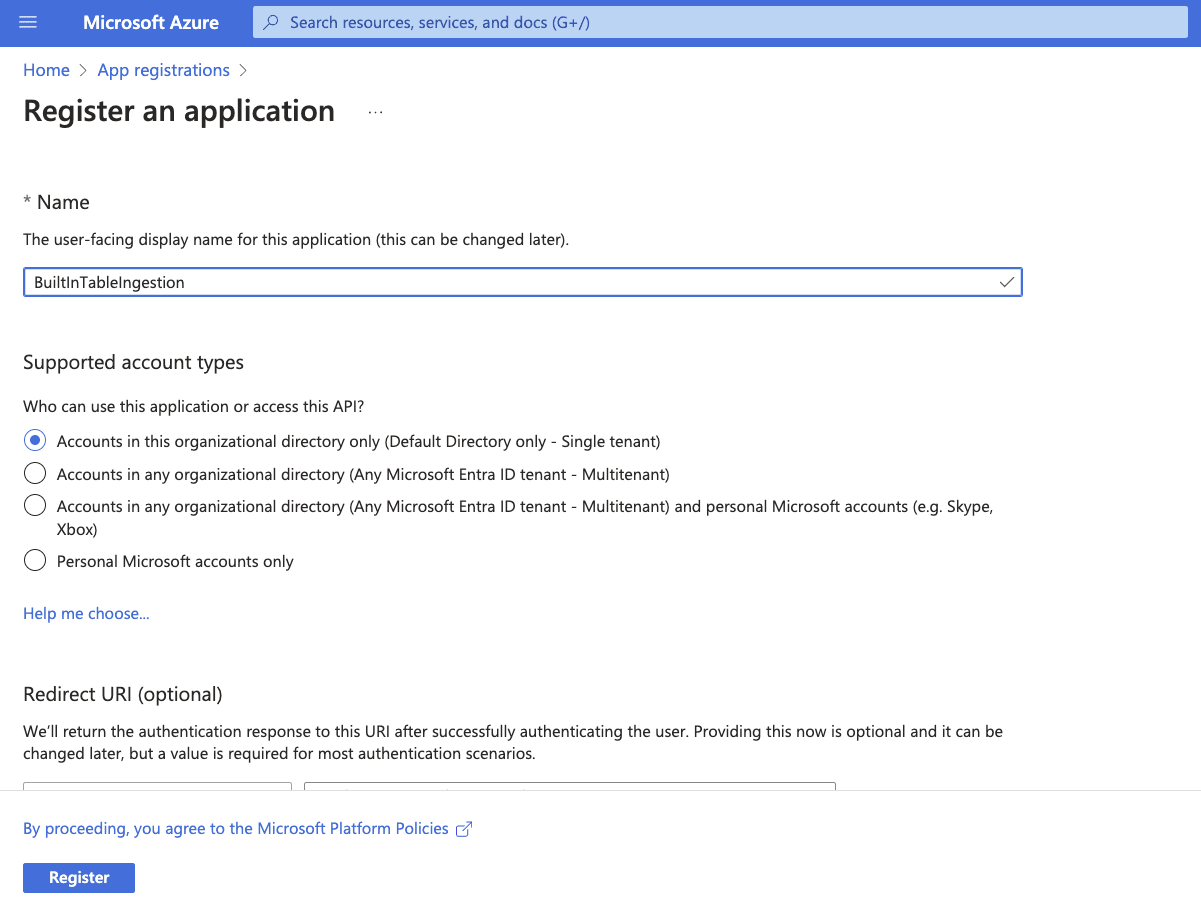
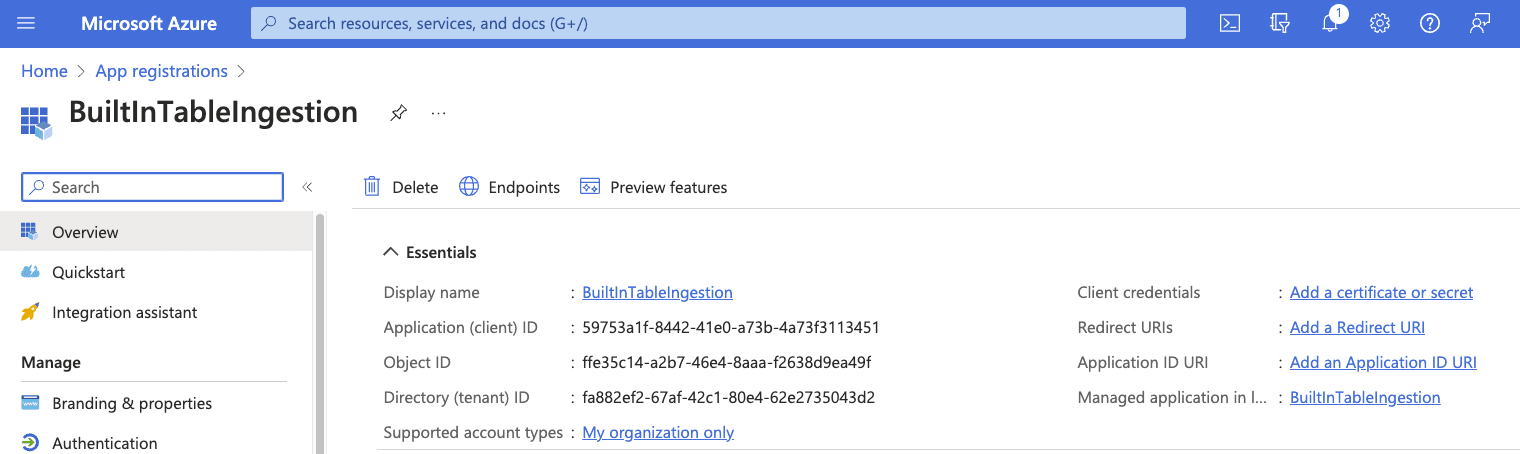
Take note of the “Application (client) ID” and “Directory (tenant) ID.” These will be required later.
Select “certificates & secrets” in the Manage menu. Under the “Client secrets” section, select “+ New client secret.”
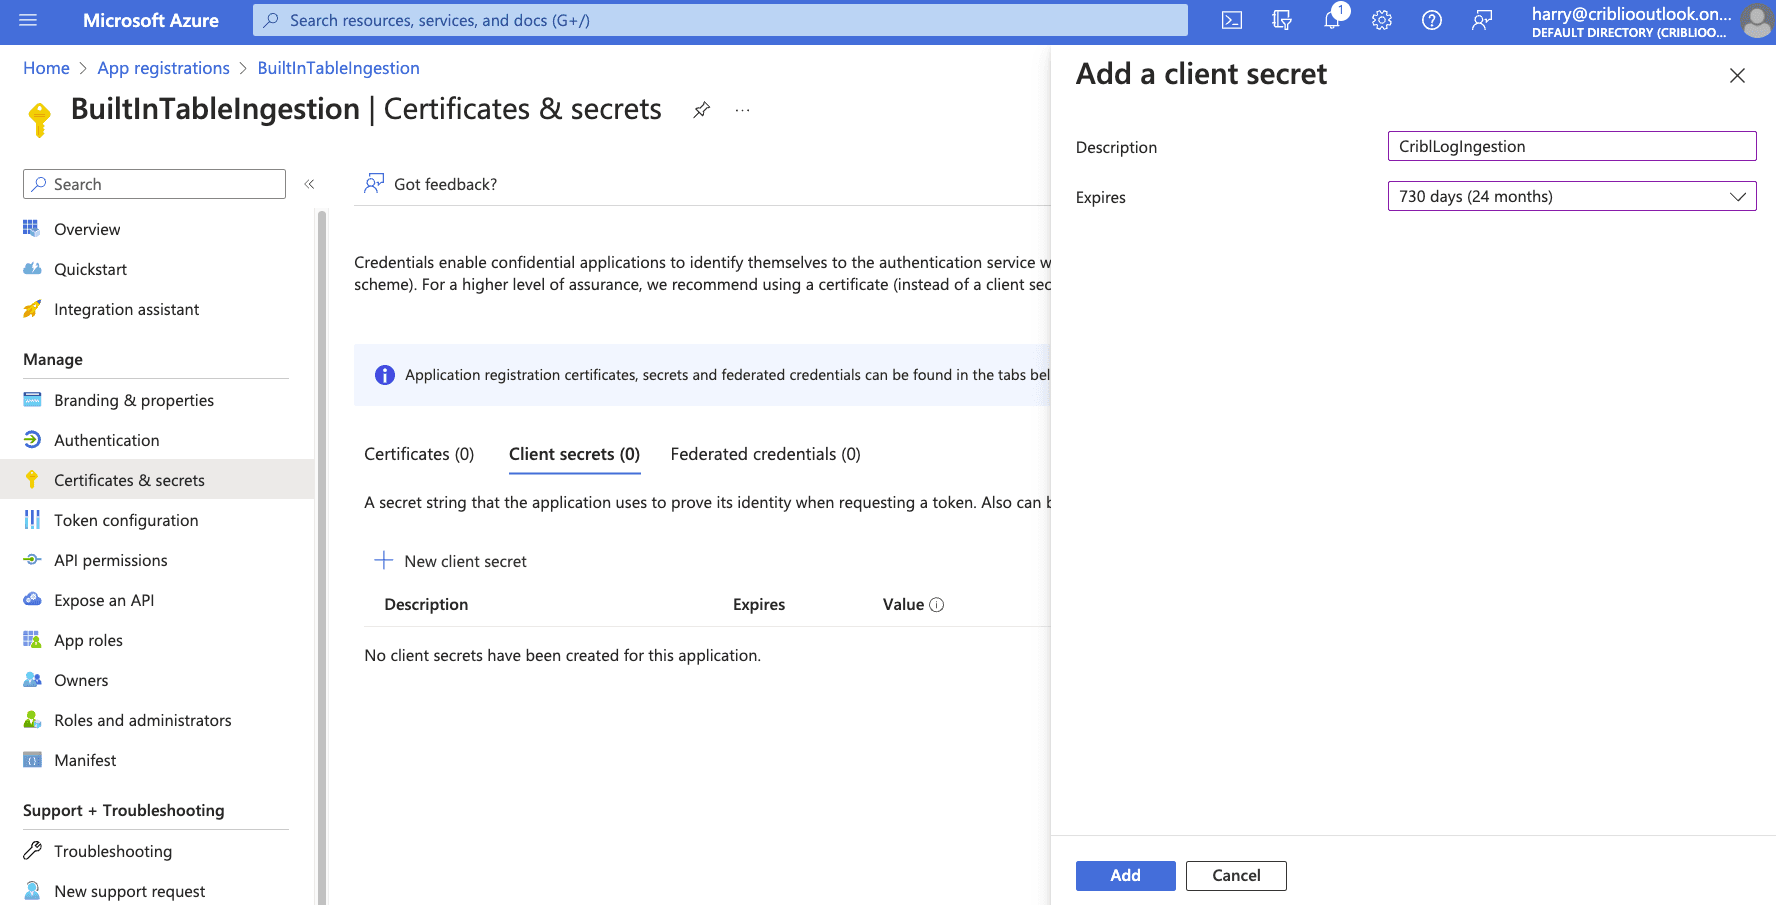
Add a description and select an expiration. Click “Add”. After the client secret has been created, note the “Value.” The Value is the OAuth Secret.
Setting Up Sentinel
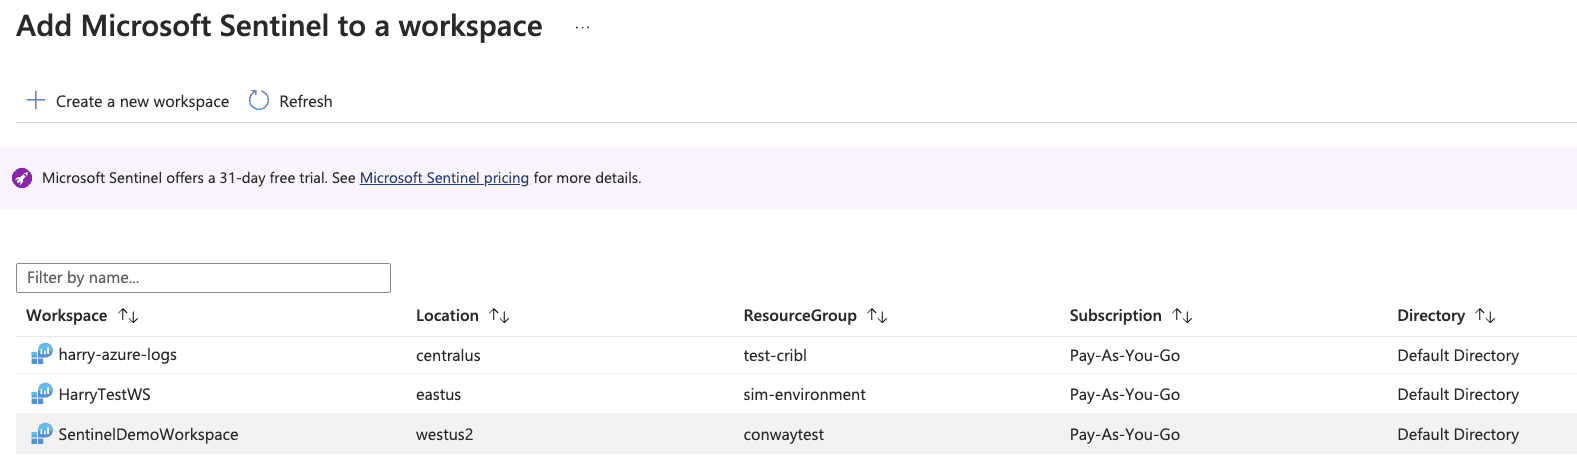
To enable Sentinel, go to your Azure portal and select Microsoft Sentinel.

Select an existing workspace to add Sentinel or “Create a new workspace”. Adding a new workspace will prompt you to select Resource Group and Region.
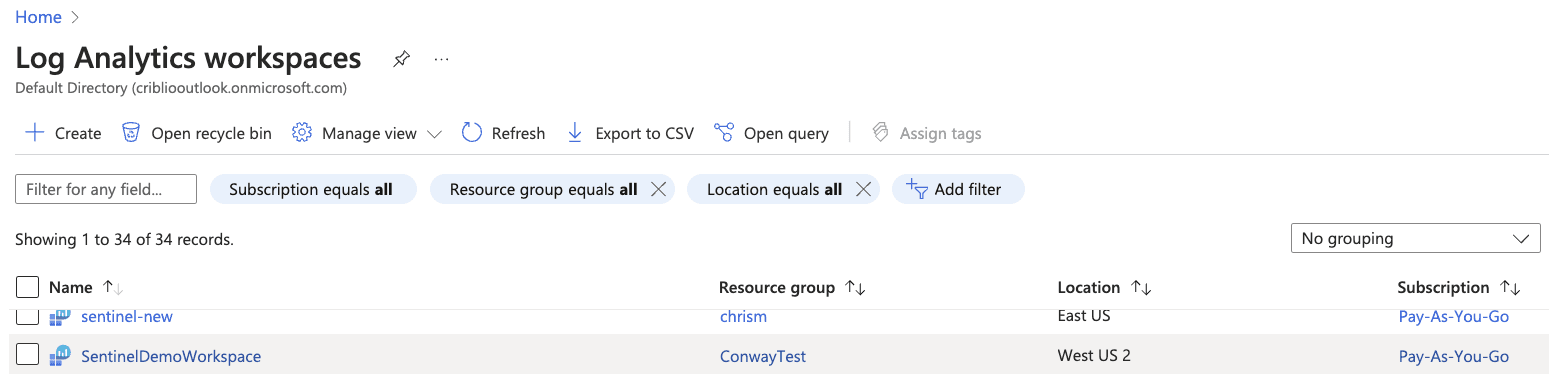
From Log Analytics Workspaces, select the workspace to which Sentinel was added.
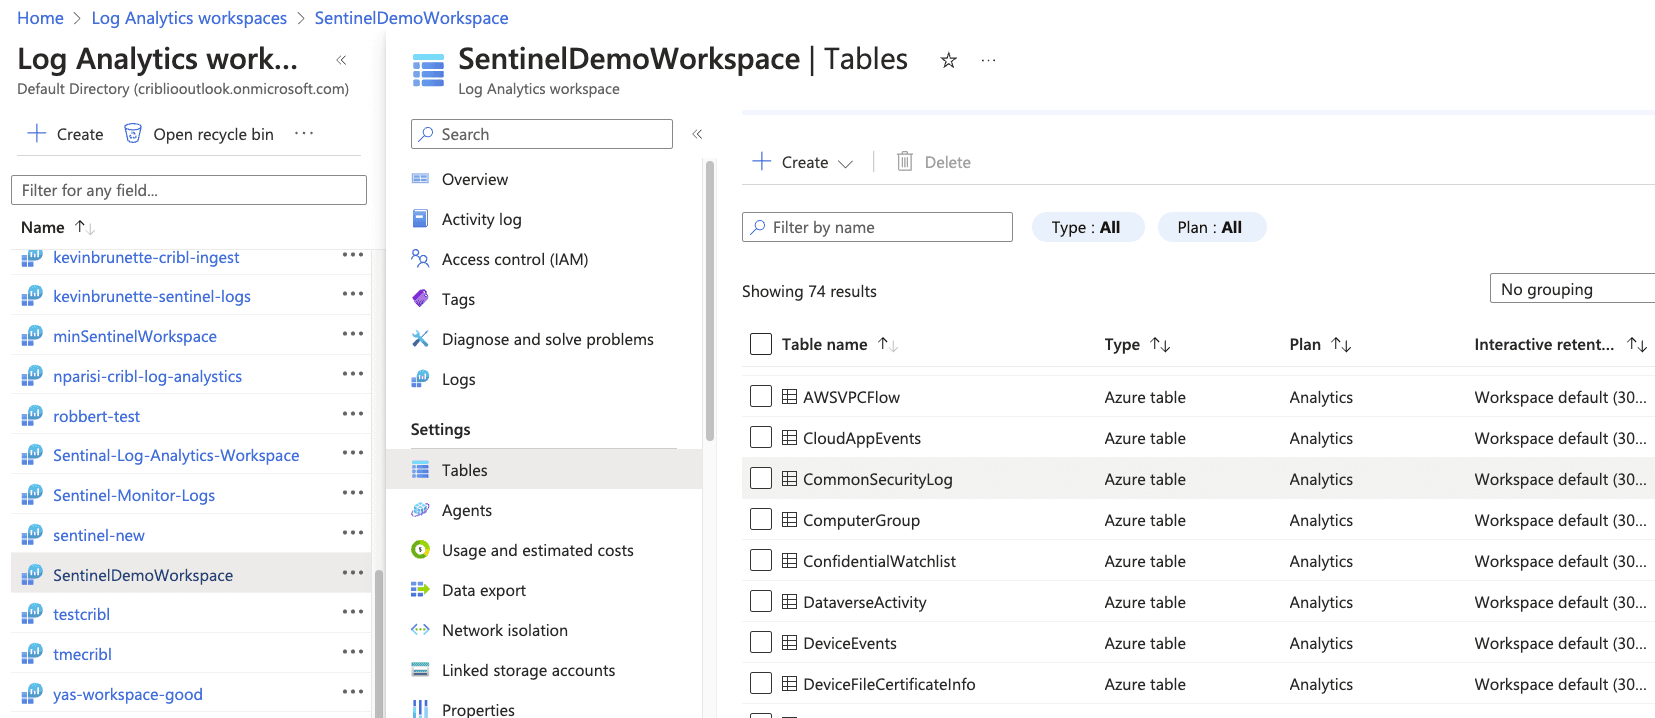
Select “Tables” and notice the built-in tables available: CommonSecurityLog, SecurityEvents, WindowsEvents, and Syslog.
Note: Syslog may not show up until data is written to it.
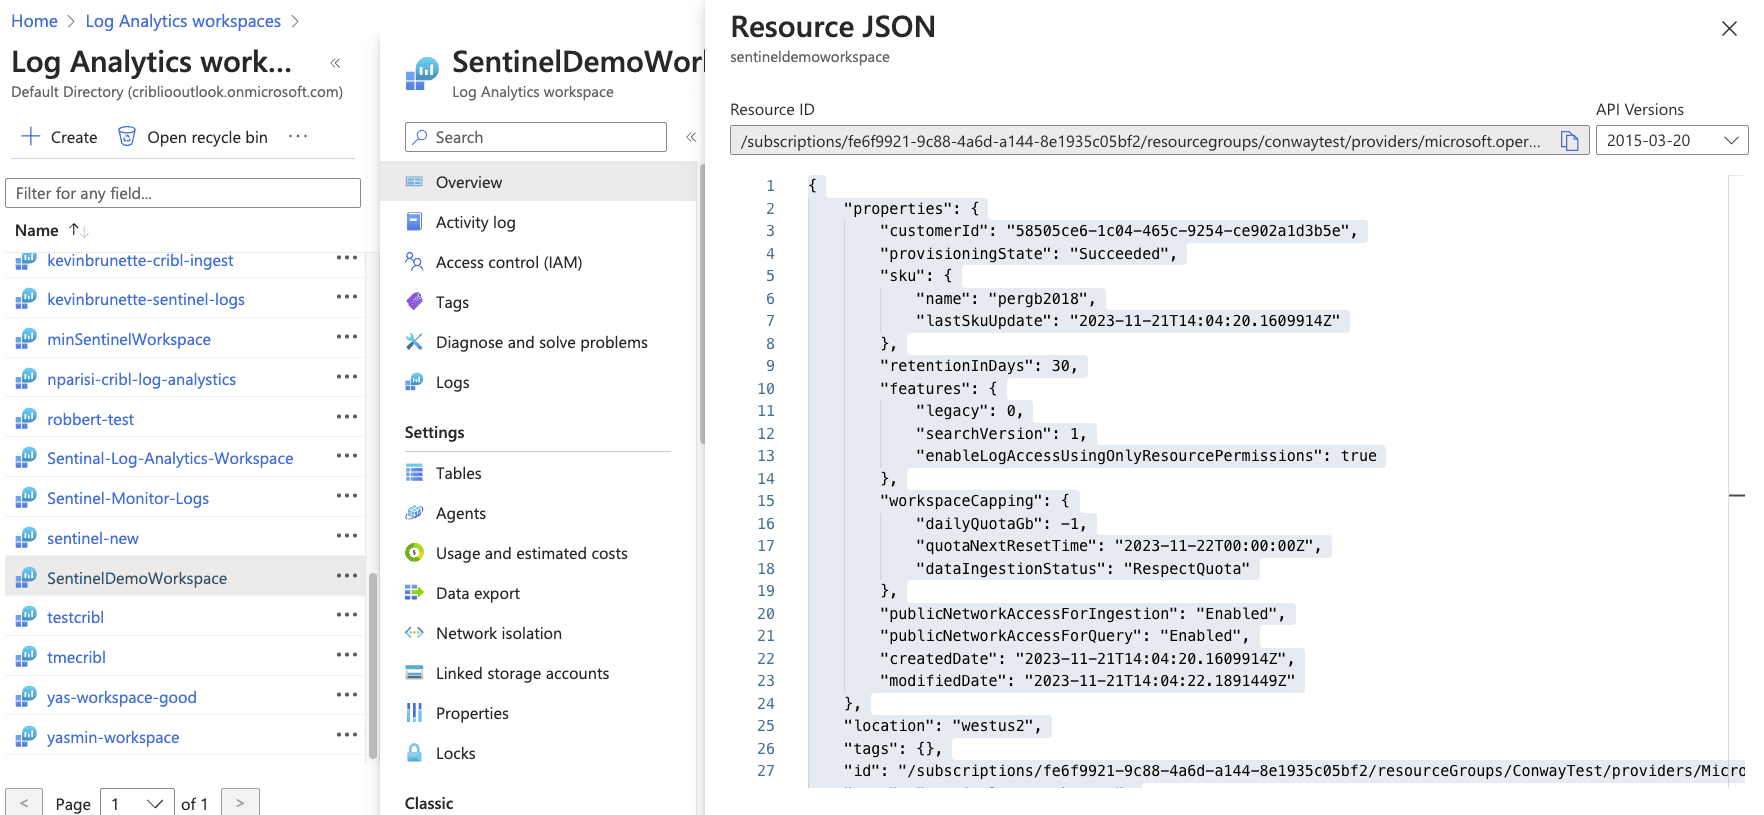
From the Overview section of Log Analytics Workspace, open the “JSON View” of your workspace. Take note of the Resource ID. This will be used as the “Workspace Resource ID” in an upcoming step.
Once Sentinel has been added to the Azure Log Analytics workspace, we will create a Data Collection Endpoint and add Data Collection Rules (DCRs) to get data flowing to one of the four built-in Sentinel tables.
Creating a Data Collection Endpoint
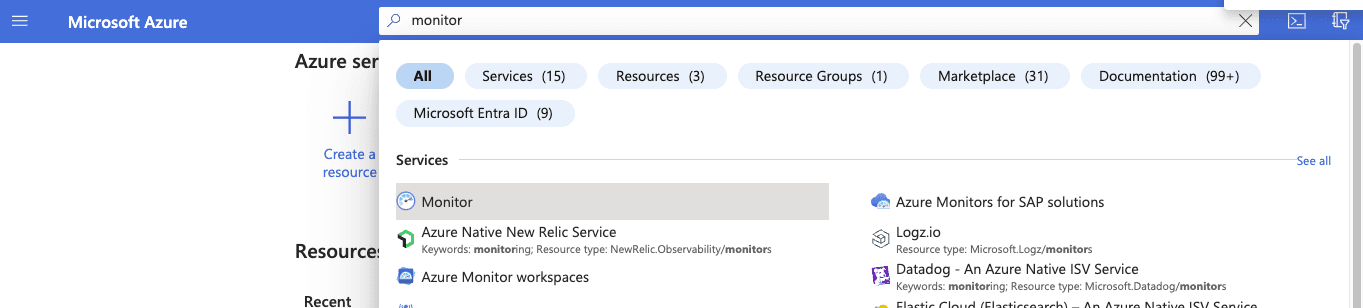
In the Azure portal search bar, search for “Monitor” and open the Monitor service.
Navigate to the “Data Collection Endpoints” section under settings and create a new “Data Collection Endpoint.” Ensure that the Region in the Endpoint matches the Azure Log Analytics Workspace region.
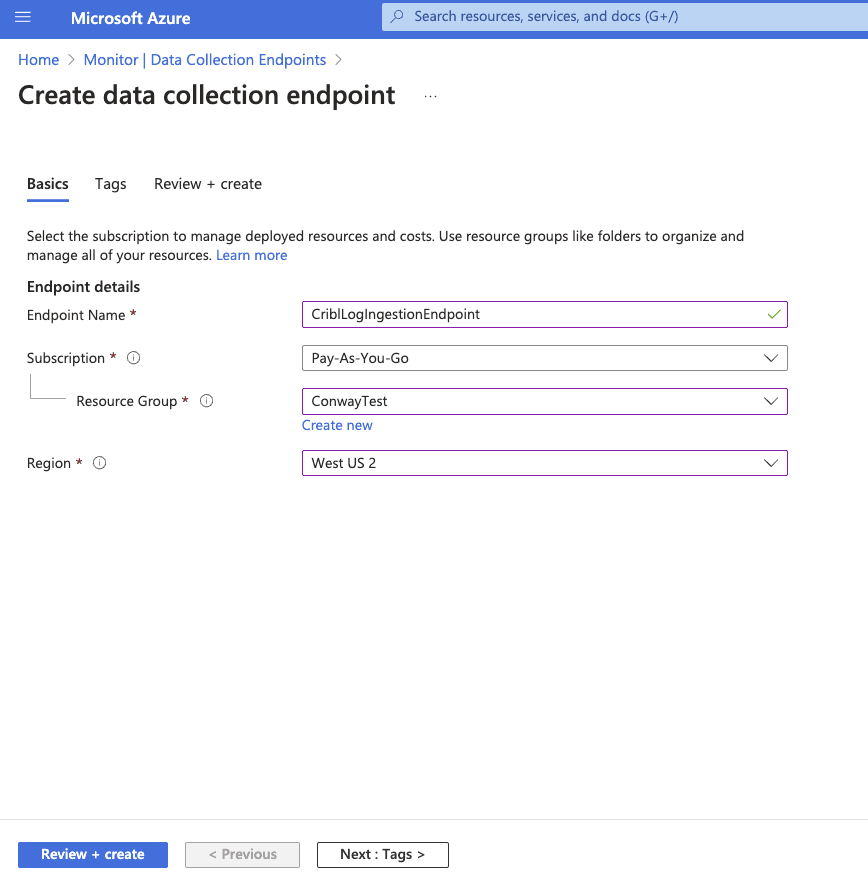
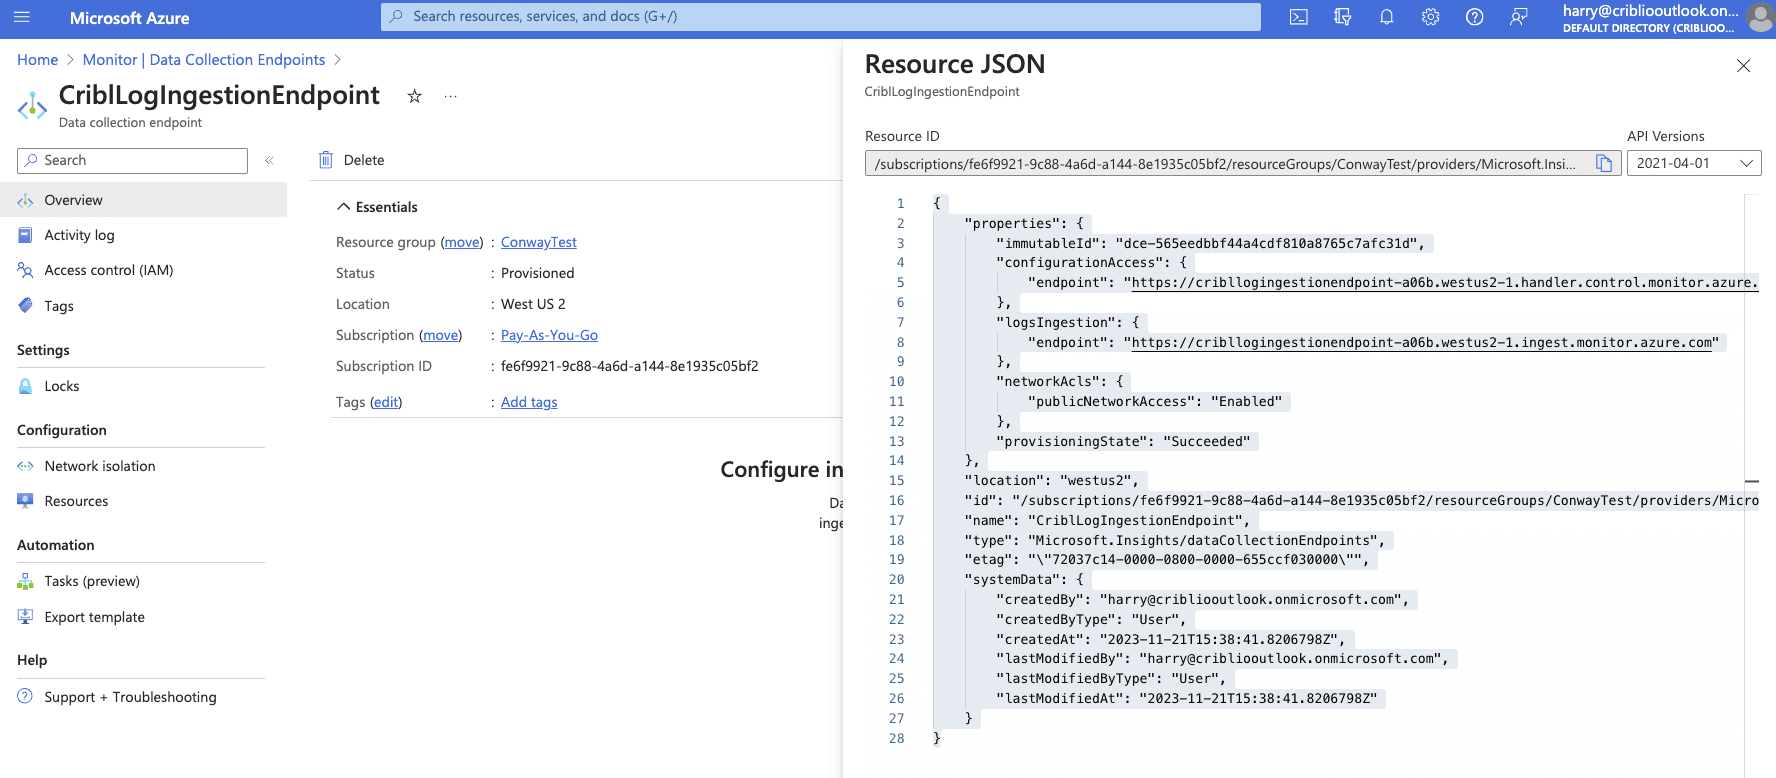
Click “Review+create” and then “Create.” Open the data collection endpoint you created and select “JSON View.” Copy the “Resource ID”. This will be used as the “Endpoint Resource ID” in an upcoming step.
Creating a Data Collection Rule (DCR)
In the Azure search bar, search for “template.” Select “Deploy a custom template” under Services.
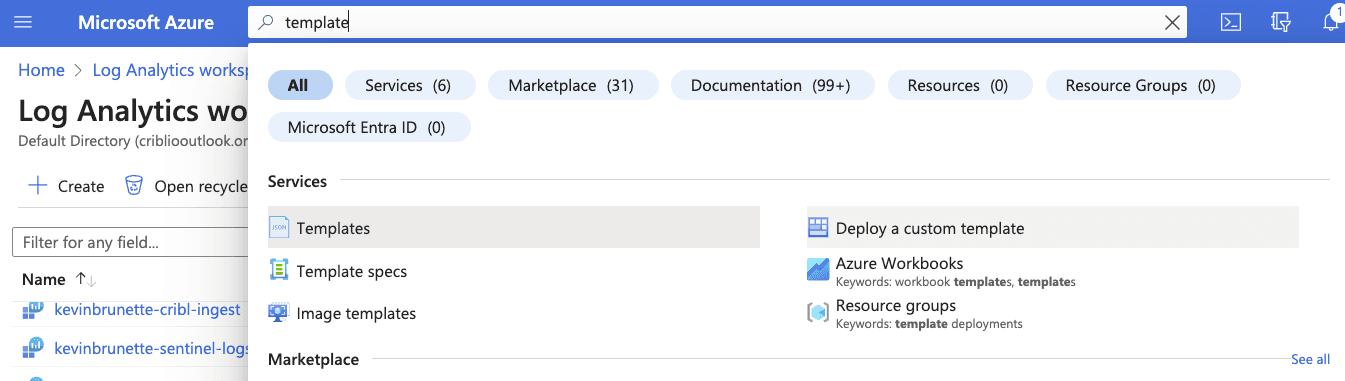
Select “Build your own template in the editor.” Paste in the template provided here. Click “Save.”

Please name it and enter the Workspace Resource ID and Endpoint Resource ID captured in the previous steps.
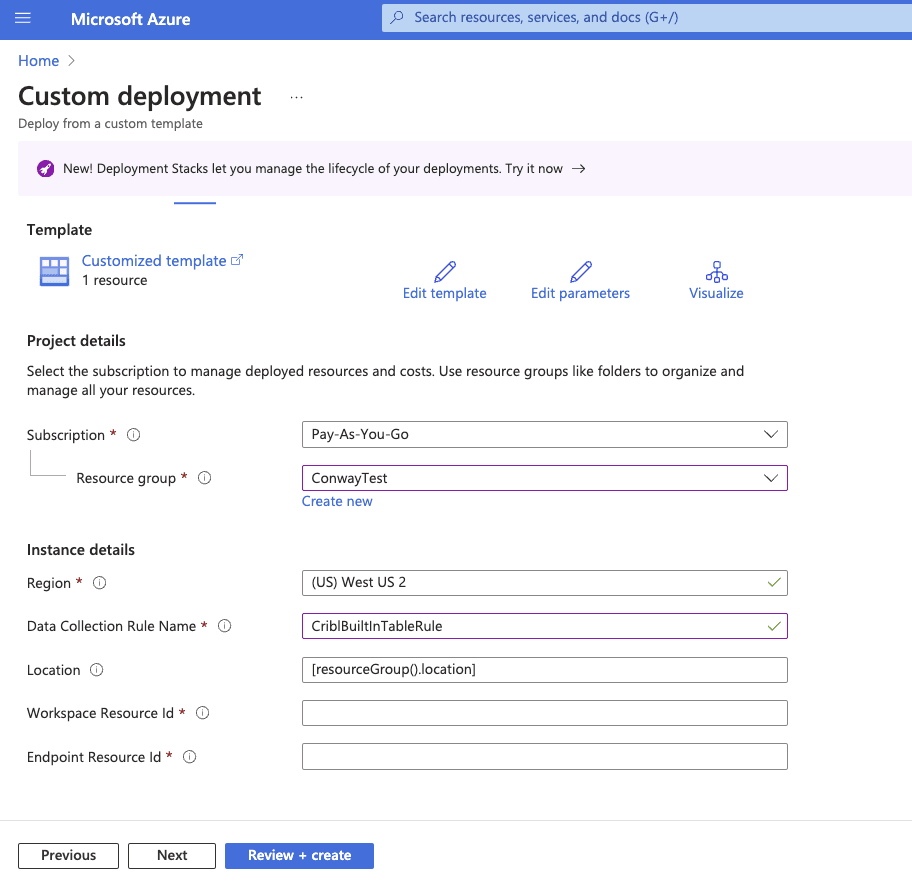
Click “Review + Create” and then “Create.” When your deployment is complete, open the DCR resource by clicking “Go To Resource.”
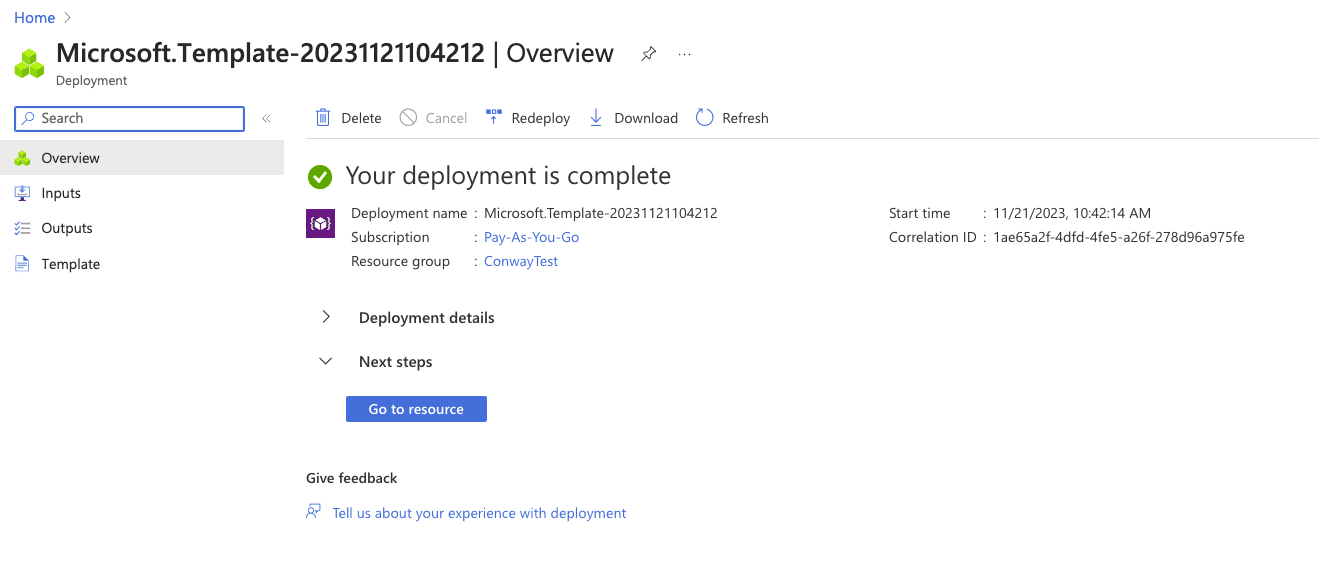
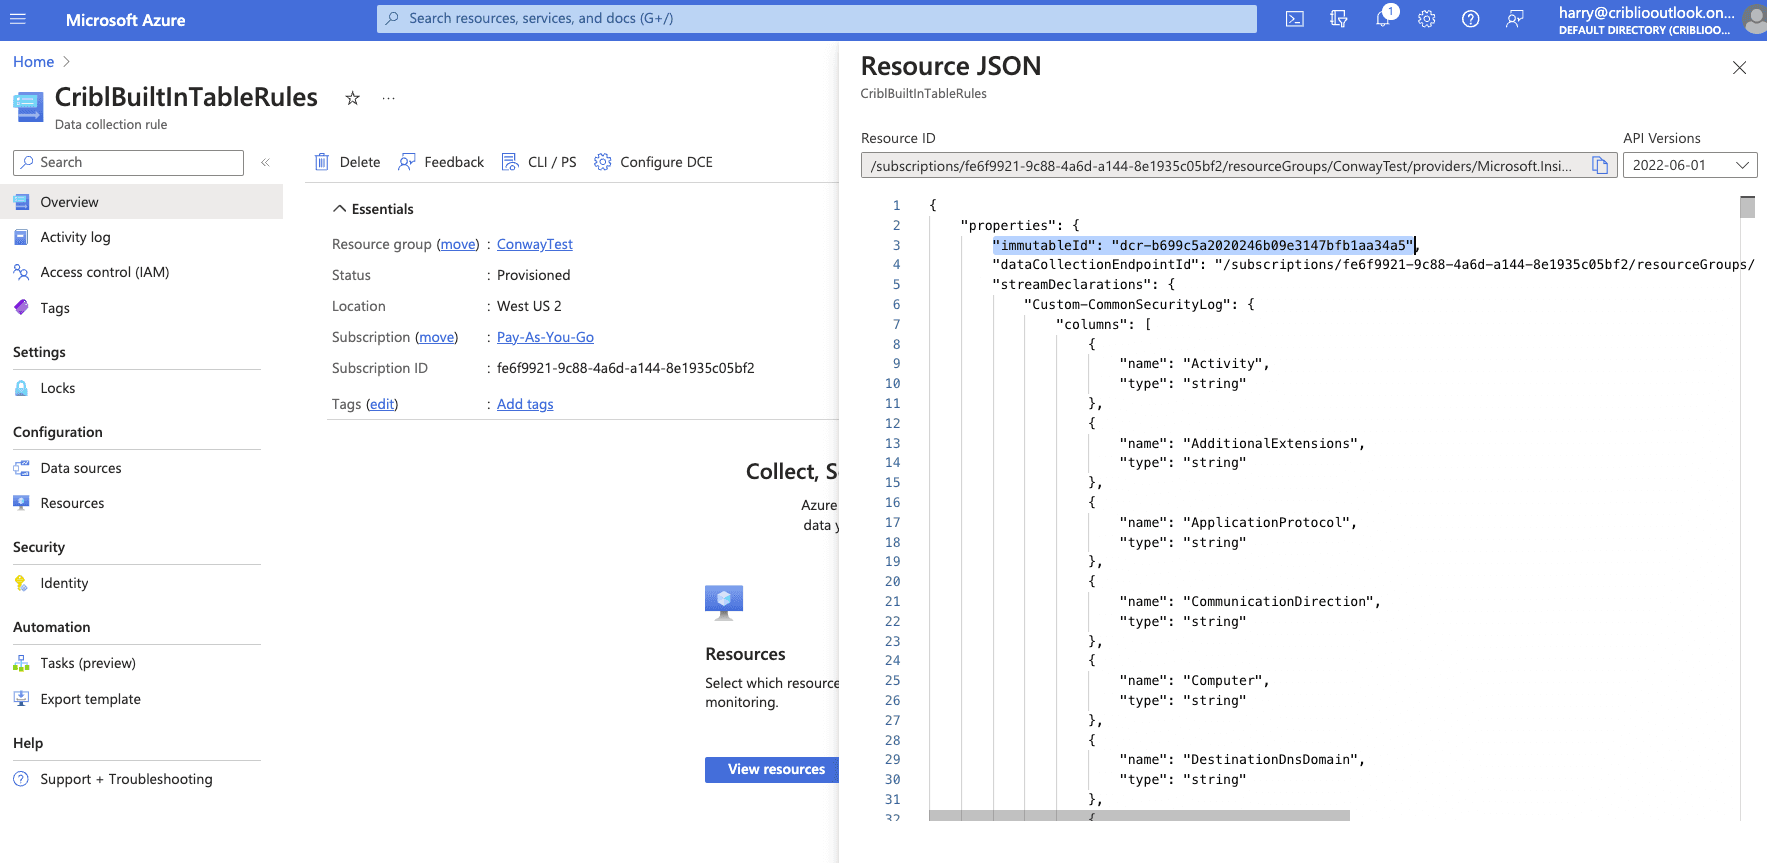
Select “JSON View” and copy the immutableID.
Add Role Assignment to the DCR
Open the “Access control (IAM)” section on the left navigation within the Data Collection Rule and select “Add role assignment.”
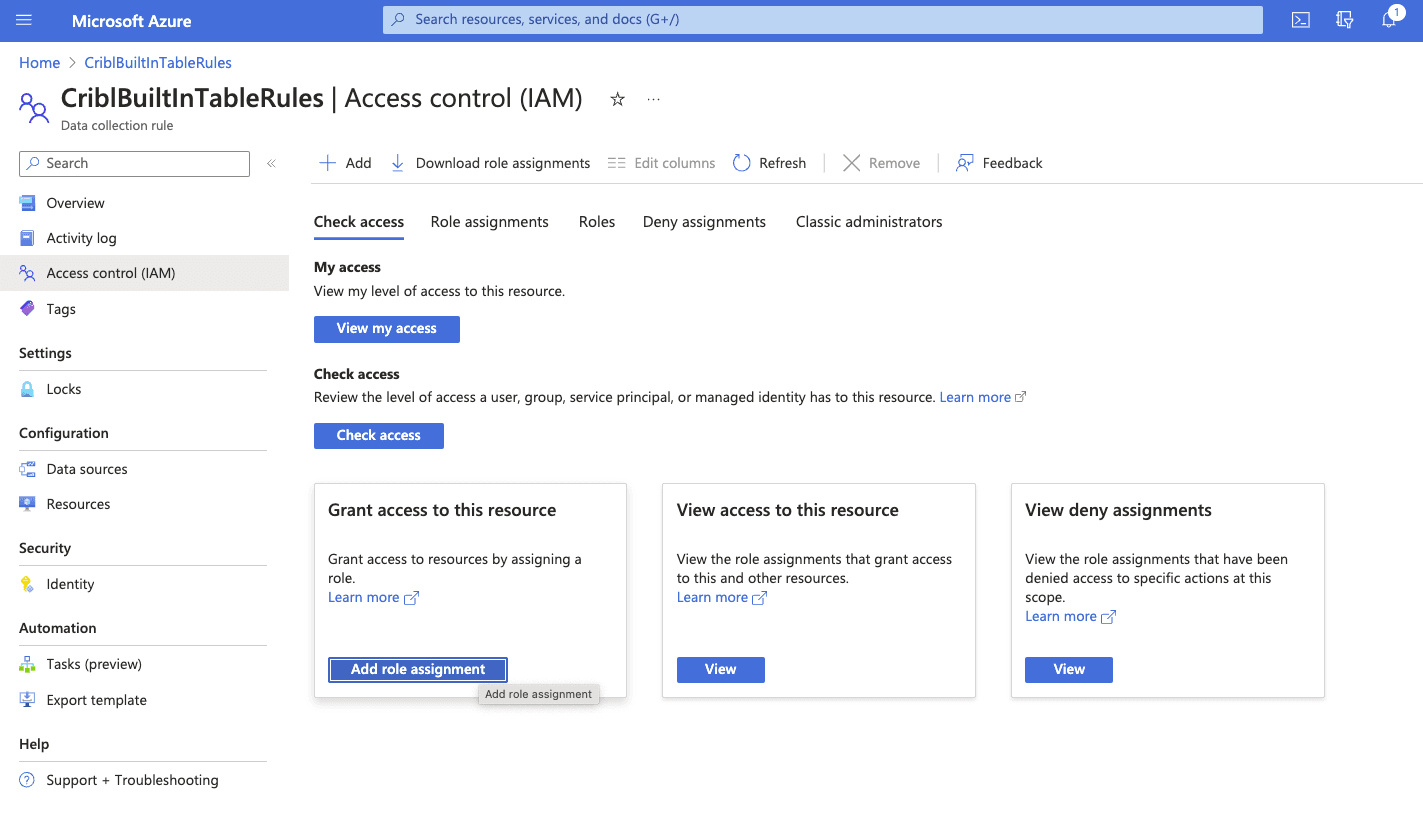
Search and select the “Monitoring Metrics Publisher” role and then click “Next.”
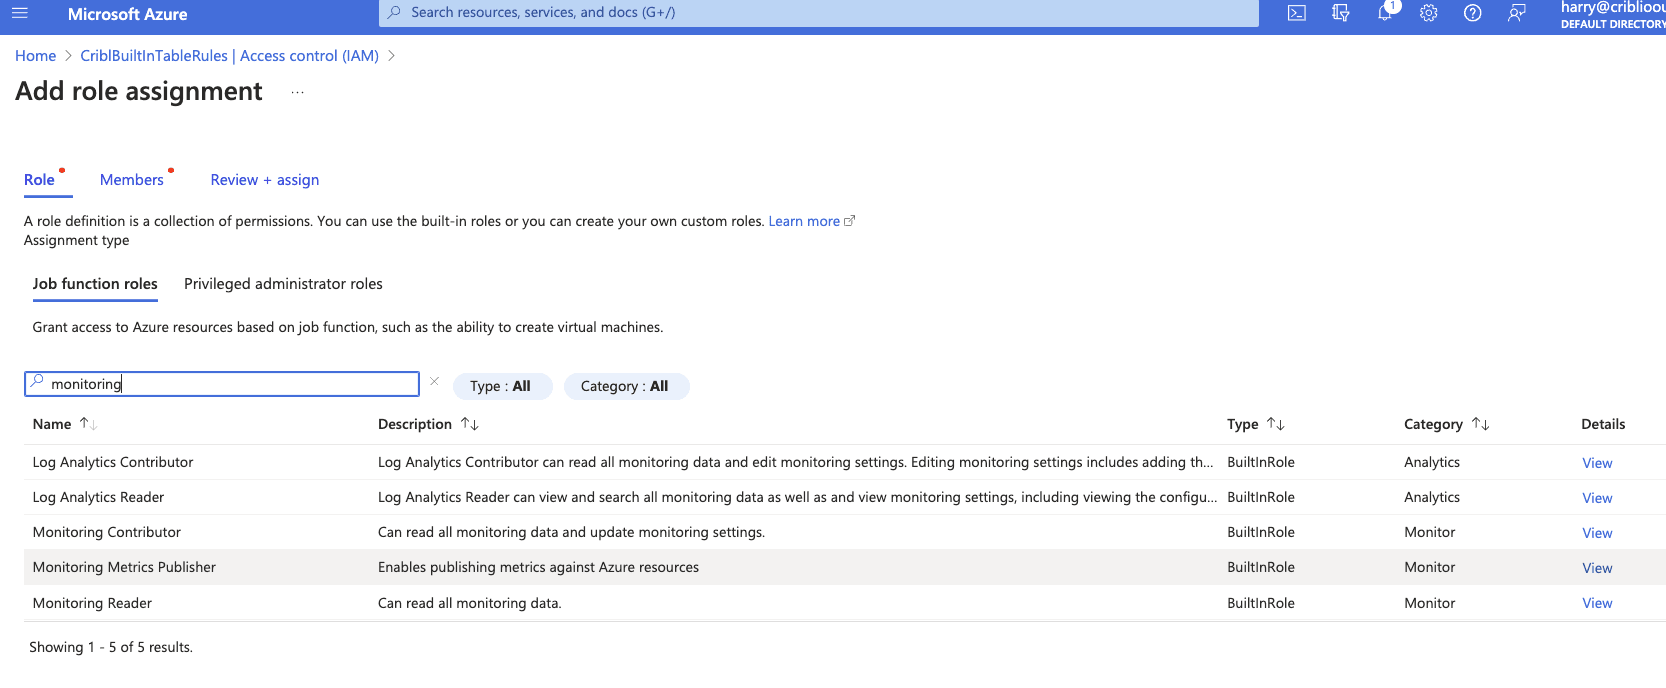
Click “+ Select members” and select the Application created when you added Credentials (first step). Click “Select” and “Review + assign” to add the assignment.
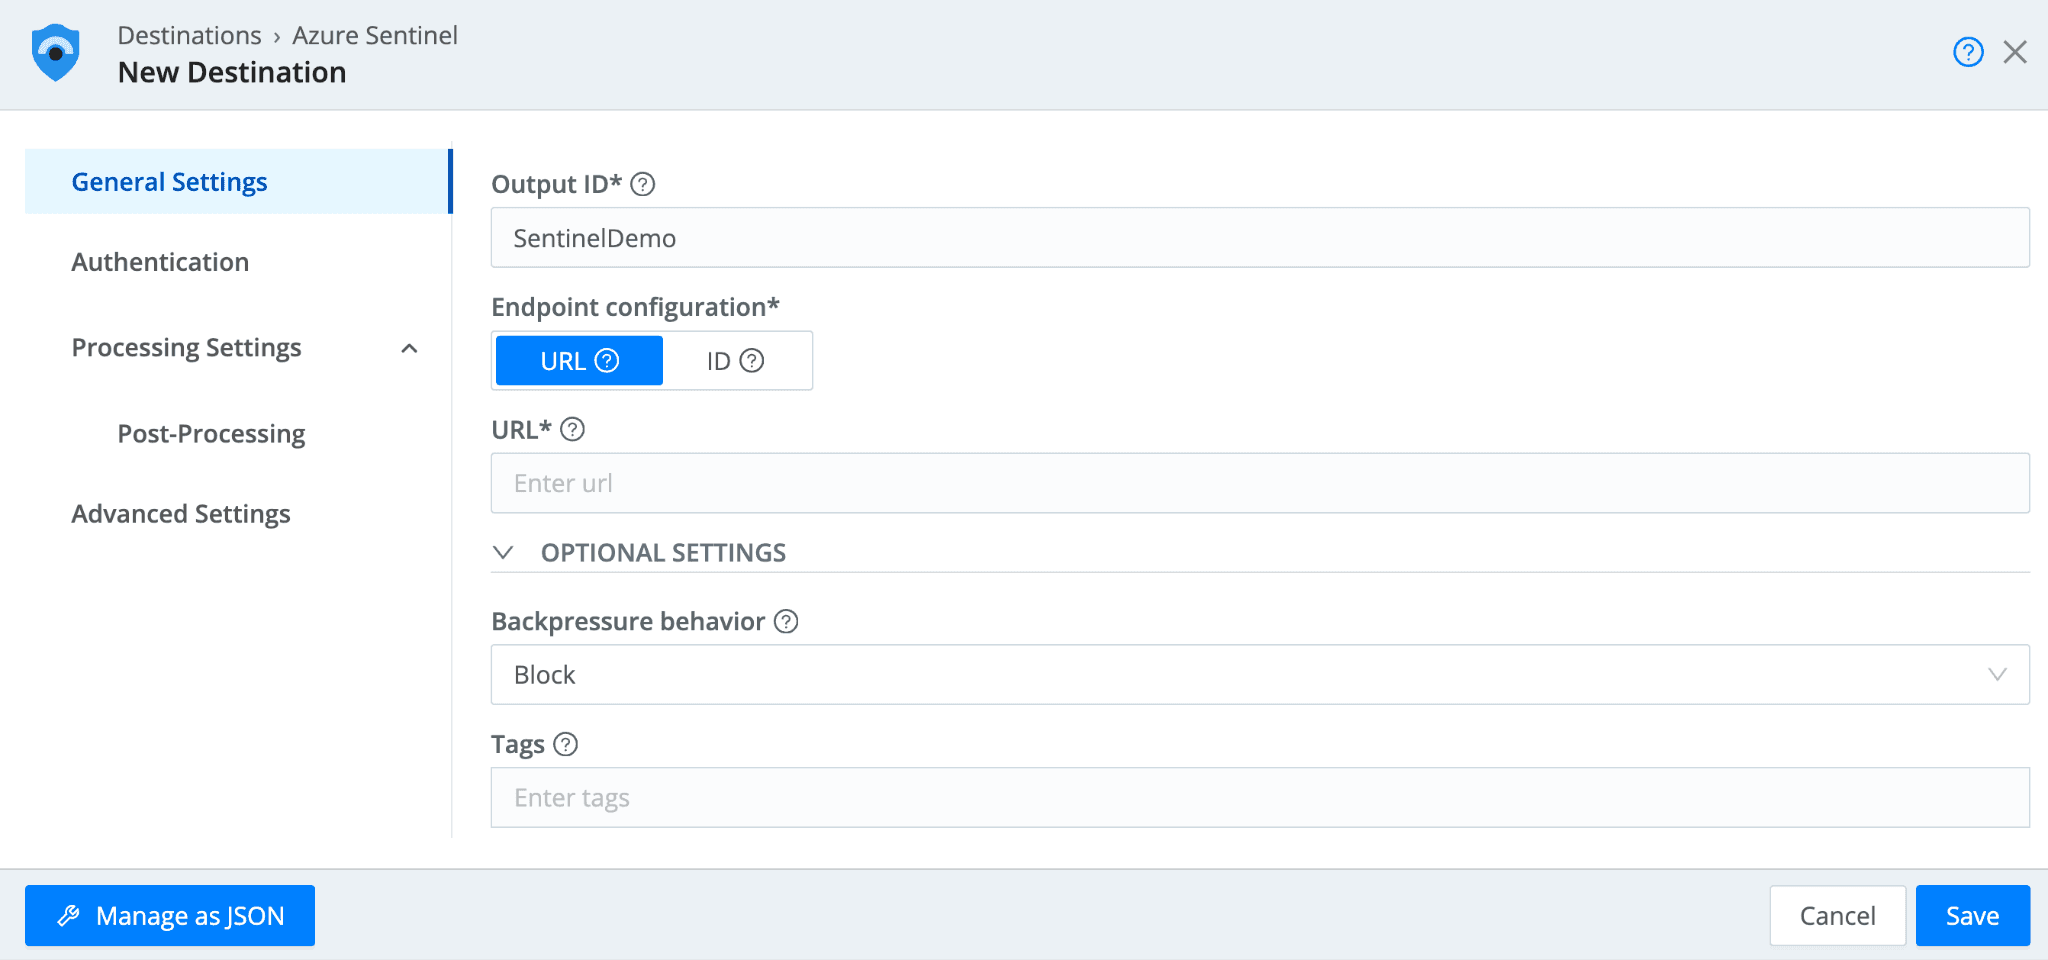
Configuring the Cribl Sentinel Destination
Once Sentinel is set up, we can go into Cribl Stream to set up the Sentinel Destination to write data to the native Sentinel tables. Please note that a single Cribl Sentinel Destination will correspond to one built-in table in Sentinel. If you wish to write to multiple built-in tables, you will need a Cribl Sentinel destination configured for each.
From Stream, in the Manage >> Data >> Destinations menu, navigate (or search) to the Sentinel Destination.
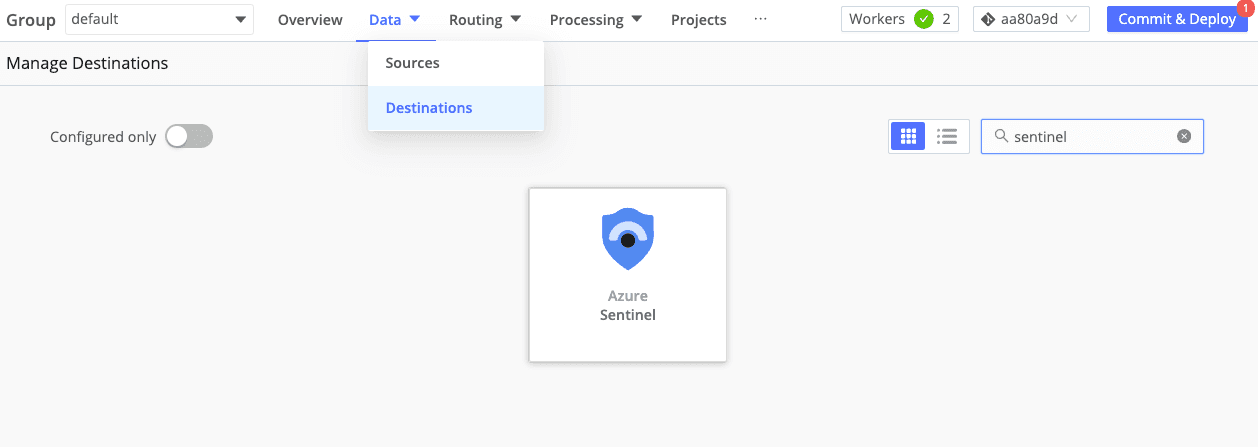
Select the tile and click “Add Destination.”
In configuring the new Sentinel destination, you will need the URL of your DCE and DCR. You can find this by navigating to the “Resource Graph Explorer” using the search bar and running the following query:
Resources

| where type =~ 'microsoft.insights/datacollectionrules'

|mv-expand Streams= properties['dataFlows']

| project name, id, DCE = tostring(properties['dataCollectionEndpointId']), ImmutableId = properties['immutableId'],

StreamName = Streams['streams'][0]

| join kind=leftouter (Resources

| where type =~ 'microsoft.insights/datacollectionendpoints'

| project name, DCE = tostring(id), endpoint = properties['logsIngestion']['endpoint']) on DCE

| project name, StreamName, Endpoint = strcat(endpoint, '/dataCollectionRules/',ImmutableId,'/streams/',StreamName,'?api-version=2021-11-01-preview')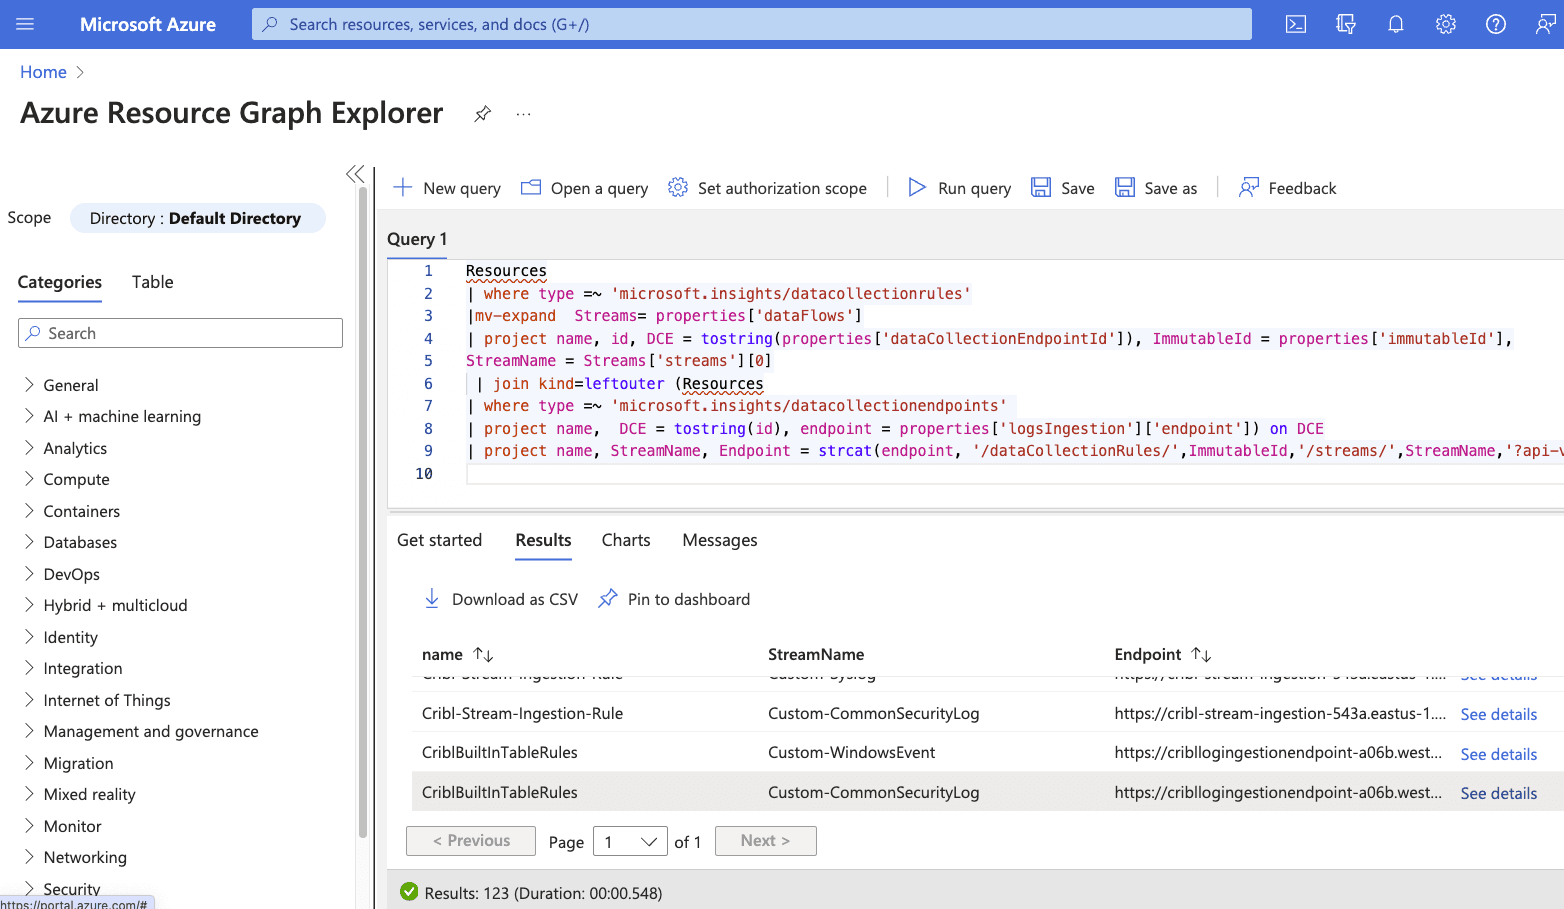
You will see four endpoints associated with your DCR because the DCR routes to 4 different built-in tables.
If you do not have permission to run the query, the URL can be built as follows:
Log Ingestion URL (Collected from the DCE)
+ the static string “/dataCollectionRules/”
+ ImmutableID (Collected from the DCR)
Example: Dcr-b699c5a2020246b09e3147bfb1aa34a5
+ the static string “/streams/”
+ stream name as defined in the DCR (inside the template)
Example: Custom-CommonSecurityLog
+ query parameter for the API version
Example:?api-version=2021-11-01-preview
In the Authentication tab, enter the Login URL, OAuth secret, and Client ID.
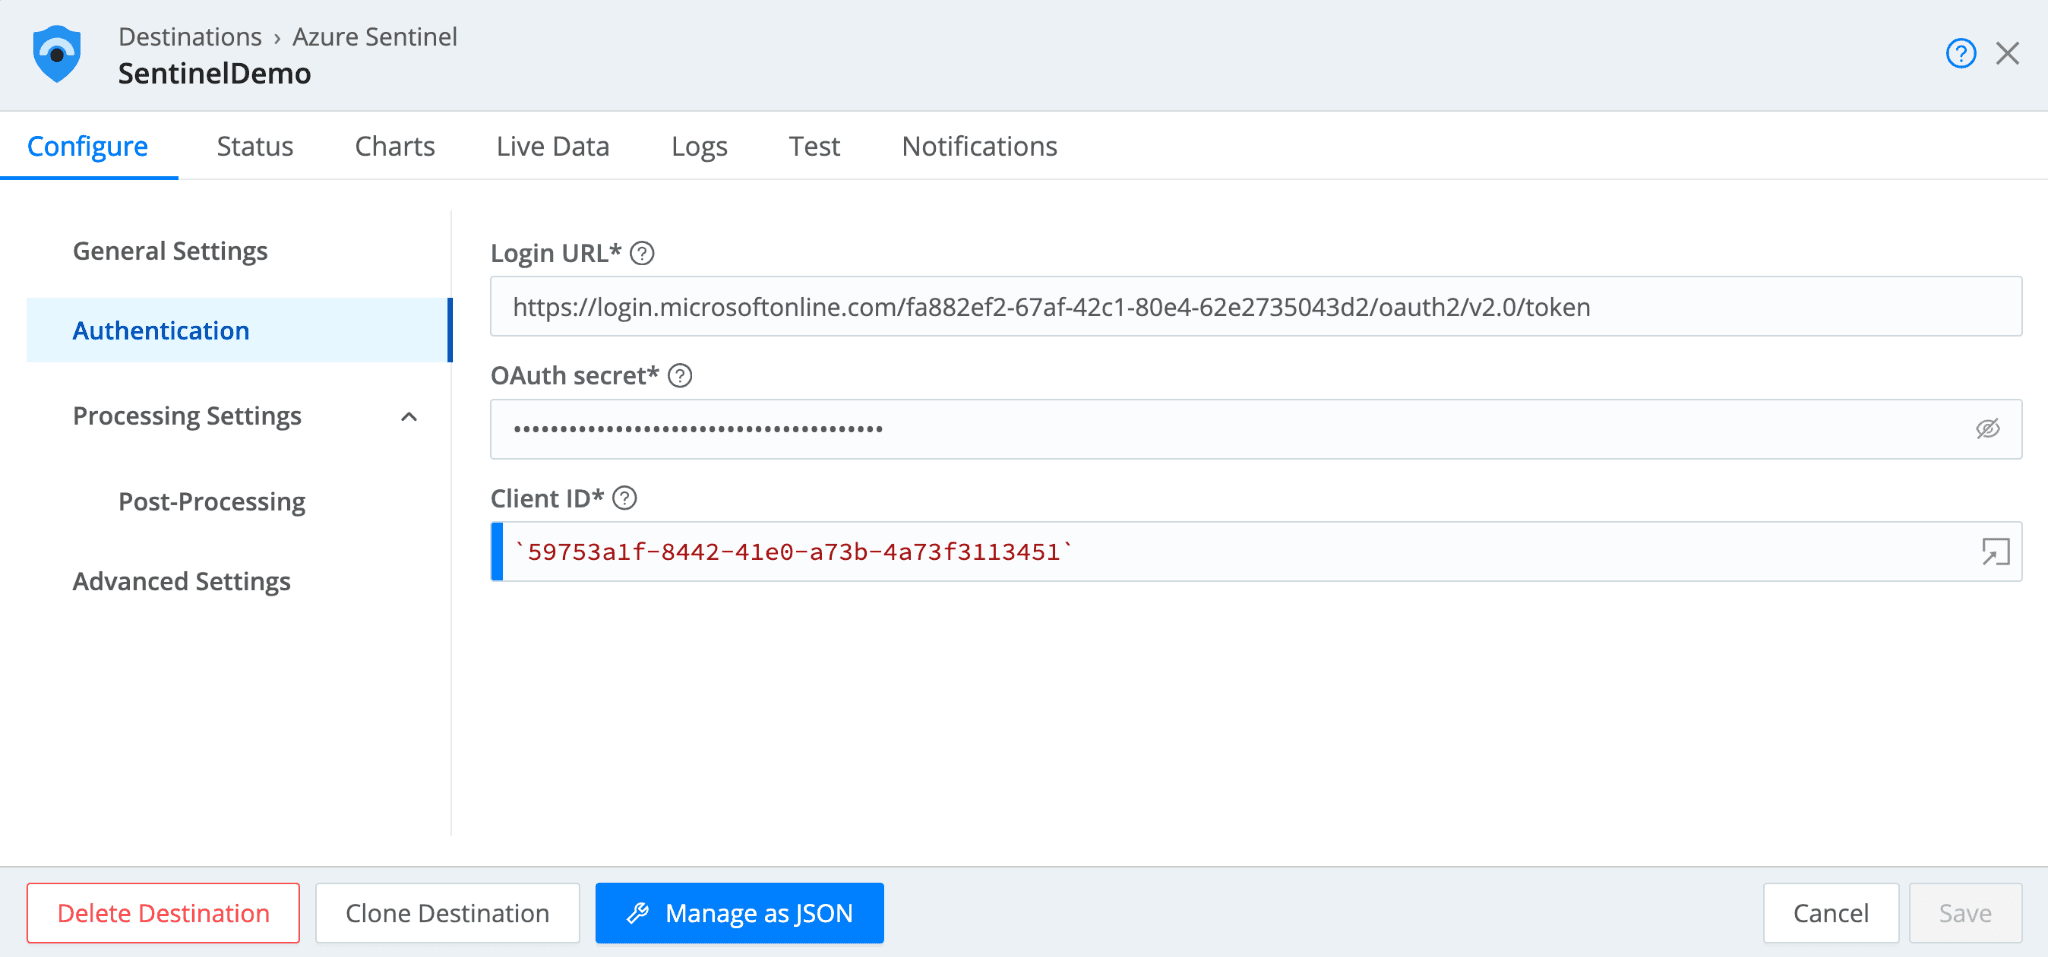
The Login URL will be:
https://login.microsoftonline.com/${tenant-id}/oauth2/v2.0/token
Tenant ID, OAuth secret, and Client ID can be found in the Creating Credentials section for this blog.
Sending Data to Sentinel
Once the Configure options are all entered in the Sentinel Destination, you can send sample test data to Sentinel to validate the connection.
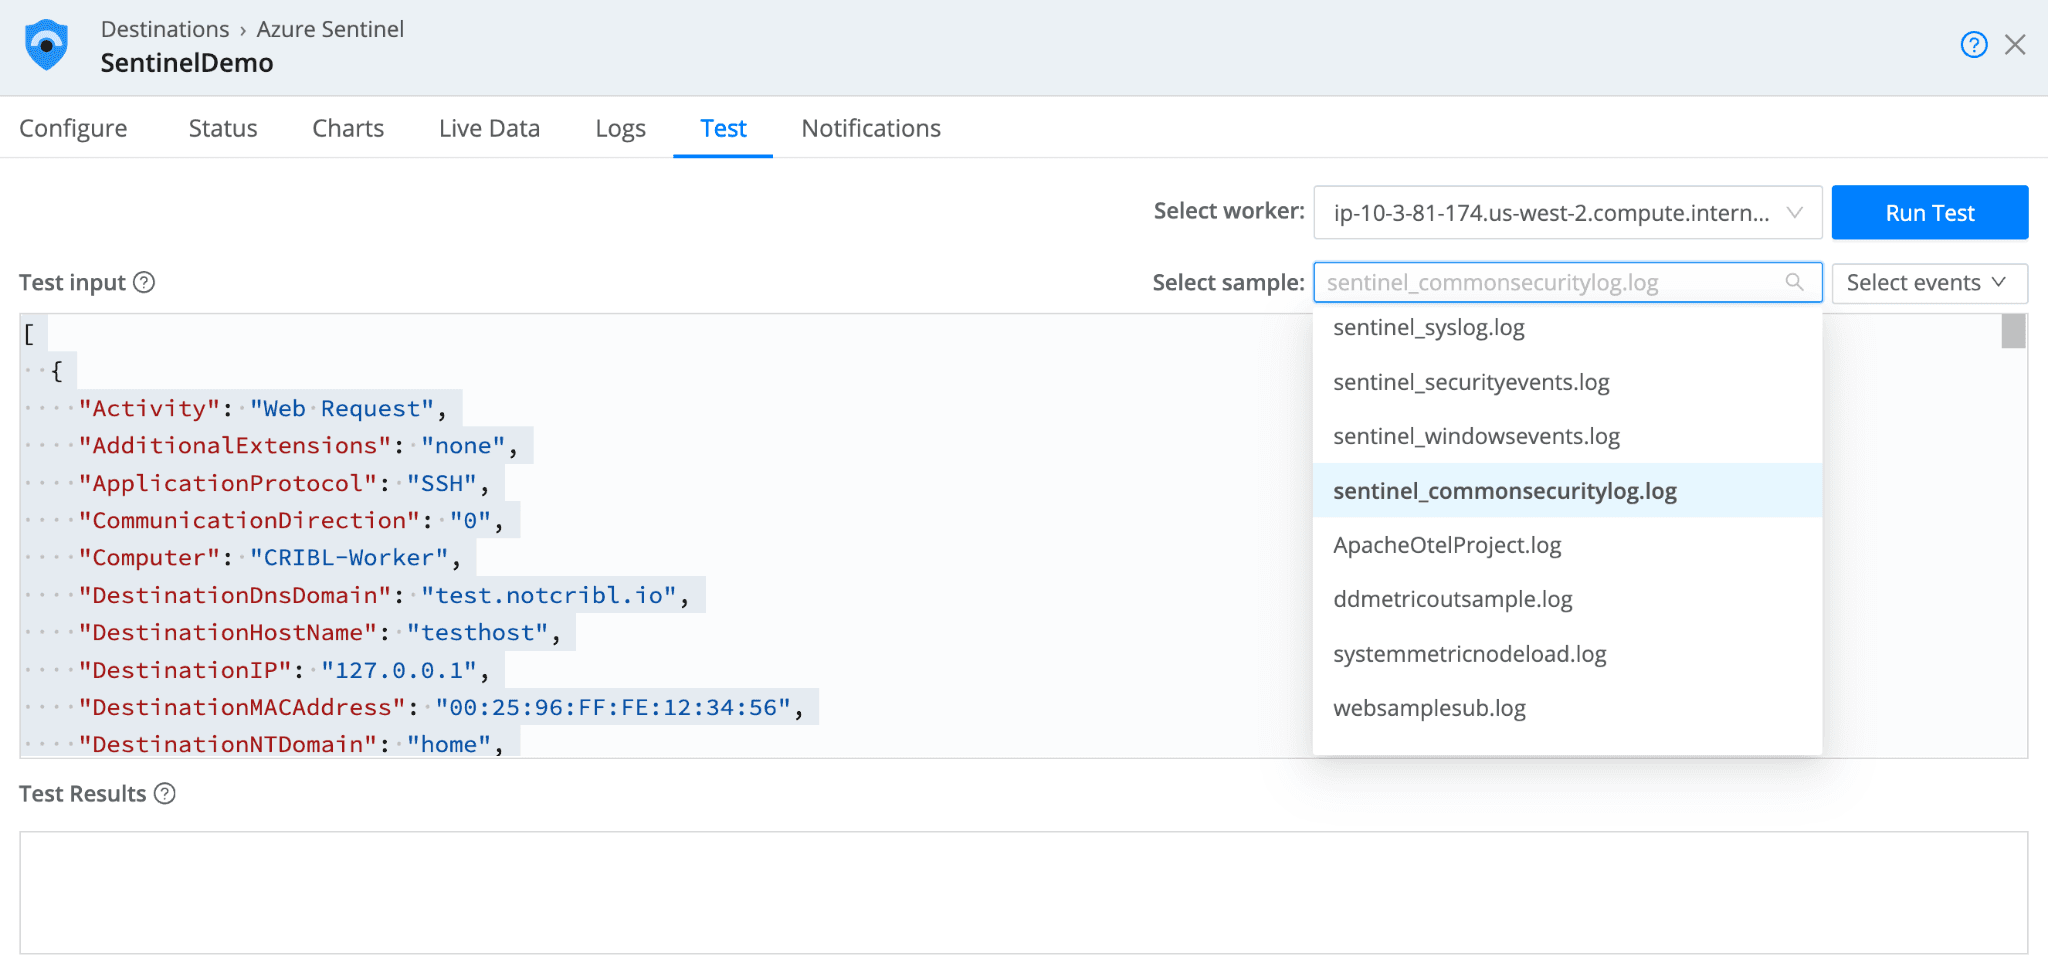
From the Sentinel Destination, select the “Test” tab. In the “Select sample” dropdown, you will see four samples for the four Sentinel built-in tables. Select a sample and select “Run Test.”
You can also take advantage of Sentinel sample data in the DataGen source. In Cribl Stream, navigate to Manage >> Data >> Sources and search for the DataGen source. Select “Add Source” to add a new DataGen.
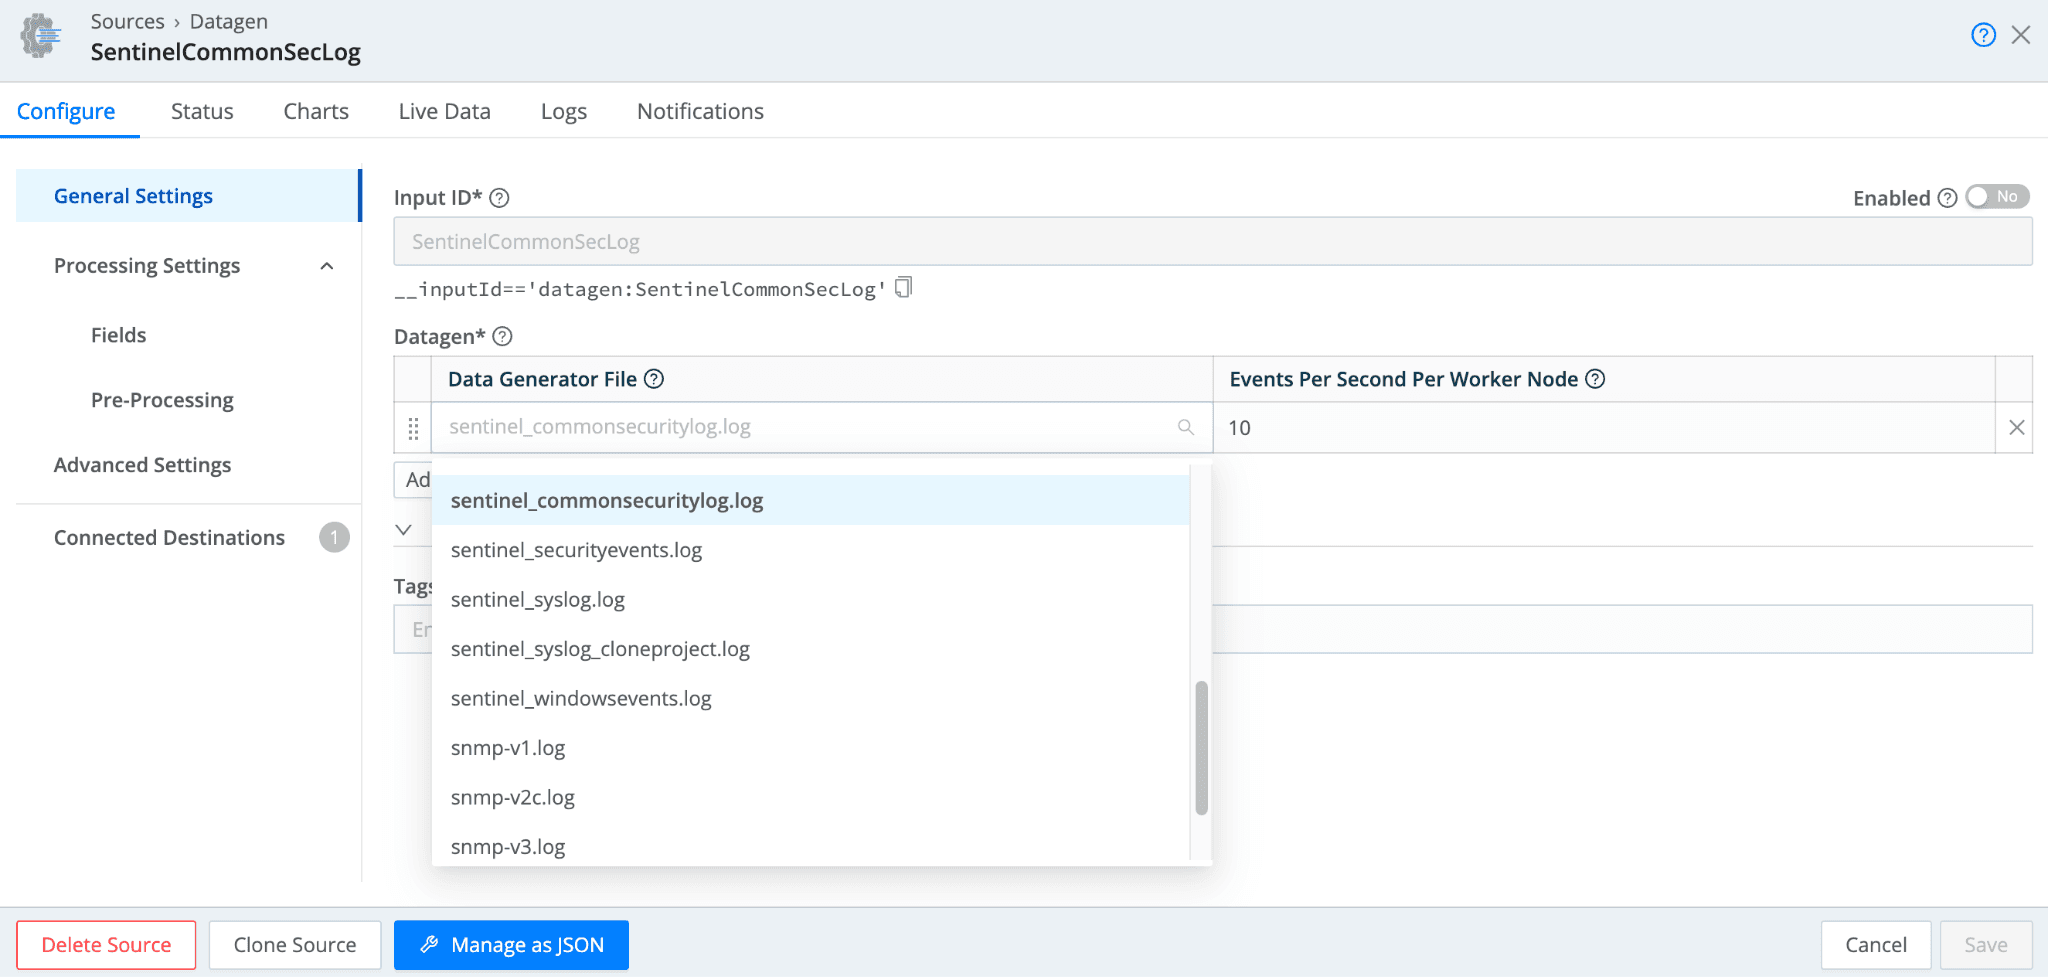
The Data Generator File dropdown has several Sentinel data samples to select from. After selecting a sample, you can associate the DataGen with the Sentinel Destination by selecting “Connected Destinations.”
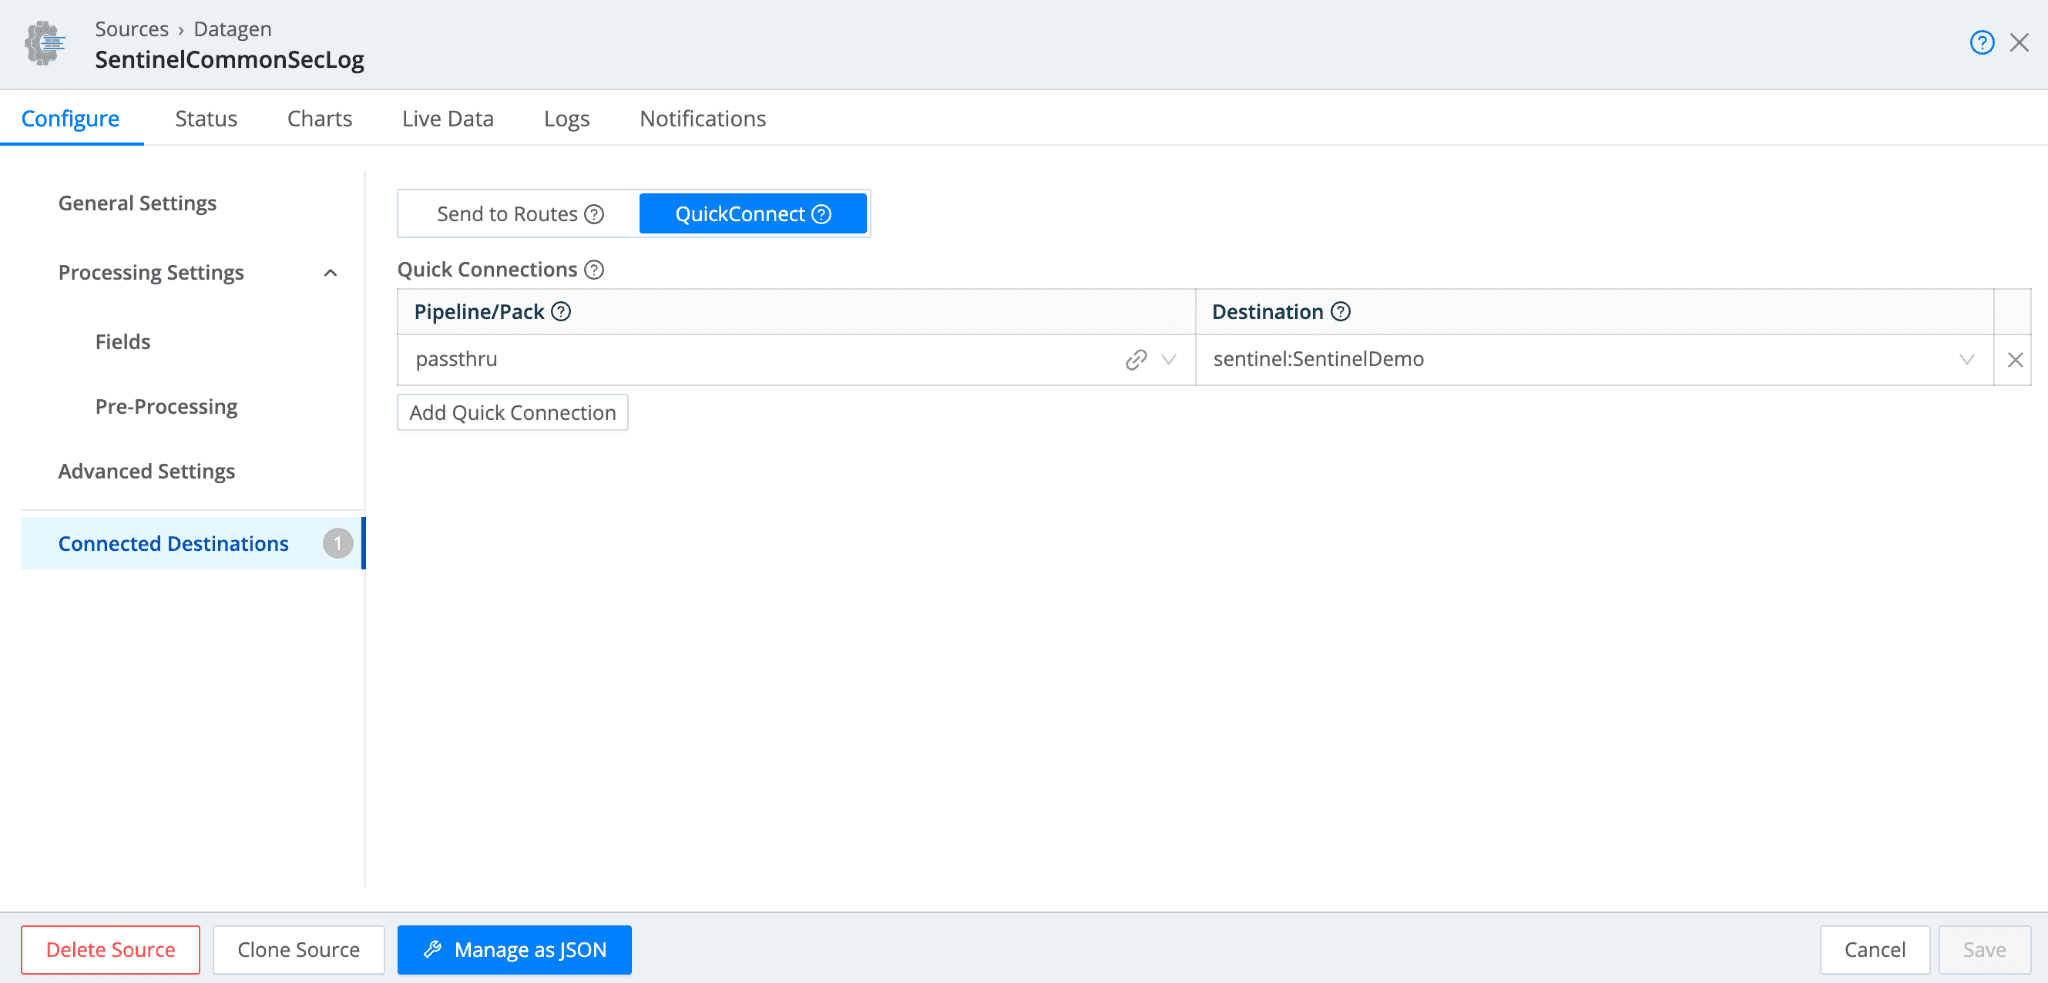
Select “QuickConnect”, and assign “passthru” as the Pipeline/Pack, and select the corresponding Sentinel Destination that you configured. Be sure to Save and Commit and Deploy.
Querying Data In Sentinel
To validate that data is landing in Sentinel, navigate to your Sentinel workspace and select “Logs.”
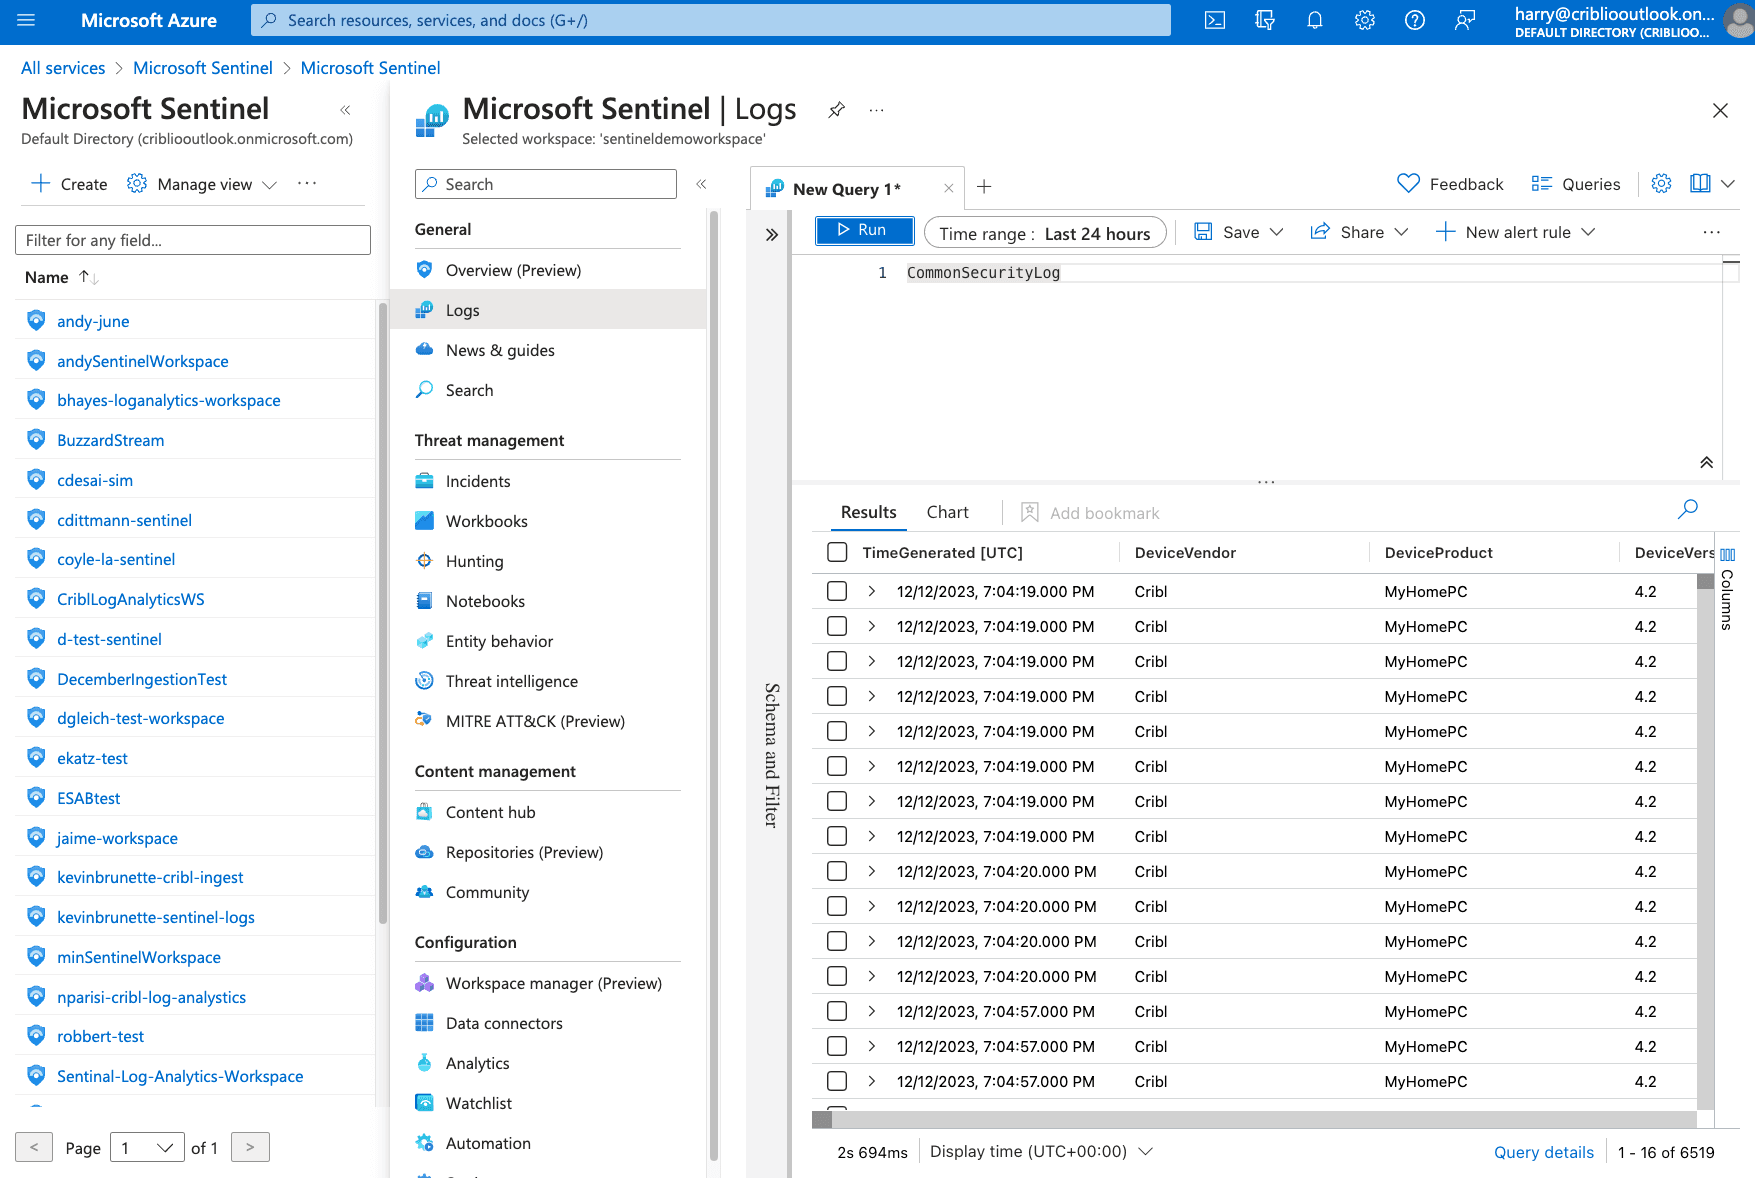
In the Query window, type in the built-in table where Cribl is writing data. For Example “CommonSecurityLog”. Select “Run”. Results will be displayed in the table.
To view data in a chart view, run the following query:
${nativetablename} |

summarize count() by bin(TimeGenerated, 1m), TenantId |

render timechart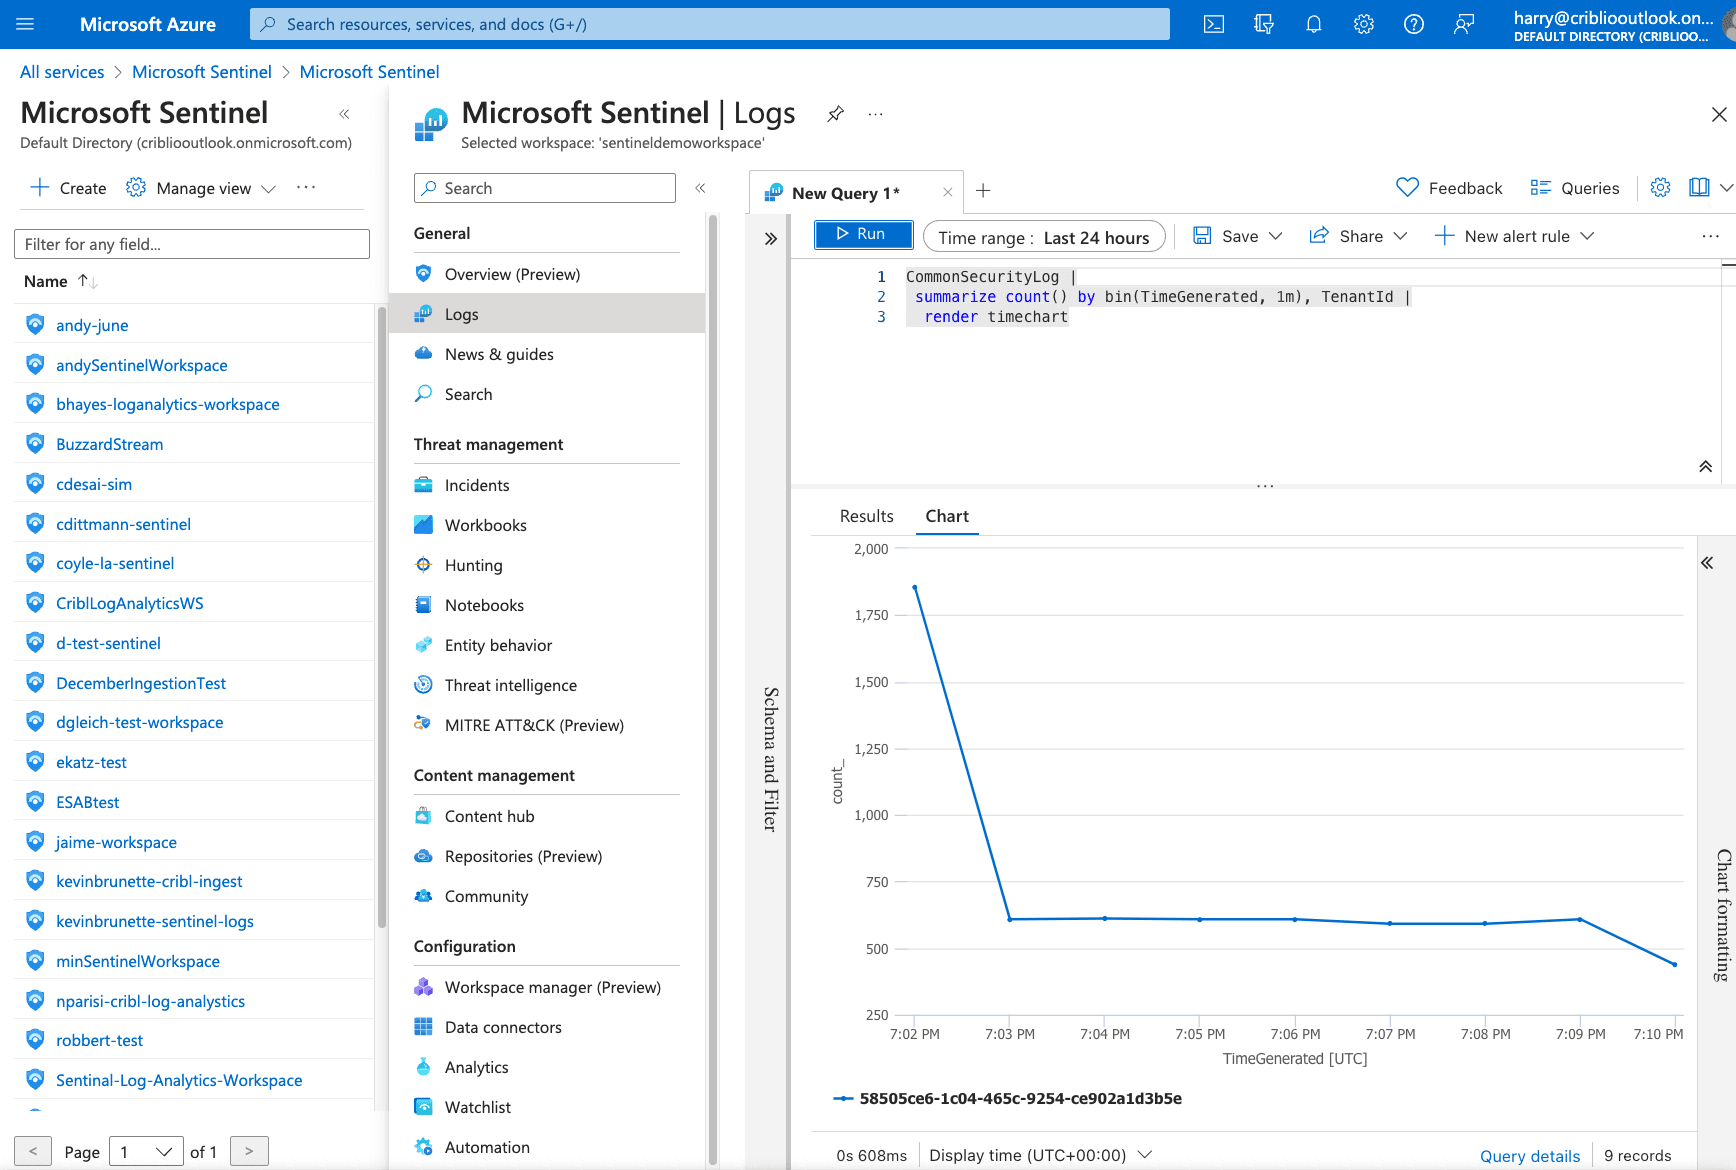
Additional Resources
If you want to use Cribl to write more data for Sentinel, please reference our “Microsoft Sentinel” Pack in the Cribl Packs Dispensary. This pack is designed to convert Palo Alto, Syslogs, Windows Events, Fortinet, and CEF logs into the formats necessary for writing to Sentinel. If you’re new to Cribl and want to learn more, you can create a free Cribl.Cloud account for instant access to all our products, try our Sandboxes, or start a free certification class.