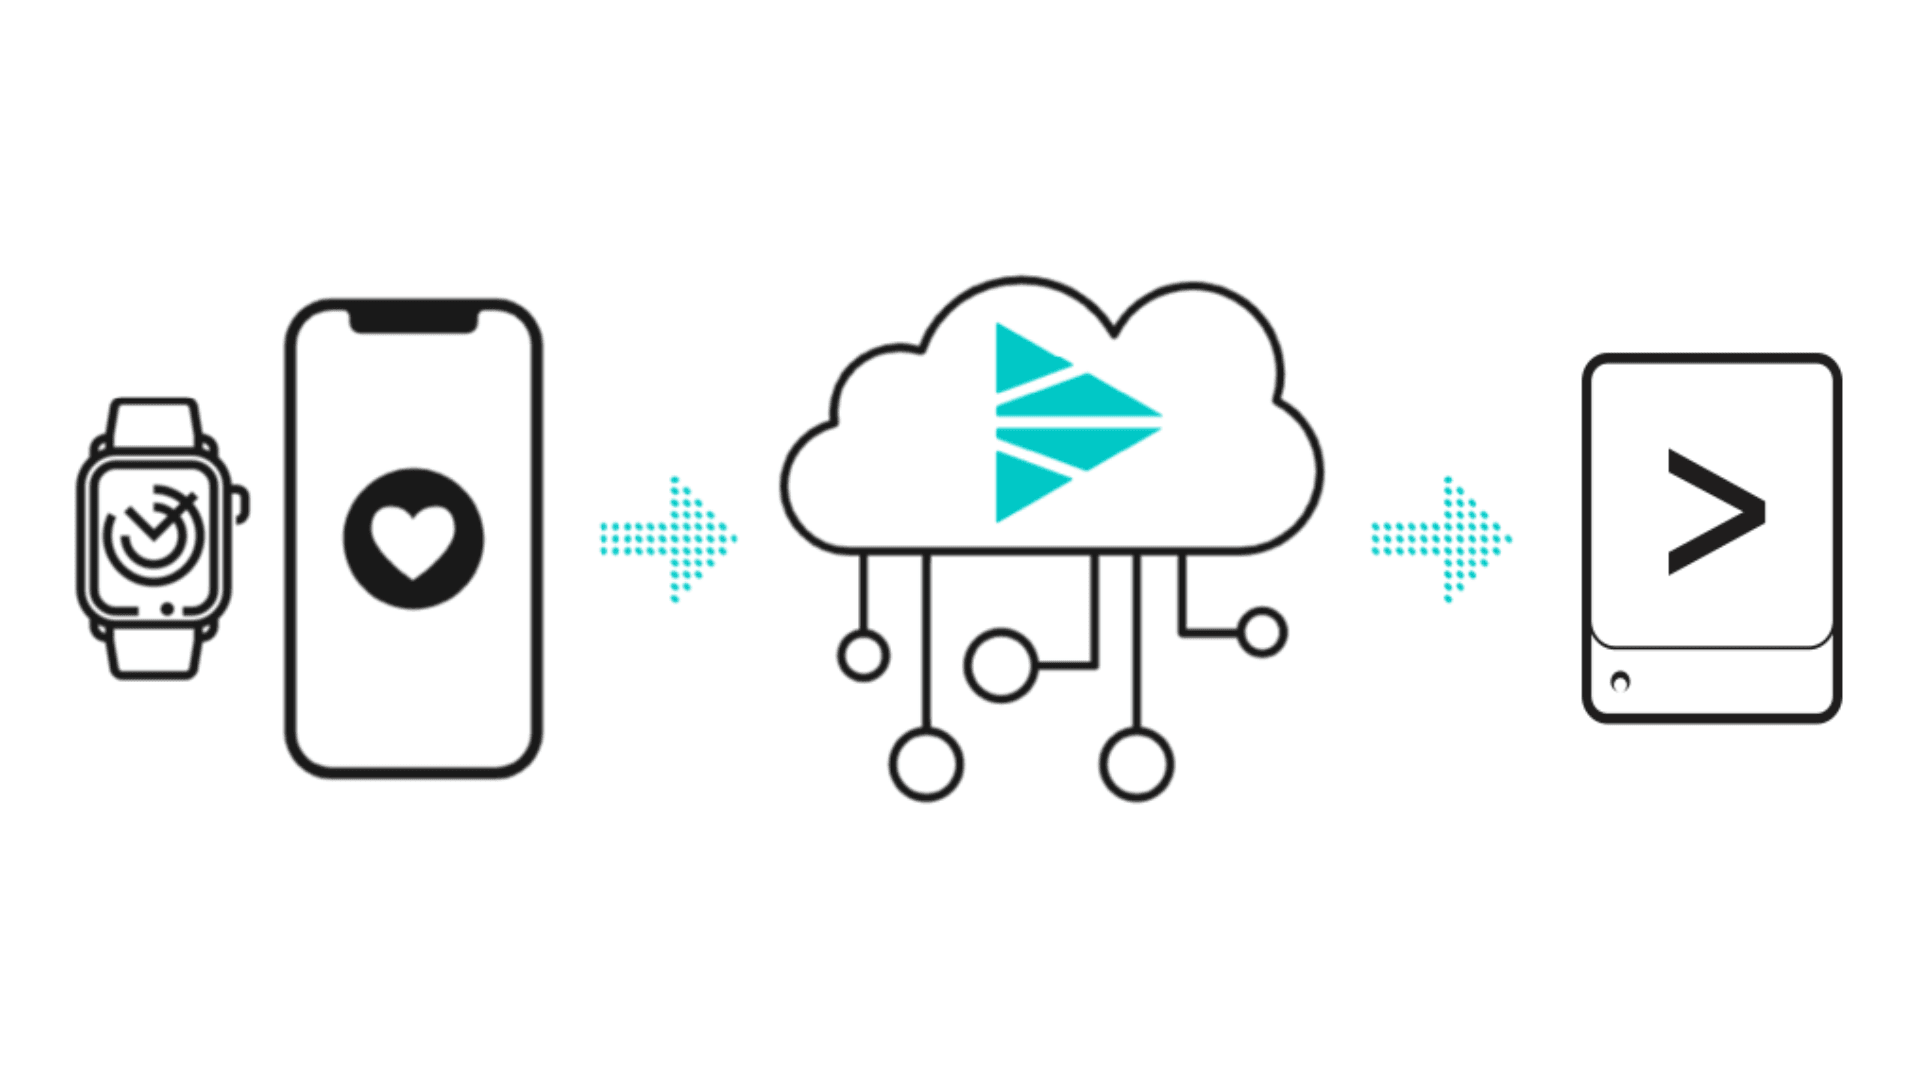

Health data is notoriously difficult to collect, route, and transform. I will demonstrate how to leverage the Cribl Stream Observability Pipeline to solve these problems and help users search their Apple Health data.
We live in an amazing time where information is readily available and shareable at a moment’s notice. With that said, it is quite difficult to capture our own health metrics and send them to analytical tools for research and understanding. Typically, we are forced to use platforms built by fitness trackers, smartwatch companies, or other proprietary solutions. This closed ecosystem makes it exceedingly difficult to look at data about you! What if you wanted to see your Heart Rate and Water Consumption over time, year over year? What if you wanted to monitor your Blood Glucose in relation to your activity? Harnessing your health data opens a whole world of possibilities.
Apple has developed a powerful Health Kit, which allows developers and smart device manufacturers to store your health data locally on your iOS device. We can access this data via an iOS app from the App Store to be sent to an analytics tool of our choosing. The problem is, this data isn’t shaped in a format easily usable by analytical tools. With the power of Stream, not only can we work with difficult data sets, but we can send them to our favorite destinations in the proper format.
In this tutorial, you will learn how to configure Stream to receive and send Apple Health data to Splunk. I will provide a PACK to transform the data as well as a dashboard to get you up and searching. By the end of this tutorial, you will be able to search your own health data and create a dashboard of you!
This Tutorial will Cover
Launching a Free Stream Cloud instance
Configuring Stream Sources and Destinations
Configuring Health Auto Export iOS app
Reviewing your Health data in Splunk
Prerequisites
A free Cribl Stream Cloud Instance
A Splunk Instance (or another destination of your choosing, for this guide we will use Splunk)
Apple iPhone with Health Kit enabled (this is where our data comes from)
Apple Watch (or other devices reporting to the Apple Health Kit)
iOS App: “Health Auto Export” (this app collects Apple Health Kit data and ships data to Stream)
Setting Up Stream Cloud
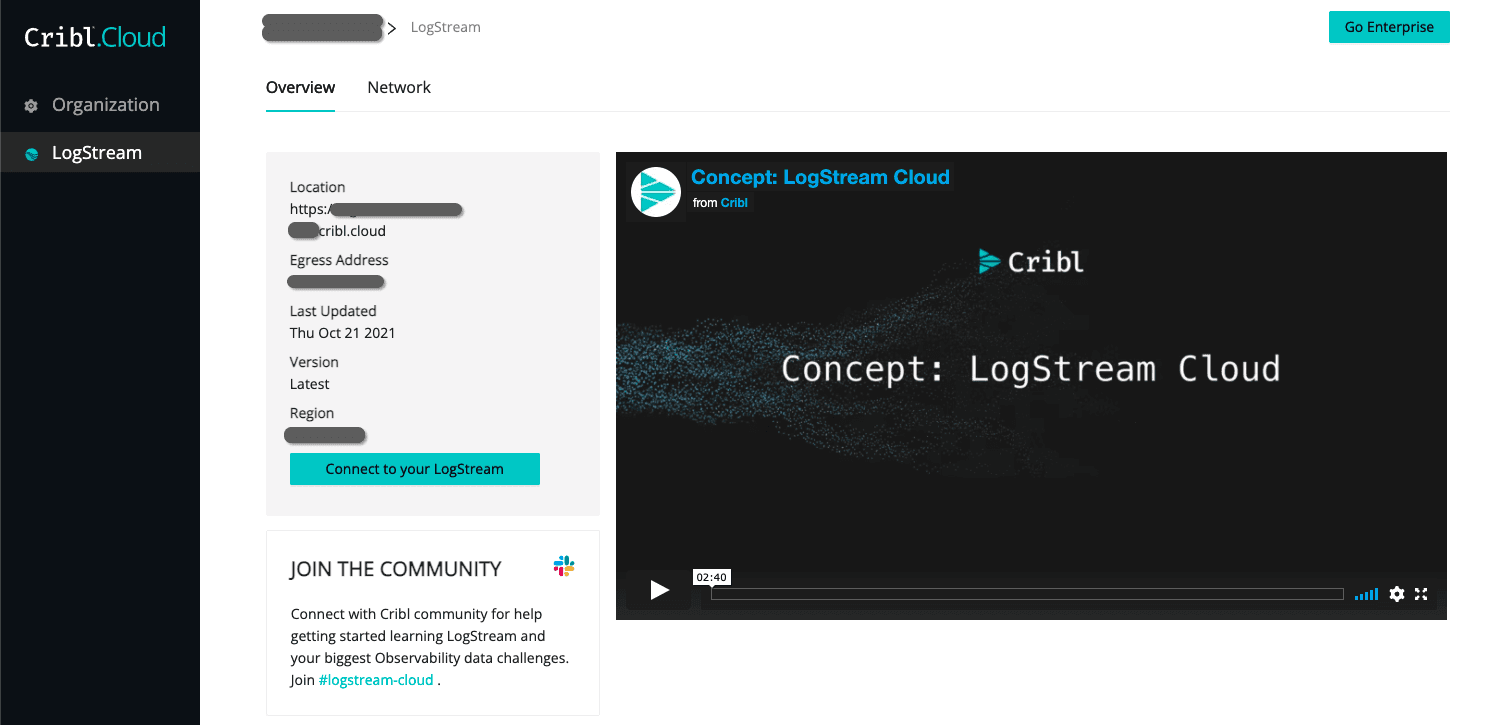
After you sign up for a free instance of LogStram Cloud, click on “Network”, and review your available inbound ports as well as the URL to your Cribl.Cloud instance. Take note of your HTTP url/port as it will be utilized in the following steps. It will likely follow a similar format to https://YOUR-CLOUD-HERE.cribl.cloud:PORT-NUMBER-HERE.Take note of the HTTP source, we will be leveraging this URL and PORT in our sources.
Configure Stream Sources
Connect to your Stream instance and select Sources from the main page. Find HTTP and Raw HTTP sources from this list. We will be modifying the default configurations in the next step.
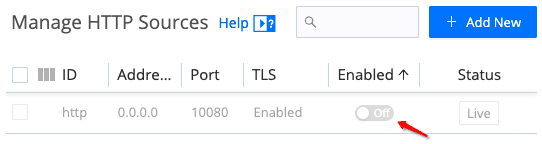
For this tutorial, we will be leveraging the open port for HTTP in our Raw HTTP configuration. In Cribl.Cloud Free, only select ports are available by default as is notated on the welcome screen (Enterprise Cloud removes this restriction, please contact us for more information). While you are free to use any port in the open range (20000-20010), we will repurpose 10080 for the Raw HTTP source in this tutorial. Click on the HTTP source and disable it from the toggle on the right side of the screen. The toggle should be in the “off” position.
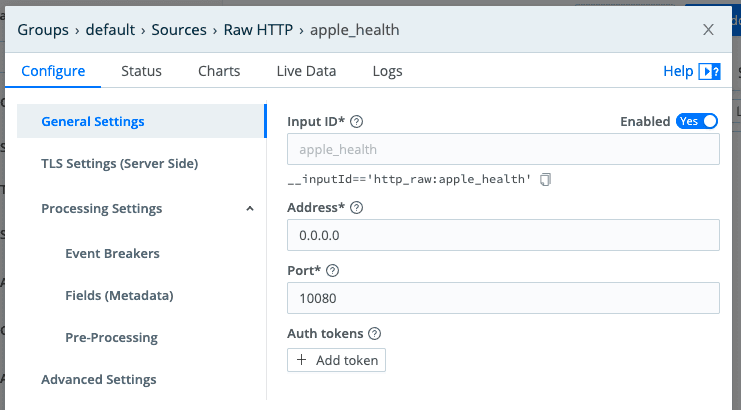
Next, navigate to the Raw HTTP source click on the default item to open the configuration. Fill out the form with the following values.
Input ID: apple_health
Address: 0.0.0.0
Port: 10080 (remember, we are using the open port from the HTTP source in the prior step. Make sure it is not in use for a HTTP source.)
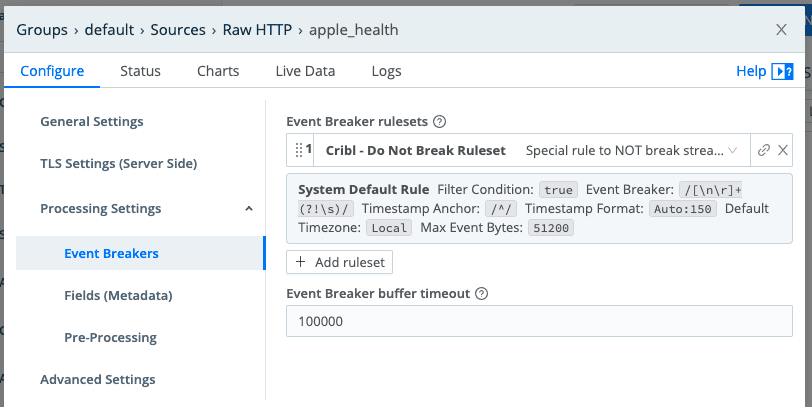
Next, we will configure the Event Breaker to the “Cribl – Do Not Break Ruleset” via the dropdown. Verify your Event Breaker buffer timeout is set to 100000 milliseconds as shown here.
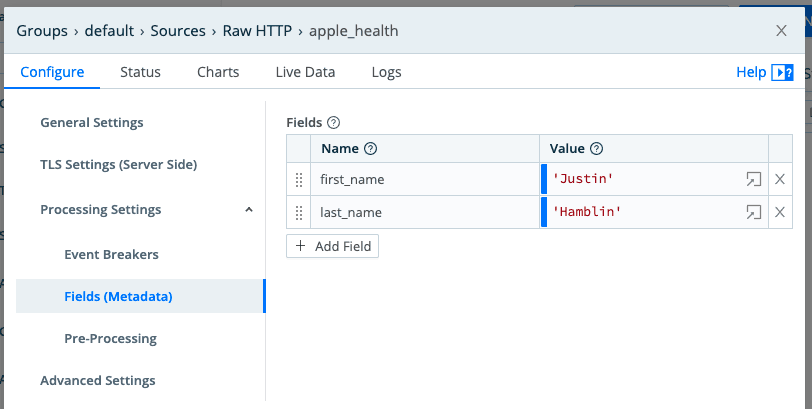
Optional: At this time, if you’d like to enrich the events received on this port, you may add fields that make sense to you. In this example I added First and Last name fields. Feel free to add as many field value pairs as you’d like. Adding fields at the source configuration is a quick and easy way to identify who this health data belongs to. If you choose to create a Multi User dashboard, you could create a new Raw HTTP source on another port, and configure the Fields with a unique First and Last name, say a family member. Remember, these fields are only assigned to data received on this port, and is done in the Pre processing pipeline. For more information on this topic, please see this page in the Cribl docs.
Configure Stream Destinations
As part of the prerequisites, you will need a Splunk deployment that can receive data from the Stream Cloud instance. In this tutorial, I am leveraging a single instance of Splunk in AWS with a free developer’s license. Any new install of Splunk will include a free 500gb License which will satisfy the needs of this tutorial. If you are leveraging multiple indexers OR a clustered Splunk deployment, please configure your destination via the Splunk Load Balanced destination in the Cribl UI.
Splunk is running and configured to receive data on port 9997 (if you would like to leverage a different port, you can customize your Stream destination in the next steps.)
Verify your role allows you search our index (apple_health) and you can create/edit dashboards.
Splunk Configuration Settings > Forwarding and receiving > Configure receiving > Add New > Port: 9997
Settings > Indexes > New Index > Name: apple_health
Configure your Splunk Destination in Stream
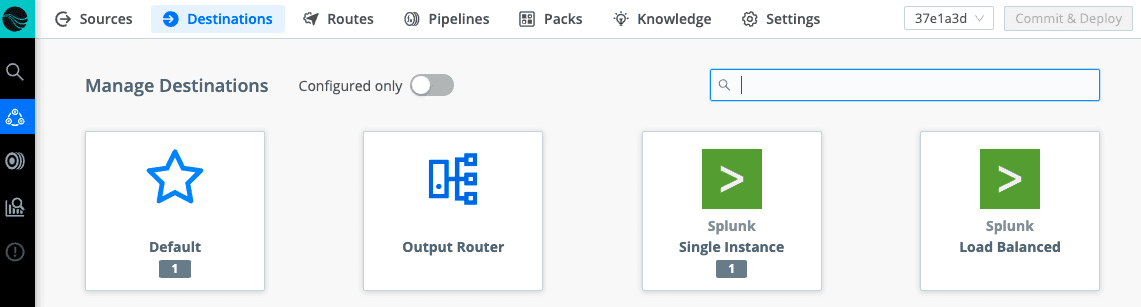
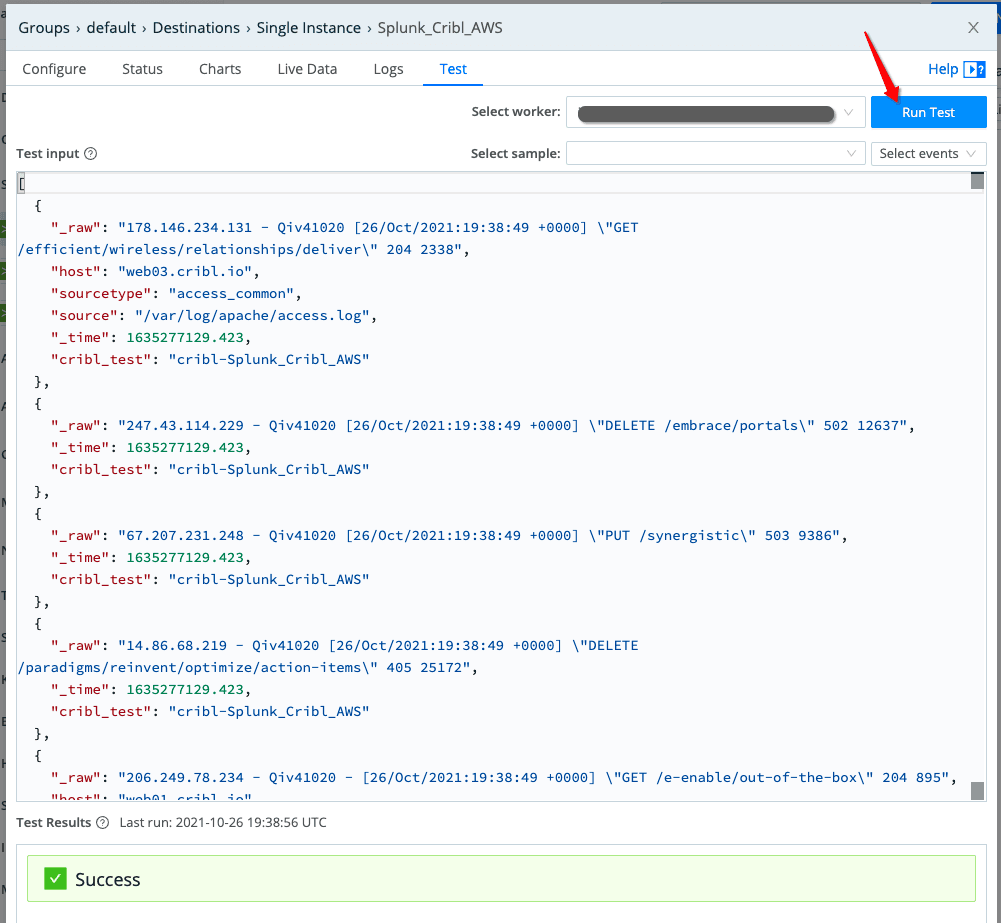
At this point, we can configure Stream to send data to Splunk. Click Destinations In Stream and navigate to Splunk Single Instance. From here we will click on the Add New button.
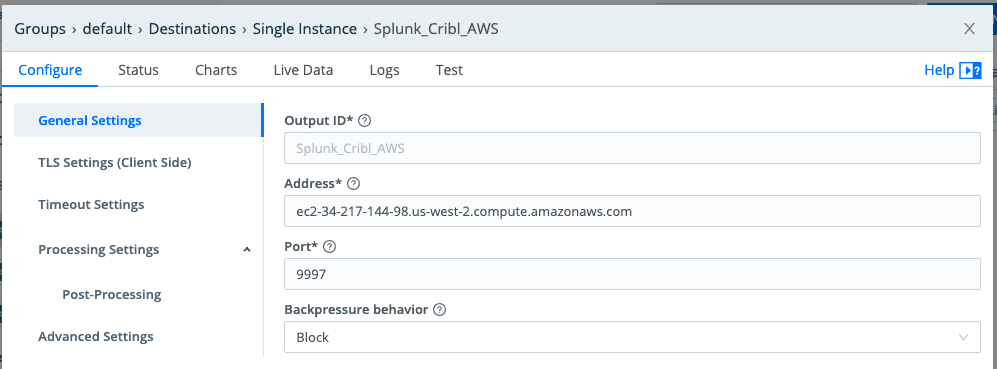
Enter the details of your Splunk deployment where data can be SENT. Splunk should be configured to receive data via the Address and the Port you configured in Splunk (see the prior step above).
Once configured click on the TEST tab and verify Stream is able to communicate with Splunk. You can verify the event was sent with the Green Success at the bottom of the screen in Stream or by searching index=main in Splunk. If this test fails, review your configurations above and verify you have a valid network path to Splunk.
Install the Apple Health pack
About Cribl Packs
Cribl Packs are a great way to save and share preconfigured routes and pipelines as well as sample data. With packs, our customers are able to quickly parse and transform difficult data sets. Packs help our customers go to production with common data sources in minutes/hours rather than weeks/months. See our Pack Dispensary here to see packs that are currently available. Check back often as new packs are added frequently. Also, feel free to join our Cribl Slack community to discuss this pack and others in the #packs channel. The cribl-apple-health pack can be found here.
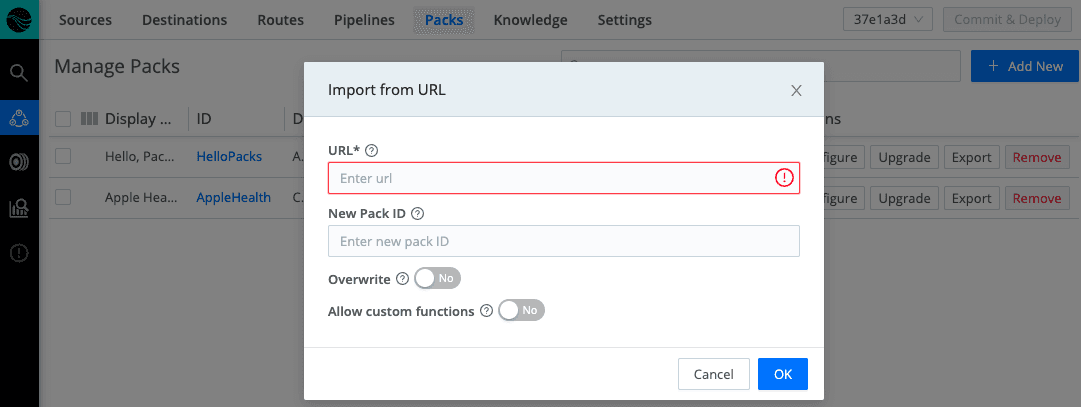
Navigate to: Packs>Add New>Import from URL
New Pack ID: AppleHealth
Click: OK
Configure your First Route
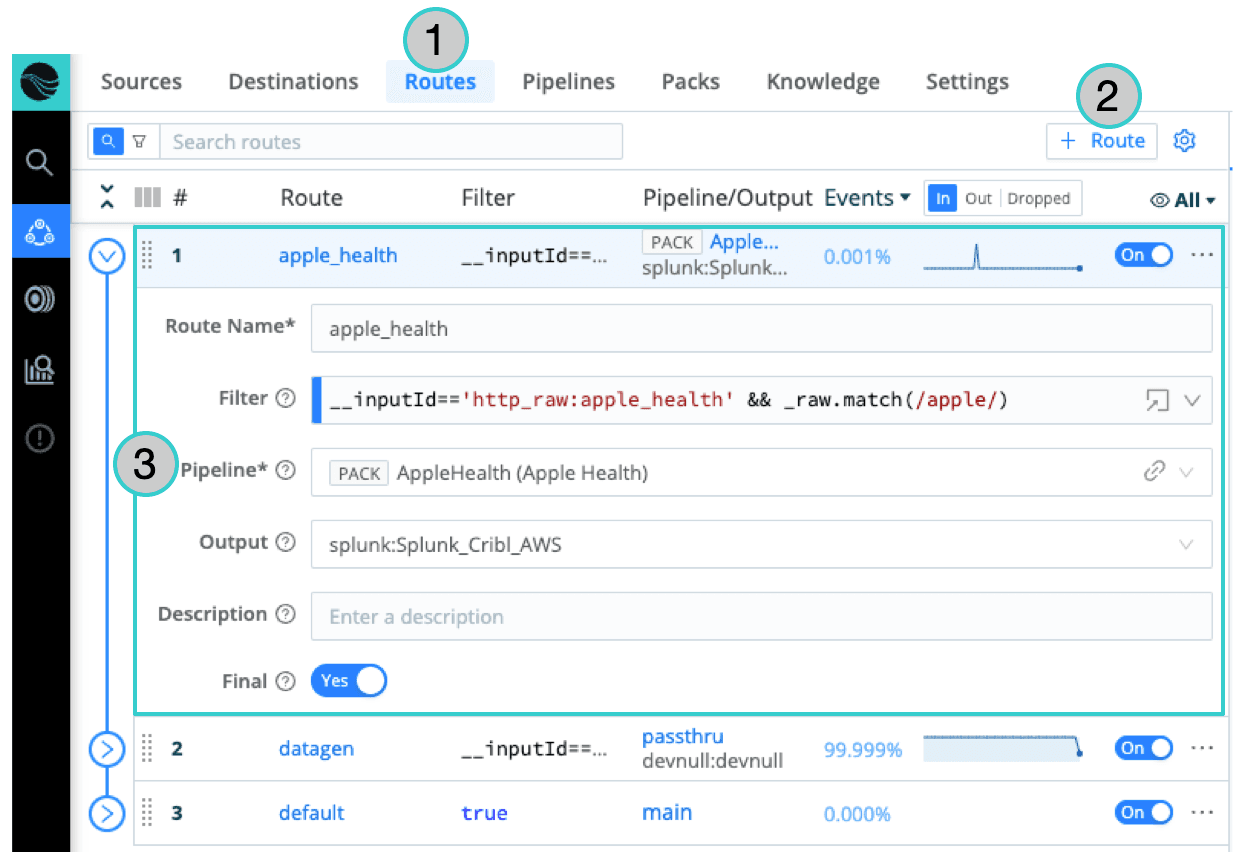
Navigate to Routes and Create a New Route
Click: Routes
Click: + Route
NOTE: Make sure your route is before the “Default” route or your route will NOT collect data to be processed.
Enter the details below
Route Name: apple_health
Filter: __inputId==’http_raw:apple_health’ && _raw.match(/apple/)
Pipeline: PACK AppleHealth
Output: Splunk (the name will be as you configured it in the destinations step above)
Configure Apple Health Exporter
About the Health Auto Export app
Health Auto Export – JSON+CSV offers a 7 day Free Trial, which provides access to Premium features. We will be using the API Export which is only available in the Premium subscription. If you would like to continue after the 7-day trial, please consider supporting this developer and paying for a subscription.
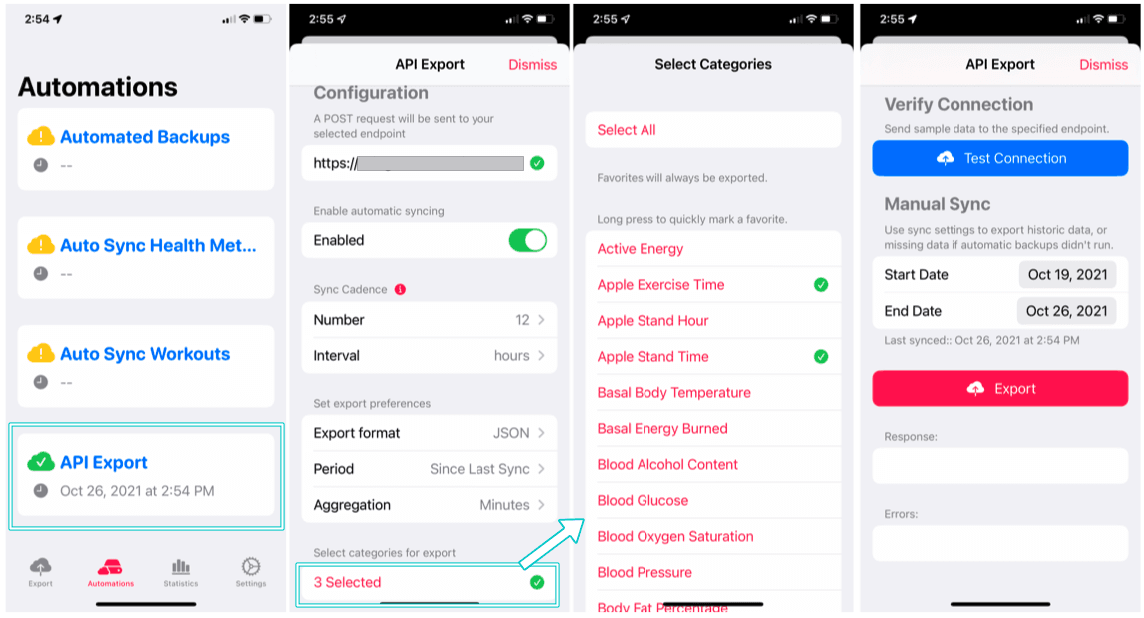
Please follow the configuration steps below. Use the screenshots above for reference.
Tap: Automations > API Export
Set the Cribl Input URL:PORT in the first entry box: Example https://in.logstream.YOURSERVERNAME.cribl.cloud:10080
Enable Automatic Syncing: Flip the ON selector, and set the Sync Cadence. For this tutorial, we will use every 12 hrs.
Set Export Options: Format=JSON, Period=Since Last Sync, and Aggregation=Minutes
Select Categories for Export: For this tutorial select Apple Exercise Time, Apple Stand Time, Heart Rate.
Test your Connection to Stream
Using the Test Connection button in the Health Auto Export app, and the Stream Capture function, we will verify your connection is working as expected.
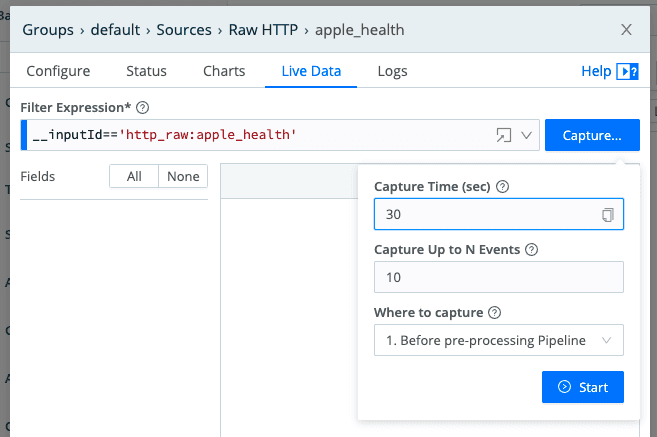
In Stream, navigate to Sources>Raw HTTP>apple_health>Live Data locate the blue Capture button.
Set the capture settings as shown below.
Filter Expression: __InputId==’http_raw:apple_health’
Capture Time (sec): 30
Capture Up to N Events: 10
Where to Capture: Before preprocessing Pipeline
Send your first set of data to from iPhone > Stream > Splunk
Click Capture and Start buttons in Stream
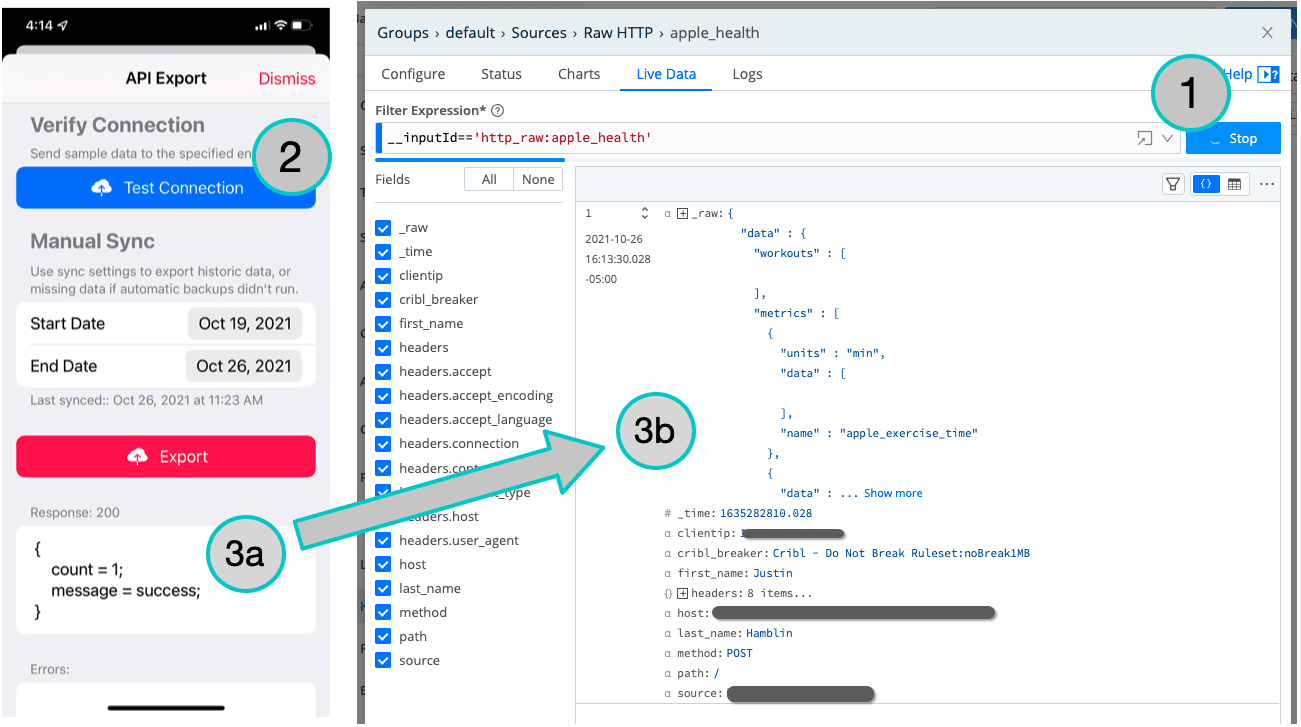
Tap the Test Connection button in the Health Auto Exporter app (While the Stream capture job is running. You will see a blue progress bar moving if running)
Verify Data is Sent and Received
Verify the successful response in Health Auto Exporter.
Verify your test data was captured by Stream.
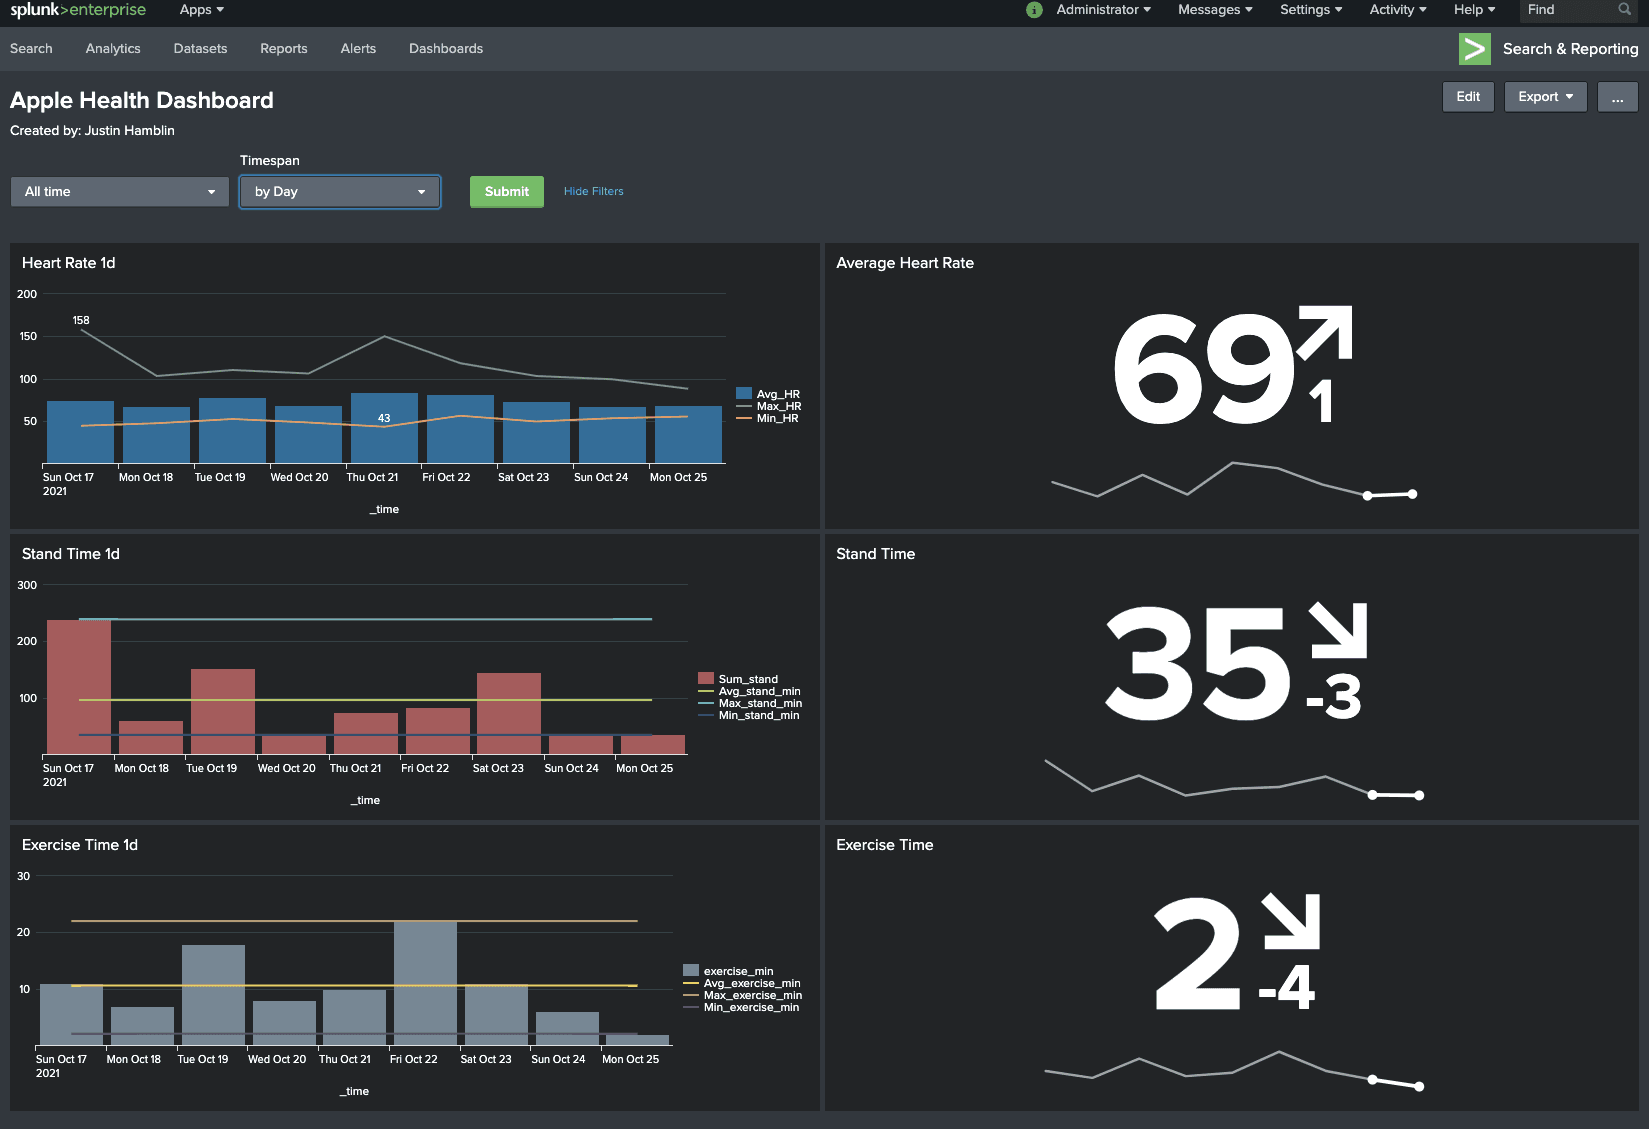
View Results in Splunk
This data is your own, so feel free to search it as you wish. To get you started, I’ve included a dashboard you can use in Splunk. While we’ve only ingested 3 health metrics, you can imagine the possibilities open to you as you increase your logging capabilities. Good luck and enjoy the Stream Life!
The fastest way to get started with Cribl Stream is to sign-up at Cribl.Cloud. You can process up to 1 TB of throughput per day at no cost. Sign-up and start using Stream within a few minutes.