Data collection from Amazon S3, first introduced in Cribl LogStream 2.0, has been an overnight success with most of our AWS customers. In 2.4.4 we’ve added a similar capability to read data at scale from Azure Blob Storage, where a lot of other customers store massive amounts of observability data; logs, metrics, events, etc. In this post, we’ll take a look at how it works, and how to configure it.
If you’re new to Cribl LogStream, you may want to take our sandboxes for a drive before reading further.
How Does It Work
Reading data from Azure Blob Storage can be accomplished directly via its API. This is pretty straightforward when the number of blobs to be read is small. However, at large scale, the following problems start manifesting themselves:
Just listing across multiple containers with tens or hundreds of thousands of objects, can become expensive and time consuming.
Tracking what blob is currently being read, and what Worker Node is reading, what can become a real issue in a distributed environment.
Resiliency is all to be figured out by the reader.
One way to address these issues is by using Azure Blob Storage events in Queue Storage via Azure Event Grid, with a LogStream distributed architecture. Conceptually, the mechanism works this way:
A new blob of data lands on Azure Blob Storage.
A Blob Created notification is sent to a Queue Storage queue, via Azure Event Grid.
LogStream Worker Processes are configured as Queue consumers, and each Process reads notifications/messages, while the Queue marks them invisible to others. This separation ensures that no two Workers’ processes read the same message.
Each Worker Process extracts the path to the blob from each message, and goes and reads it from Blob Storage.
When the read is completed, the Worker Process then deletes its messages from the Queue.

Benefits
Scalability – the more Worker Processes you have consuming messages from the Queue, the higher the read throughput.
Resiliency – If one Worker Process becomes unavailable, the Queue will make its messages visible to others.
Timely delivery – acting on notification tends to be faster than scanning and listing all blobs.
Azure Configuration
There are multiple ways to configure Azure to achieve this. If you’re new to it, please follow along these three steps:
1. Set Up System Topic in Event Grid
Navigate to Event Grid System Topics. Create a new topic by clicking on +Create, and then set the Topic Type to Storage Account (Blob).

Select the desired Subscription and Resource Group. In Resource, select the storage account of interest. And assign the topic a preferred name.

2. Set Up a Queue
Navigate to your Storage Account and create a Queue.

Select the Storage Account of interest, and then in the submenu, select Queue Service > Queues.

Click + Queue to create a queue.

3. Configure Storage Account to Send Notifications
From the Storage Accounts menu, select Events.
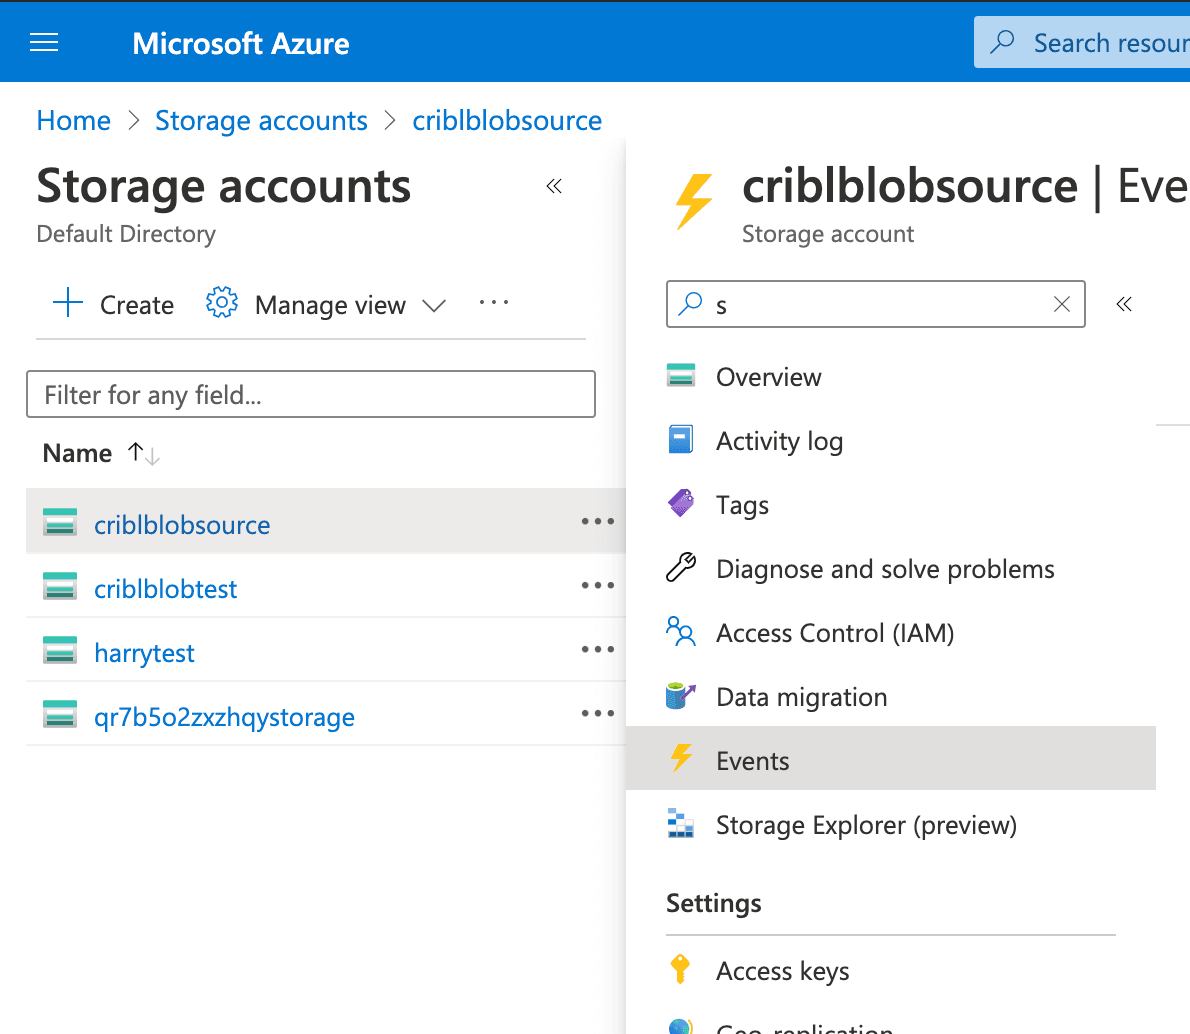
Then click + Event Subscription to configure notifications:
Enter a Name for the subscription.
In System Topic Name, enter the name of the system topic created above.
In Event Types, select Blob Created, and deselect Blob Deleted.
As the Endpoint Type, select Storage Queues.
Click Select an endpoint, and click the subscription to use (Pay‑As-You-Go).

Next, select the storage account on which to add the subscription.

Select the queue you created above, and Save.

Click Create to complete the process.

LogStream Configuration
Before we start configuring LogStream, let’s make sure we have the following config settings/strings available:
The storage account Queue name (from above)
The storage account Connection String (found under Storage Account > Name > Access Keys)
Next:
Navigate to Sources > Azure > Blob Storage and click + Add New.
Enter the Queue value from above.
Enter the Connection String value from above. (Alternatively, you can use `env.AZURE_STORAGE_CONNECTION_STRING`.
Ideally, use a Filename Filter that identifies blobs of interest.
Optionally, modify Event Breakers, Fields (Metadata), and Pre-processing, as necessary.
Then, in Advanced Settings, change the following only if really necessary:
Max messages – number of messages each receiver (below) can get on each poll.
Visibility timeout (secs) – duration (in seconds) over which the received messages are hidden from subsequent retrieve requests, after being retrieved by a Worker Process. Practically speaking, this is the time each Worker Process is given to fetch and process a blob.
Num receivers – number of pollers to run per Worker Process.
Skip file on error – skip files that trigger a processing error.
Best Practices
Use the Filename Filter as aggressively as possible, using Preview to test the expression as you build it. Filtering ensures that only files of interest are ingested by LogStream, thus improving latency, throughput, and data quality.
If higher throughput is needed, increase the Source’s Advanced Settings > Number of Receivers. However, note that this setting is per Worker Process. E.g., a Worker Node with 21 Worker Processes, and Number of Receivers set to 2, will have a total of 42 pollers.
While the Source’s default Visibility timeout (secs) value of 600s works well in most cases, when ingesting large files, tune up this value or consider using smaller blobs.